How To Tarp A Roof
When you see water dripping from the ceiling, that usually means it's time to look at the roof. Perhaps you just had a big storm that blew off some shingles, or maybe the roof has a leak that has been active for some time. Either way, you're probably going to need professional repair, preferably as quickly as possible. Unfortunately, roofers are busy people, especially after a storm, and it may be some time before you find one who is available. If you don't do something to halt the leaking immediately, you could have some major interior damage to repair by the time the roofer does arrive to make repairs.
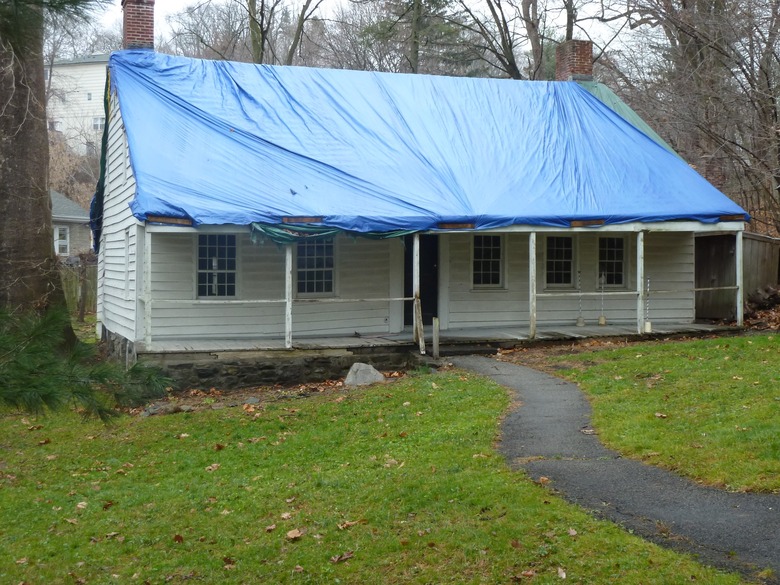
A roof tarp is the answer. Tarping your roof is definitely a temporary solution, however. The longest you should expect to leave the tarp in place is about 90 days, although you can leave it a little longer if the weather isn't too bad and you're having a hard time scheduling the repair. The tarp has to be firmly secured and tight to withstand even moderate winds, and for this, you will need 2-by-4s and screws. You'll also need good weather and proper equipment so you can work on the roof safely.
The Basic Strategy for Tarping a Roof

The Basic Strategy for Tarping a Roof
Roof leaks can be difficult to pinpoint. The best diagnostic method is go into the attic and look for water dripping from the underside of the roof deck. If you can't get into the attic, the task is more difficult, because water can seep a long way along the roof rafters before it drips onto the ceiling and into your home's interior. If you go on the roof and inspect the shingles, the reason for the leak is sometimes obvious, but often it isn't, and you may end up having to tarp over a large part of the roof to be sure that the damage is covered.
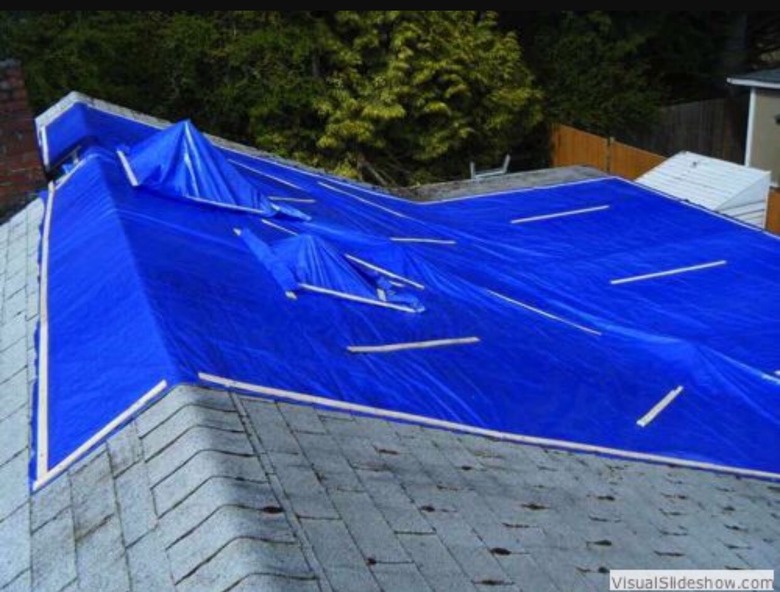
Purchase a tarp that will cover completely cover the area, with 2 or 3 feet to spare on all sides. The tarp should be long enough to extend over the roof peak or hip and extend at least 4 feet down the other side. This is important. If the tarp doesn't extend over the peak of the roof, water can get underneath the tarp, rending it useless.
Tip
It is best to use poly tarps for covering a roof; canvas ones are too heavy and expensive. Choose heavy-duty poly tarps with a double layer or a thick weave that won't tear in the wind.
The general procedure is to wrap the top and bottom ends of the tarp around 2-by-4s and screw the lumber to the roof. You then secure the sides of the tarps by placing 2-by-4s over them and screwing them down. Naturally, this means that you have to put holes in the roof that will have to be repaired by the roofers when they finally arrive. If putting holes in your roof makes you uncomfortable, or if you have a tile roof, purchase a tarp long enough to extend past the eaves on both sides of the roof so you can attach it to the siding or the soffits.
How to Install a Roof Tarp
How to Install a Roof Tarp
Before tarping the roof, it's important to clean it. Use a stiff broom to sweep off debris, such as leaves and sticks and loose moss. If you know exactly where the leak is, cover it with a piece of plywood screwed to the roof decking as an insurance measure.
- Purchase a pair of 2-by-4s that are slightly longer than the tarp is wide.
- Secure one end of the tarp to one of the pieces of lumber, driving screws with large washers through each of the grommet holes and into the wood.
- Wrap the tarp three or four times around the wood, then secure the wood to the soffit or the roof deck on the side of the peak opposite the side that is leaking.
- Pull the other end of the tarp over the peak and down the roof far enough to cover the leak, then secure that end to another 2-by-4. Pull the tarp as tightly as you can before securing that piece of wood to the roof deck or the opposite eave.
- Now that the tarp is tightly secured to the roof, seal the edges by laying 2 by 4, 2 by 2 or 1 by 3 lumber along the edges of the tarp and screwing the wood to the roof deck. Avoid leaks by driving the screws directly into rafters or by using screws with rubber washers. In lieu of screws, you can also use sandbags to hold down the edges of the tarp, but don't use bricks, wood, or anything else that can slide down the roof, fall off and injure someone. Remember the roof has to be repaired anyway, so the safest way to secure the tarp is to use screws.
Tips for Working Safely While Tarping Your Roof

Tips for Working Safely While Tarping Your Roof
Working on a roof is dangerous, and if you aren't comfortable doing it, don't hesitate to call someone else to install the tarp. If you choose to do it yourself, here are a few guidelines to help you do it safely:
- Wait for good weather. Never work on the roof when it's raining, snowing or windy.
- Wear rubber-soled shoes.
- Never walk on the tarp itself. You can damage the tarp, or the tarp may cause you to slip.
- Secure the ladder to the eaves before you climb onto the roof. If the ladder can move, it can easily slip out from under you when you try to get back on it from the roof. If you have ladder locks, use them.
- Get a helper to spot you on the ladder and to hand you supplies while you're on the roof.
- Determine the pitch of the roof before you walk on it. You can do this by making measurements of rise and run in the attic. If the pitch is steeper than 8/12—which means it rises 8 inches for every 12 inches of horizontal distance—do not walk on the roof without a harness.