How To Insulate An Attic
While most houses contain some attic insulation, many are under-insulated. That's a meaningful issue because attic insulation can help significantly reduce heating and cooling costs, and it helps make the living area more comfortable. Here's a look at how to increase your home's energy efficiency by upgrading the attic insulation.
Do You Have Enough?
Do You Have Enough?
The first step is to determine how much insulation you currently have and how much you need to add. For a quick assessment, climb into the attic and look around— if you can see the tops of the ceiling joists, your attic insulation is not up to current standards.
To be more precise, you can also measure the depth of the insulation and convert the inches to R-values. R-values measure a building material's resistance to heat flow. It's a handy number to know because it levels the playing field when comparing insulation materials. All common attic insulation materials fall within the R-3 to R-4.5 per-inch range. So even if you don't know what is currently in the attic, you can get an idea of the approximate R-value.
When inspecting the attic, exercise caution. Don't put weight on the sections between the ceiling joists. The hidden surface is probably the drywall that makes up the ceiling below and it is not designed to hold your weight. Use boards or a sheet of plywood laid across the joists to move around the attic. When working in the attic, dress appropriately. Attics can be very hot or very cold, and they are usually very dusty. Wear long pants, a long-sleeve shirt, and use a dust mask.
Older attics may have a plank floor over the joists. If so, you can pry up a floorboard or two to check on how much, if any, insulation is installed in the joist cavities.
 ozgurcoskun/iStock/GettyImages
In most cases, you can add new insulation on top of the old. But wet or moldy insulation and material that is compressed will need to be removed before adding more insulation.
Insulation Materials
Insulation Materials
Here's a look at common attic insulation materials.
- Batts and blankets. The most common are made of fiberglass or mineral wool, but you can find batts made of denim and other materials as well. They come in a variety of thicknesses with the R-value listed on the packaging. They are sized to friction-fit between the ceiling joists. When adding to existing insulation, the unfaced batts should be laid perpendicular to the ceiling joists. Costs vary by product, but expect to pay $0.30 to$ 0.40 per square foot for an R-19 batt. Add about $1 per square foot if a professional does the job.
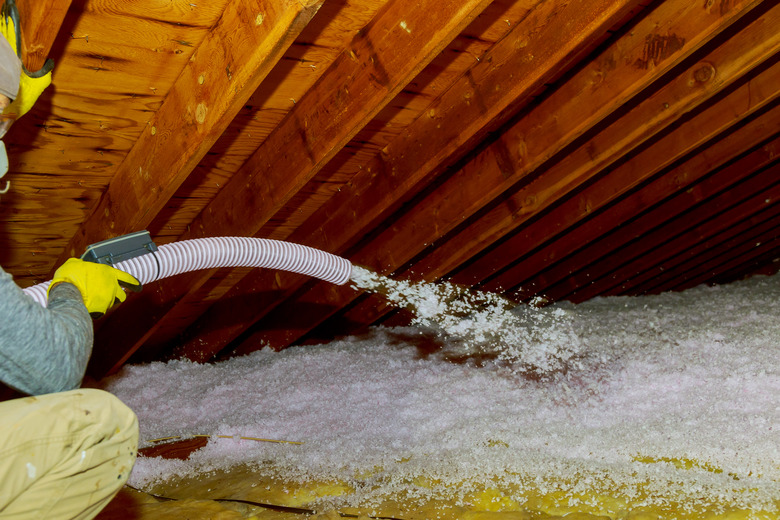
- Loose-fill or blown-in. Either spun fiberglass or cellulose, which is a paper-based product treated with fire-retardant chemicals, can be blown into the attic using special equipment. This type of installation allows for complete coverage in tight and unusually shaped spaces. The costs of the two materials are similar: $0.70 to $0.80 per-square-foot for an R-20. This type of installation is usually handled by a pro, adding about $2 per square foot for labor charges, but installation equipment is available for rental for the DIYer. Some retailers will provide a machine for free when you purchase a certain quantity of product.
- Spray foam. This is a professionally installed product used in limited circumstances, usually when the attic will be converted to living space and you want to insulate between the roof rafters. It costs about $1 per board foot, and the labor costs are at least double those for other materials.
 photovs/iStock/GettyImages
There’s More to Insulating Than the Insulation
There's More to Insulating Than the Insulation
Attic insulation does not exist in a vacuum. To be effective, insulation works best when it is combined with air sealing and proper attic ventilation.
Air sealing is the process of stopping moving air, the air that is heated or cooled, from escaping from the living area. Attic insulation slows down conductive heat loss, but it does not stop heat loss from moving air. Together, attic insulation and air sealing can help make an attic energy efficient.
Air sealing is among the most mundane of home improvement tasks. It means that you, or your contractor, has to seal any penetrations in the floor of the attic. And there are a lot of them, including boxes for lighting fixtures and penetrations from electrical cables, heating and cooling ducts, pipes, and flues and chimneys. Most can be sealed with spray foam that comes in a can or caulk. Be aware that in some cases special caulks may be required. Some building codes require fire-blocking caulk when sealing penetrations between floors. Caulks formulated for high-temperature situations should be used when sealing openings around flues and chimneys.
Warning
Special attention needs to be exercised when dealing with recessed canister (can) light fixtures that extend up into the attic space from the room below. Older canister lights are not meant to be packed with insulation around them, as they may overheat and cause fires. The recommended way to handle these light fixtures is to enclose them in a box that will keep the insulation a safe distance away from the light fixture. This caution does not apply to more modern canister lights, which are designed to handle higher heat and can be packed with insulation around them. Consult the manufacturer's directions regarding insulation around the lights.
Attic ventilation expels the moisture-laden air that makes its way into the attic. If it isn't provided an escape route, the moisture may condense in the cold space above the insulation, wetting the insulation, rendering it useless and possibly damaging the building materials. Although it sounds contradictory, attic ventilation also helps keep attic space cool, which is an important factor in climates that experience heavy snowfalls. Attic ventilation keeps warm attic air from melting roof snow, which then melts and drains down where it refreezes at the eaves, causing ice dams that can damage the roof. In cold, snowy climates, the idea roof/attic system is one where the ceilings are very well insulated while the unfinished attic space has a free flow of outside air.
 Gmex/iStock/GettyImages
One of the best ways to ensure proper ventilation is to use a combination of soffit and ridge vents. This combination creates a convective loop. As outside air is drawn in near the attic floor through the soffit vents, it rises to exit the ridge vents along the top of the roof, taking the moisture with it. To work, the attic insulation cannot cover the soffit vents. Baffles installed between the roof rafters keep the vents clear and provide a path for the ventilating air.
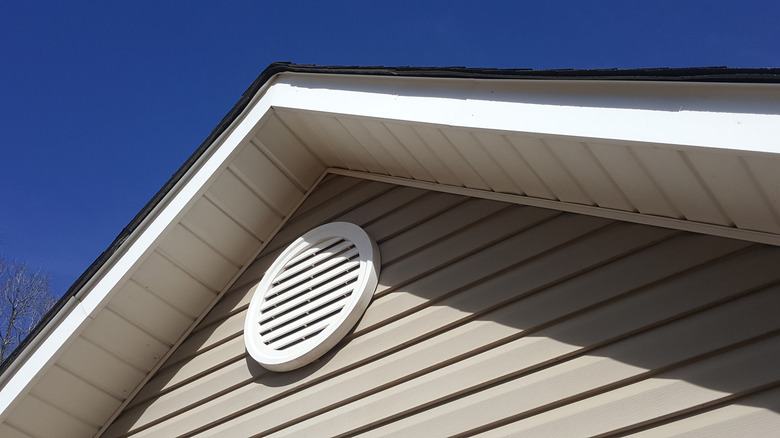
In homes where a ridge vent and soffit vents aren't practical, ventilation can be improved with gable vents on the end walls of the home, located near the peak of the roof, and with flat-fitting roof vents fitted into the roof surface with flashed caps.
Proper ventilation may require a combination of several of these ventilation methods.