How To Caulk A Shower Or Bathtub
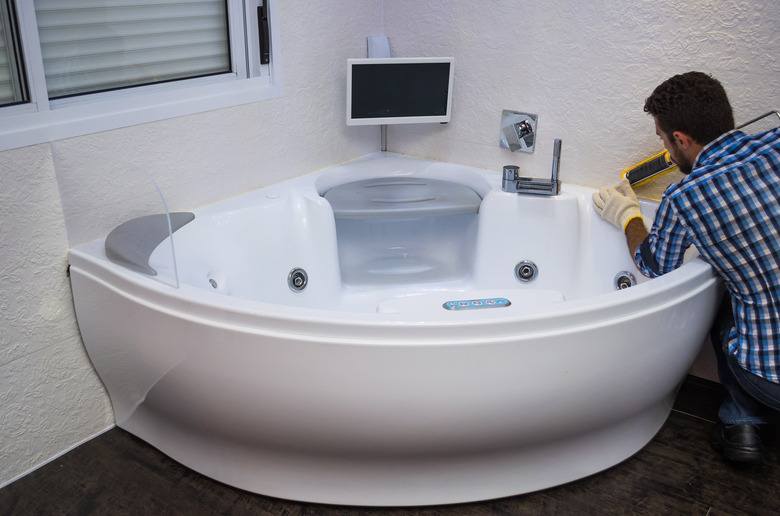
The joint between the top of a bathtub or shower pan and the wall above it is usually filled with an elastomeric caulk the provides a watertight seal and moves with the expansion and contraction of the surfaces it is attached to. But eventually, the caulk needs to be replaced because it is unsightly thanks to dirt, mold or mildew, or because the joint leaks. In those cases, the old material must be removed and replaced with new caulk.
Removing Old Caulk
Removing Old Caulk
Don't be surprised if getting rid of the old caulk proves to be the toughest part of the caulking project. Old brittle caulk is difficult to remove, so be prepared to try different tools and techniques to get the job done The goal is to remove all traces of the old caulk and present a clean, dry surface for the new material.
As you attempt to remove the caulk you will get a sense of what is working and what isn't. But here's a strategy to help you get started.
Things Needed
-
Chemical caulk remover
-
Caulk removal tool
-
Needlenose pliers
-
Plastic putty knife
-
Rubbing alcohol
-
Rags
- Apply a chemical caulk remover. These products are designed to soften up the caulk to make it easier to remove by hand. You can usually find them where you buy the caulk.
- Establish a foothold. Once the caulk remover has had a chance to work, pry a small section away from the wall. You can use a special caulk removal tool, which is also sold where caulks are sold, or a utility knife with a sharp blade, a putty knife, or the hook end of a painter's five-in-one tool.
- Remove the caulk in sections. Using needle-nose pliers, grab the exposed end of the caulk and remove as large a section as possible. You will probably need to repeat the previous step and this step a number of times.
- Clean the area. Use a plastic putty knife to remove any last traces of old caulk. Clean the joint with rubbing alcohol. Allow the surface to dry completely.
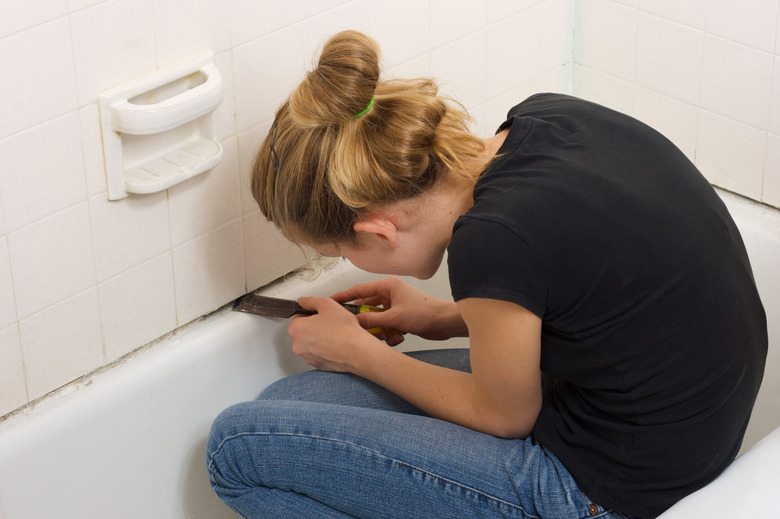 pastorscott/iStock/GettyImages
Choosing the Right Caulk
Choosing the Right Caulk
For caulking a tub or shower, silicone-based caulks or those that are 100 percent silicone are best. They can provide a watertight seal, and they will remain pliable for years. Most contain additives that fight mold and mildew. Actually, caulk manufacturers list the product's uses right on the label, so it is easy to pick the right one. Just be careful to buy the color you want. The caulk you buy at a hardware store or home center is usually available in white and clear.
Caulk comes in squeeze tubes, cans that come with an applicator tip, and caulk cartridges that require the use of a caulk gun. Pros always use the cartridges. You can find a good quality caulk gun for under $20, and it will come in handy for other caulking projects, such as sealing around doors and windows and fixing leaks in roof flashing.
Applying the Caulk
Applying the Caulk
Professional plumbers and tile setters caulk the joint between the tub or shower pan and the wall using freehand technique. Before you try this method, be aware that silicone caulk usually requires mineral spirits for cleanup. And applying caulk can get messy if you have never done it.
A better method is to use painter's tape to provide a caulking guide, as described in this example.
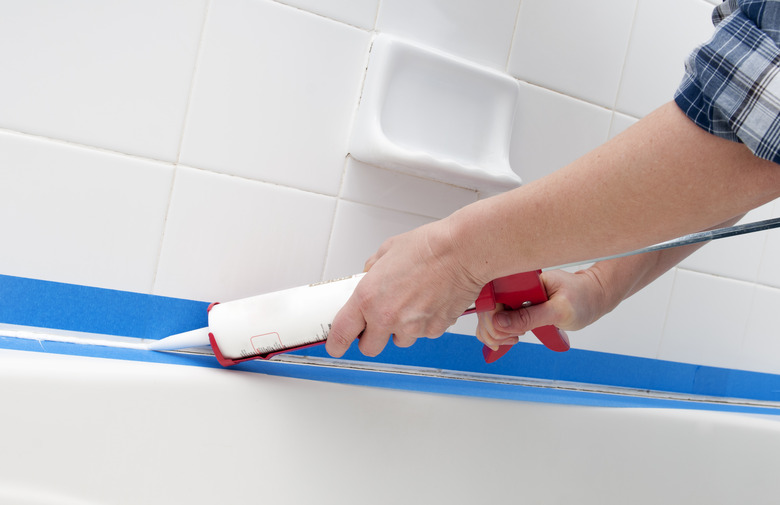 mphillips007/iStock/GettyImages
Things Needed
-
Painter's tape
-
Silicone tub-and-tile caulk
-
Caulk gun
-
Utility knife (if needed)
-
Caulk-shaping tool or plastic spoon (optional)
- Apply strips of tape on the top of the tub or shower pan about 1/8 inch from the joint. Do the same on the wall above. Try to keep the tape as straight as possible. It is easier to get a straight line when working with long sections of tape rather than short sections.
- If you are using a caulk cartridge, use a utility knife to cut the tip at about a 45-degree angle. The size of the opening you create should match the size of the gap you want to caulk as closely as possible. Some caulk guns have a built-in slicing tool to clip off the tip of the caulk tube.
- There should be a long spike-like piece of metal attached to the bottom of the caulk gun. Insert it into into the tube opening to break any inner seal in the caulk cartridge. Otherwise, you can use a long wire to puncture the seal.
- Squeeze the gun's trigger to get the caulk flowing. It is a good idea to keep a section of newspaper or piece of cardboard nearby to catch drips from the caulk tube.
- Feed the caulk into the seam using a steady motion as you squeeze the trigger on the caulk gun. Some people like to pull the caulk bead behind the tube; others prefer to push the bead ahead of the tube. Use whichever method you are most comfortable with.
- Once you have completed a run, wet your finger and run it along the bead to smooth and shape it.
- Remove the tape, and give the bead another smoothing with a wet finger. There are also caulk-shaping tools available if you prefer to use one rather than your finger. Some people use the back of a plastic teaspoon to work the bead.
- Clean up the work area, and allow the caulk to cure the required amount of time before using the tub or shower.