How To Install Gutter Guards
Roof gutters rely on gravity to direct runoff from rain and melting snow away from the foundation of the house. It's a simple system that can easily be interrupted by leaves or other debris that clog the gutter and stop the flow of water. That's where gutter guards come in: they provide a way to let the water in while keeping the other stuff out.
General Gutter Guard Installation Tips
General Gutter Guard Installation Tips
There are a number of gutter guard-type products, and not all of them are installed in the same way. But there are some general procedures that anyone working on their gutters should follow:
- Clean the gutters. Before doing anything, make sure your gutters are clear of any type of debris.
- Make the necessary repairs. Seal small openings with a gutter mastic. For larger openings use a piece of aluminum flashing that is set in mastic to hold it in place. Make sure that all gutter attachment points are secure.
- Work safely. Installing gutter guards often requires working from a ladder, so ladder safety is an important part of the project. If you are working from an extension ladder, consider a ladder stabilizer. This device is U-shaped and attaches to the ladder. When in place, its feet rest on the roofing material rather than the gutter.
Buying Gutter Guards
Buying Gutter Guards
There are many different products available, and there are a few things to consider before purchasing one.
- Gutter style and size. Most residential gutters are what is known as K-style and are 4 or 5 inches wide. There are also other styles, including U-shaped gutters that can be up to 7 or 8 inches wide.
- The size of the openings. Some gutter guards are designed to keep out large leaves but have relatively large openings. Others have smaller openings to keep out finer debris, such as pine needles.
Common Gutter Guard Installation Procedures
Common Gutter Guard Installation Procedures
Be sure to read the installation instructions for these products because procedures can vary slightly. But installation does fall into one of two broad categories: friction-fit and fully adhered products
Friction-fit products include foam dams and plastic screens. These are the easiest to install. Foam dams are lengths of wedge-shaped foam that you placed into the gutter. The foam lets the water through, but it keeps other debris out. The foam doesn't reach to the bottom of the gutter, which provides an open channel for the water to flow. Use a utility knife to cut the foam to size and to cut slits in the foam to wrap around gutter spikes.
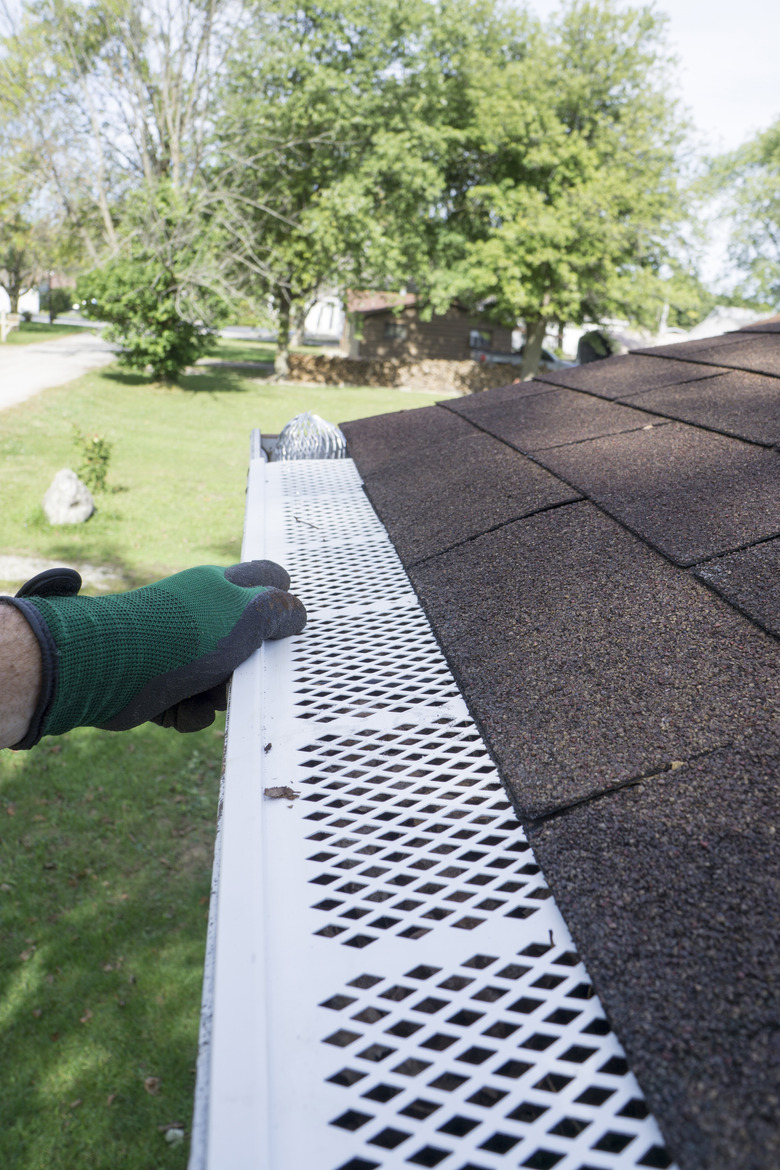
Plastic screens come in rolls. Cut a section to fit a length of gutter and then wedge the screen against the inside of the front of the gutter and the back of the gutter. The screen will bow slightly in the middle, and the tension, manufacturers say, will keep the screen in place.
 Gutter Guard by Gutterglove
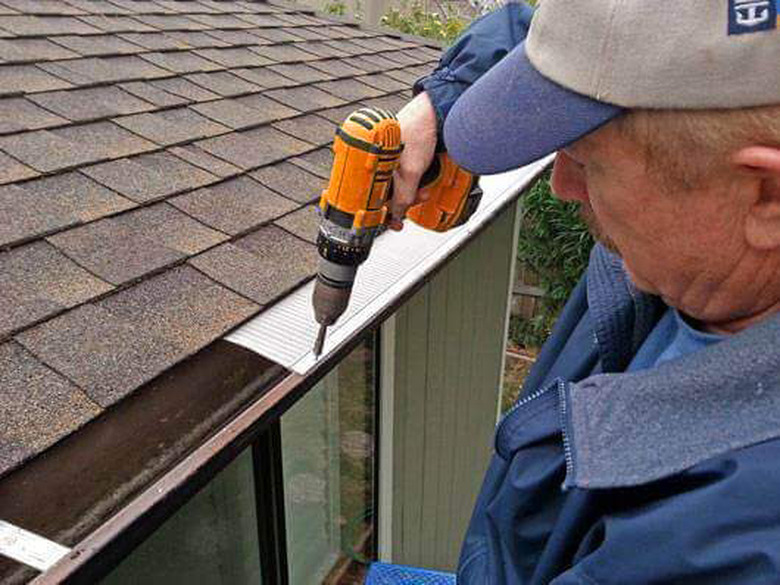
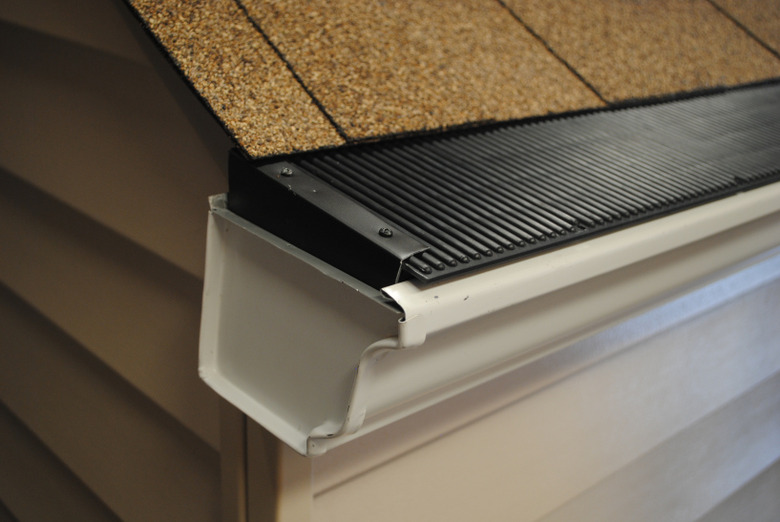
Fully-adhered products offer a more permanent solution. In most cases, the front edge of the gutter guard is screwed to the front top edge of the gutter. The products usually come with (or recommend) self-tapping screws that are installed every 4 feet or so. Attachment of the back edge depends on the relationship between the gutter and the roof. If the gutter is tight against the roof edge, the guard is slipped under the roofing material. But when that is not practical, the back edge of the guard is screwed to the fascia. The back edge will need to be bent down for this method.
Keeping End of Runs and Corners Clear
Keeping End of Runs and Corners Clear
Straight runs of gutter guard are relatively easy to install. When two sections butt up against one another, they should overlap slightly. Sometimes this means using tin snips to cut away a small section of the front and back extrusion, or frame, of the gutter guard so that only the filtering portion of the product overlaps.
Some special installation requirements include:
- End of run: At the end of a run, the material is usually bent down into the gutter to seal the ends from debris.
- Outside corners: These usually call for miter cuts, again made using tin snips.
- Inside corners: For inside corners formed by roof valleys, slide a section of gutter guard into the corner. Sometimes you can simply butt the adjoining section against the first. Some manufacturers call for cutting a small section of the front and back frame and then tucking the filtering material under the adjoining section. Inside corners present problems because of the volume of water and because they serve as choke points for gunk that washes down the valley. Many manufacturers recommend installing a water diverter at the bottom of the valley. Some diverters are made of perforated material that holds back the debris while letting the water through. Others are made of solid sheet metal that catch the debris while directing the water away from the inside corner.
 Raindrop Gutter Guard Systems
Gutter Guard Maintenance
Gutter Guard Maintenance
More than one manufacturer promises that you will never need to clean your gutters again if you install their product. That isn't always true. Even if the guard keeps all of the debris out of the gutter, there are times at which leaves, pine needles, and other debris will stick to the surface of the gutter guard and clog the holes. When this happens, you will need to brush off any material that wind fails to remove.