How To Install Blow-In Insulation

In most of its many forms, house insulation must be installed in bare wall and ceiling cavities before the drywall goes up. Blow-in insulation is the exception, and it's the go-to product when you want to fortify your existing insulation without undertaking a major construction project. Three materials are commonly used to make blow-in insulation: fiberglass; cellulose, which is often recycled from old newspapers; or rock wool. Installing it in the attic is usually a straight shot, and virtually anyone can do it. A handy homeowner can also install it behind finished walls, but there's a bit more work involved cutting holes for the blower nozzle and patching the holes when you're done.
If you're wasting money heating a building that is under-insulated, you can get all you need to rectify the situation at your local building supply outlet. You can insulate a good-sized attic in about a day, but expect to rent the equipment for two or three days if you're insulating finished walls. It's so common for homeowners to blow in their own insulation that stores that stock the material also rent the equipment to blow it. They may even loan the equipment for free if you are buying a large quantity of insulation.
Know What You're Working With
Know What You're Working With
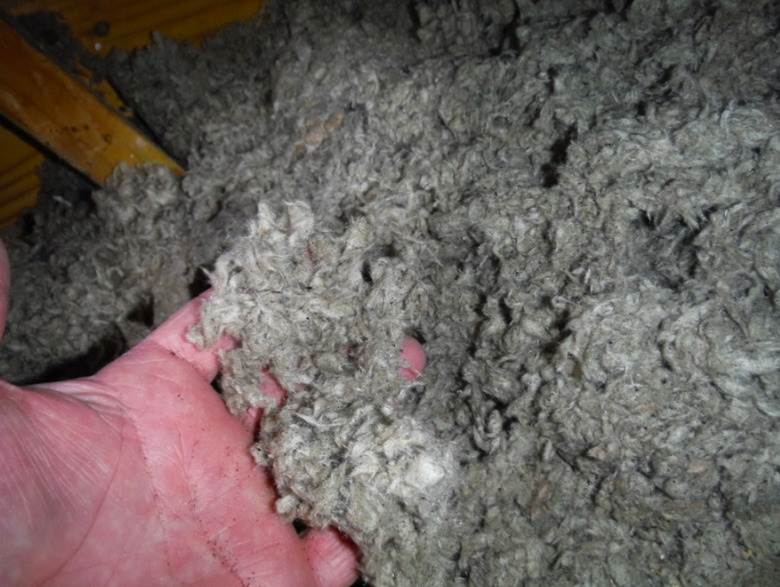
Manufacturers use three different materials to make loose-fill, and any given product may contain one, two or all three of these materials. Fiberglass has the least density of the three and the smallest R-value per inch. It's the best material to use over a heavy layer of attic insulation because it doesn't add much extra weight. It's also the only product recommended for filling wall cavities between studs that are spaced 24 inches apart.
Rock wool, also known as mineral wool or slag wool, is produced by spinning the slag that forms on the surface of molten metal. This material is basically recycled rock, so it's moisture-proof as well as non-flammable. It's heavier than fiberglass and it insulates better. You need between 11.5 to 13 inches to achieve an R-38 insulation value, compared to 14 and 17 inches of fiberglass to achieve the same R-value.
Cellulose is usually made from old newspapers and cardboard boxes that have been shredded and treated with a fire retardant. It's the heaviest loose-fill material. Only 10 to 12 inches are needed to get an R-38 value.
Blowing Loose-Fill in the Attic
Blowing Loose-Fill in the Attic
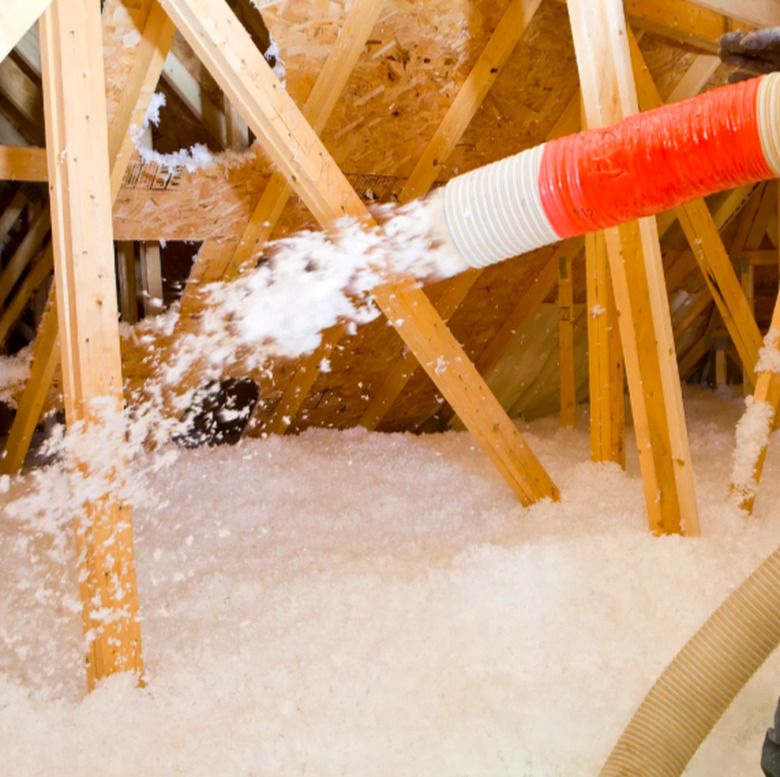
The most common use of loose-fill in the attic is to fortify the existing insulation to bring it to the R-value specified for your region. In most cases, that's R-38, according to the Energy Star website. You can also blow it into an uninsulated attic. Just be sure to spread a plastic or kraft paper moisture barrier on the ceiling drywall before you start shooting. Don't install a moisture barrier if you're blowing over existing material because this can cause the existing insulation to clump.
Either way, you'll want to make sure you seal all gaps around stove pipes, vents and around the edges of the attic by filling these spaces with foam insulation from a can. You'll also want to mark the required height of the loose fill on posts or trusses to ensure that you reach the desired R-value. Also, don't forget to check the soffit vent baffles between roof rafters to make sure they are long enough to extend up past the new insulation. If not, you'll want to replace them with longer ones.
Your job will be easier if you have a helper to load the hopper while you blow. Station the blowing machine near the attic ladder and bring the hose with you into the attic. Start blowing around the edges, making sure these are completely filled before you work your way into the center. Fill to the height you pre-marked on the framing members and you're done.
Tip
There can be some trial and error involved in adjusting the air mixture on the insulation blowing machine to allow the mixture to blow freely through the tubes. Insulation is often very tightly packed in the bags, so it helps to break the pieces into smaller chunks as you feed it into the hopper.
Don't be alarmed if you receive static electrical shocks while blowing insulation. The friction of the dry insulation blowing through the tubing on a dry day can generate static electricity that can give you a surprising, though non-dangerous, shock. There are special anti-static blower tubes available, or you can also "ground" the blower tube by attaching one end of a long metal wire to the metal nozzle on the blower tube and the other end to a metal rod driven into the ground. Static electricity is less of a problem on humid days.
Blowing Loose-Fill into Walls
Blowing Loose-Fill into Walls
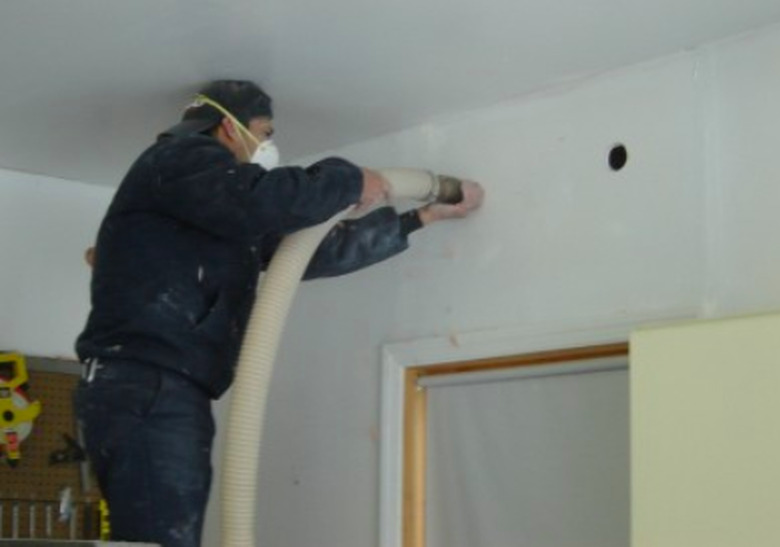
Blowing loose fill behind walls is a good way to provide new insulation or to fortify existing insulation. Contractors usually choose cellulose for this job because, inch-for-inch, it provides the best barrier to air flow. However, it tends to settle in 24-inch cavities. For these wider wall cavities, fiberglass is the best choice.
The procedure involves cutting 2-inch holes at the top of the wall and in the middle, just below the horizontal blocking. The blower nozzle should fit snugly in the hole to prevent blow-back. You'll know the cavity is filled when the machine starts making more noise than usual and a small amount of material falls out when you remove the nozzle.
Drill the holes with a 2-inch hole saw and save the cutouts. When you're finished blowing, stuff some newspaper into the hole, spray a small amount of foam insulation and set the cutout back in place. When the foam sets, you can trim the hardened material that oozes out with a knife, then tape over the cutout and finish the patches with joint compound. When done properly, the holes disappear completely.