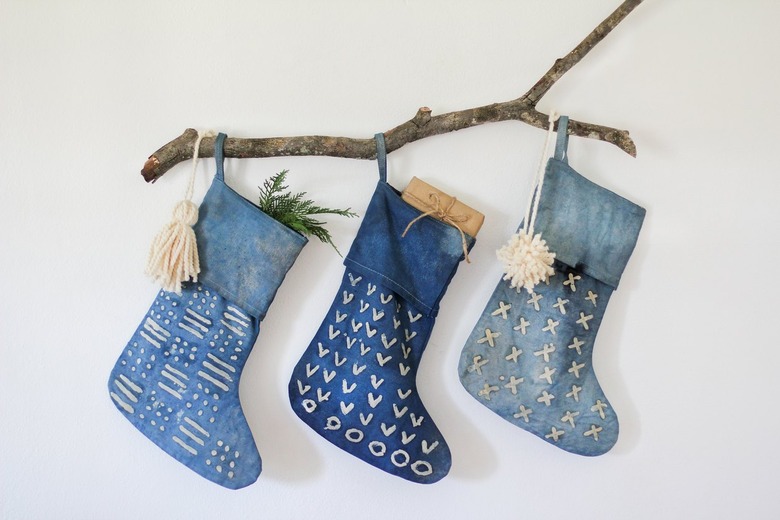
DIY Indigo Batik Stockings
We may receive a commission on purchases made from links.
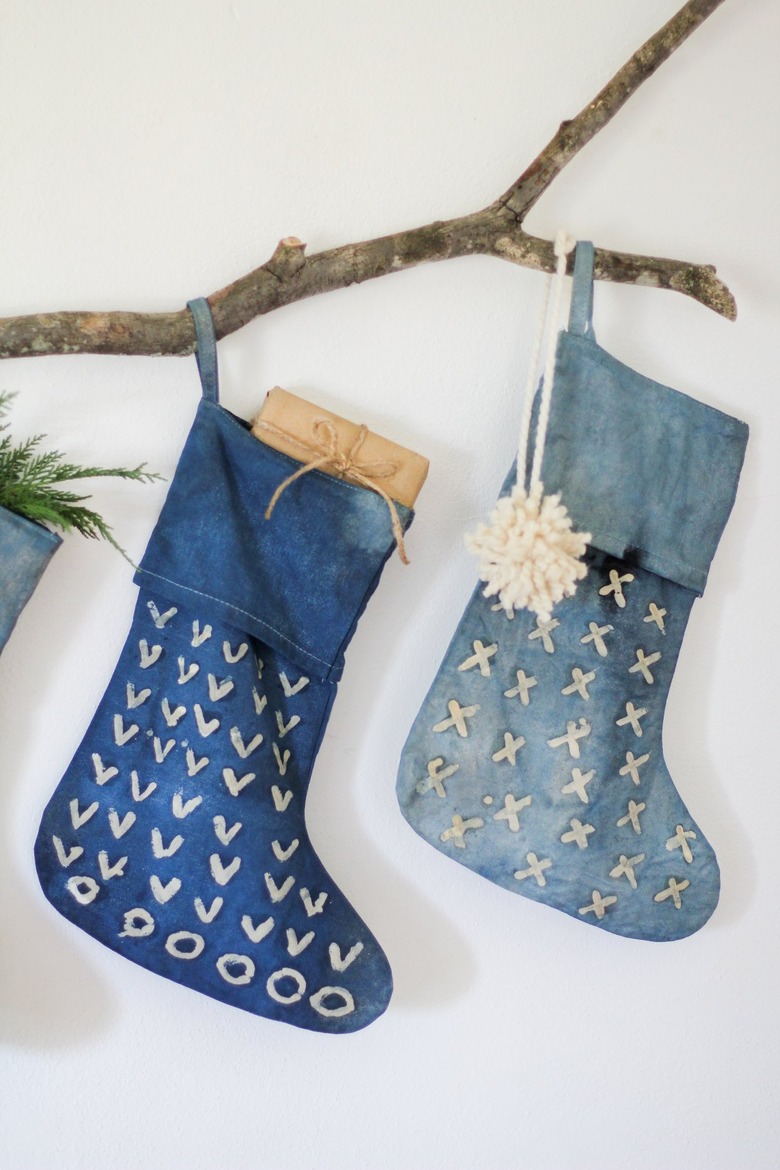
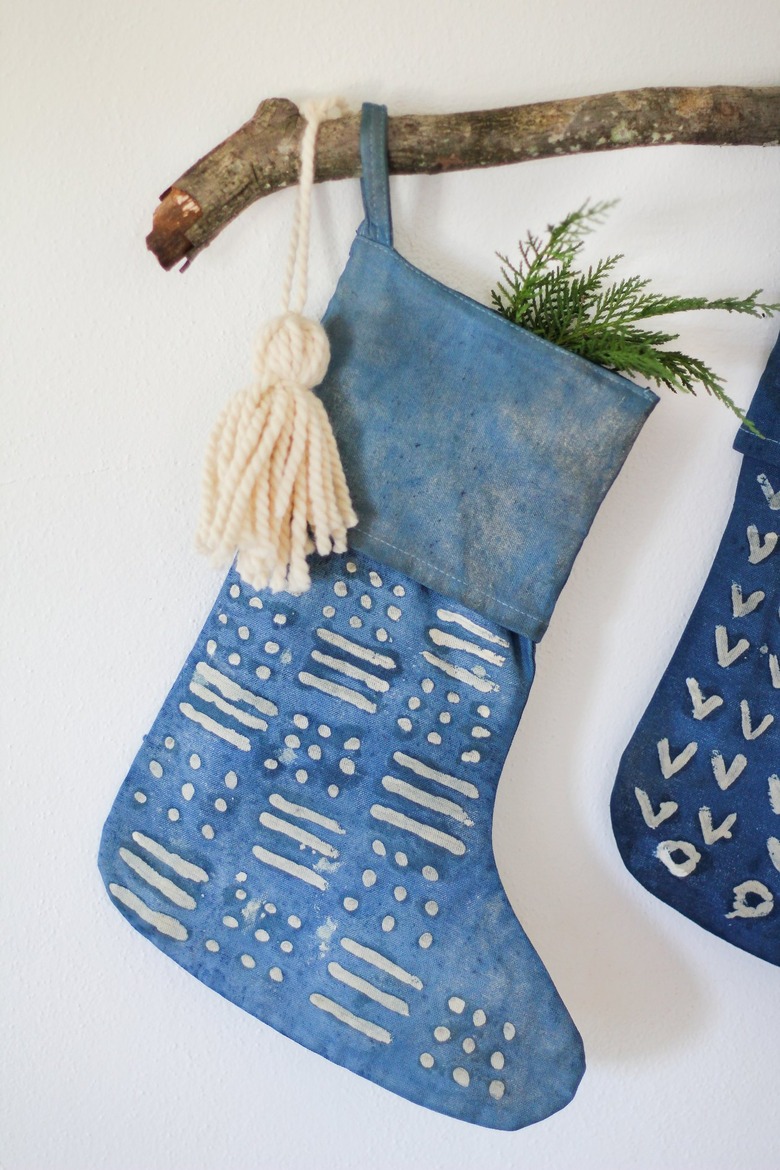
Bring merriment to your mantel with stylish stockings that offer a modern twist on traditional holiday decor. We can't get enough of the color indigo, a plant-based dye that gives jeans their classic look. So we set out to create a blue version of a standard Christmas stocking and combined it with an Indonesian technique called batik — a method that uses wax to create a pattern on fabric by resisting the dye. We have to say, we're pretty thrilled with the results, and we can't wait to fill these beauties with all of the best holiday trinkets and treasures.
Things Needed
 Trisha Sprouse for Hunker
Step 1
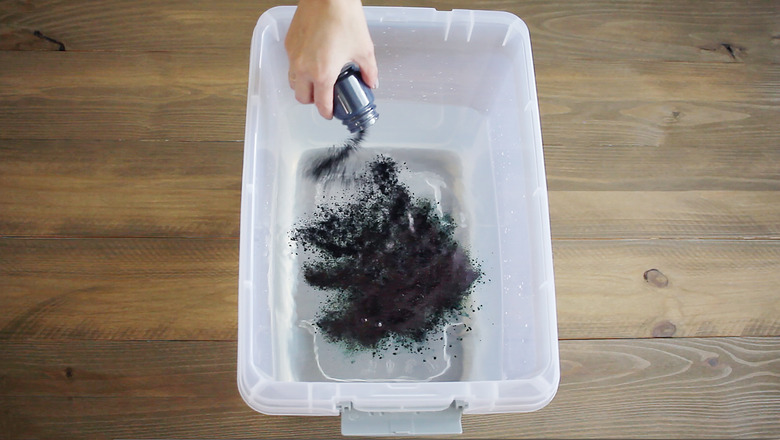
Fill a large bin or bucket with four gallons of warm tap water. Add the indigo dye to the water.
 Trisha Sprouse
Use a paint stick to stir the dye in a clockwise motion.
 Trisha Sprouse
Step 2
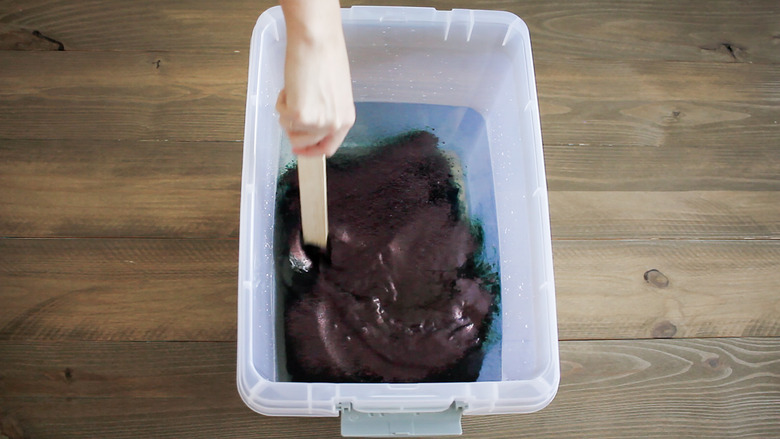
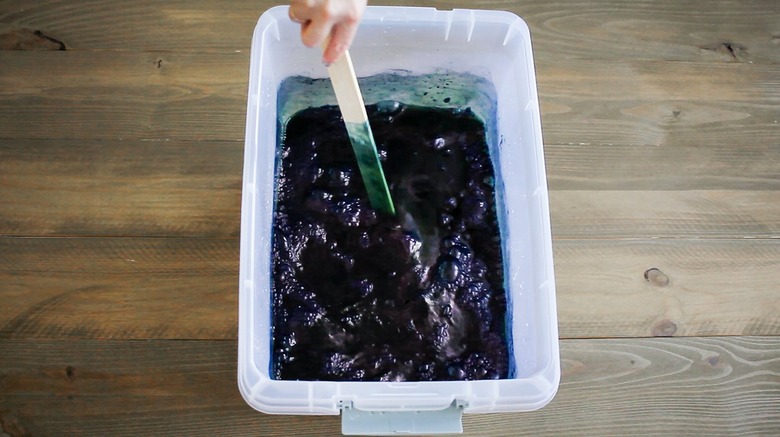
Add the soda ash and reducing agent to the dye bath, and then stir in a clockwise motion.
 Trisha Sprouse for Hunker
Switch directions and stir in a counterclockwise motion, dragging the paint stick along the outer edges of the bucket to ensure all of the powder gets mixed. You'll notice that the dye bath will have a greenish hue once mixed. This is normal.
 Trisha Sprouse for Hunker
Step 3
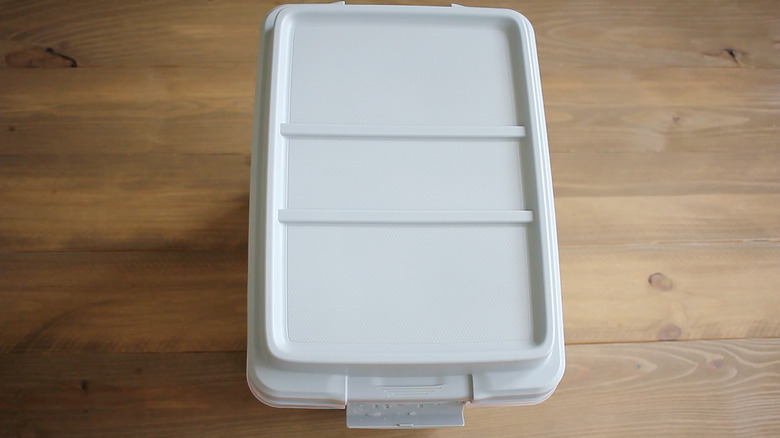
Place a lid on the dye bath and let it sit for at least 20 to 30 minutes.
 Trisha Sprouse
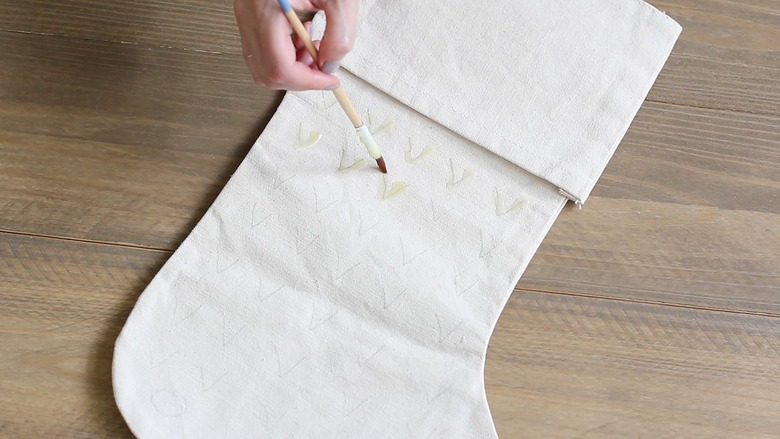
Step 4
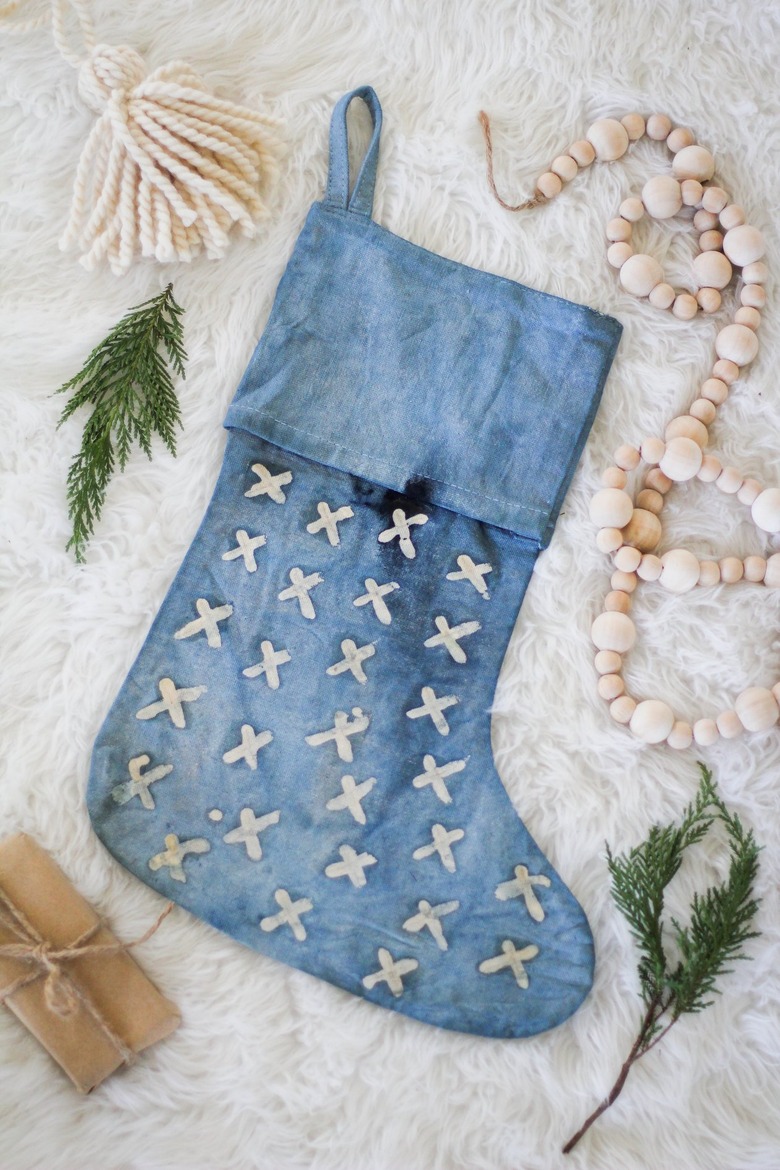
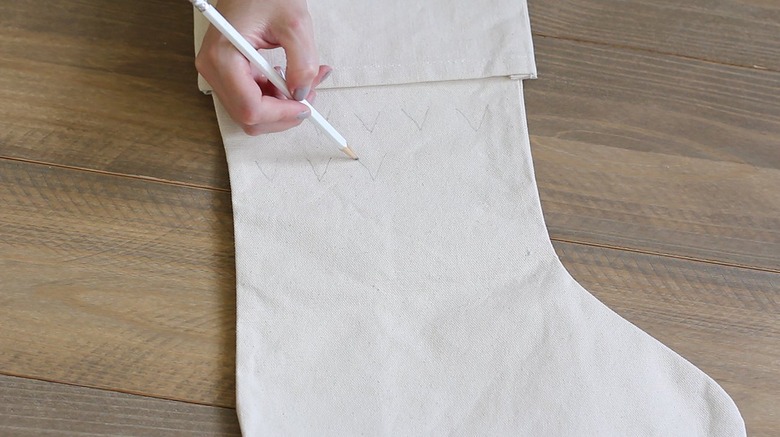
Meanwhile, use a pencil to lightly sketch the design you'd like to create on your stocking. We stuck to a variety of basic shapes: Vs, Os, Xs, lines, and dots. Keep in mind that whatever pattern you draw is what will remain undyed on the stocking.
 Trisha Sprouse for Hunker
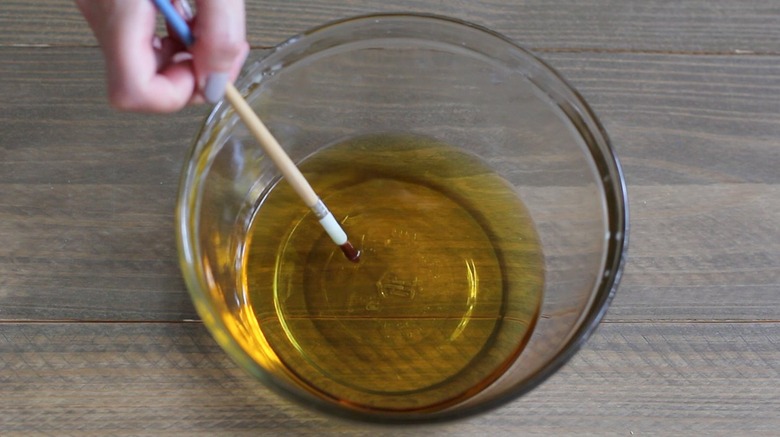
Step 5
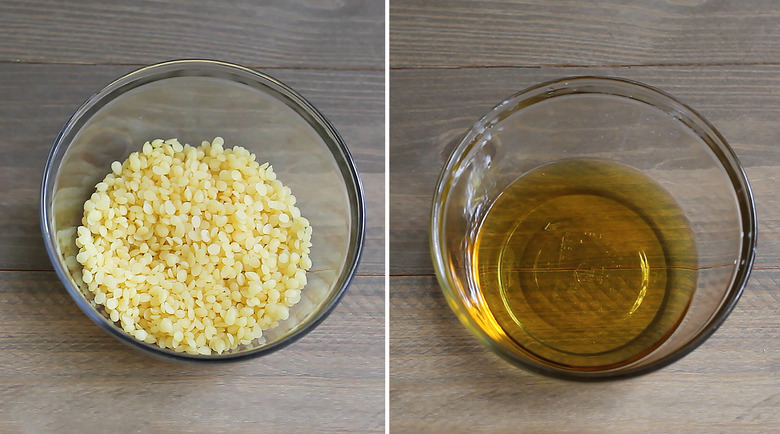
Melt half a cup of candle wax in a bowl, either in a microwave for 30 second increments, or over a double boiler.
 Trisha Sprouse
Dip a fine tip paintbrush into the melted wax and immediately trace it over the sketched designs on the stocking.
 Trisha Sprouse for Hunker
The wax hardens quickly, so you'll need to keep re-dipping the paintbrush frequently to cover the entire pattern. Don't worry if some of the wax drips or runs outside of the lines. The little imperfections will only make your pattern more unique and interesting.
 Trisha Sprouse for Hunker
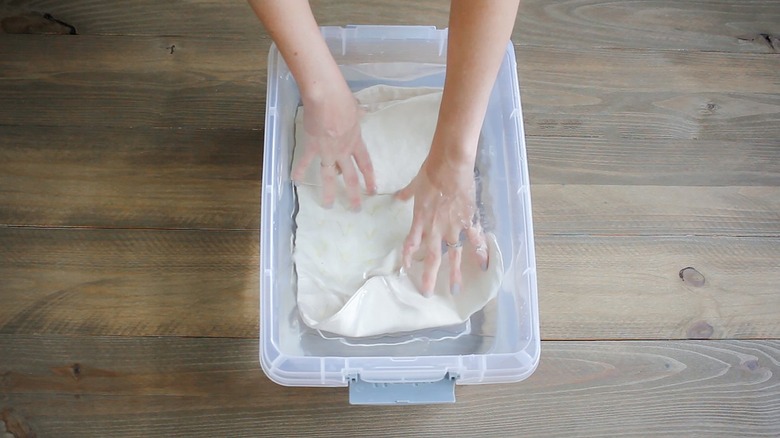
Step 6
Allow the wax to cool and harden on the stocking for about ten minutes or so, and then submerge the stocking in water to thoroughly wet the fabric in preparation for the dye bath.
 Trisha Sprouse for Hunker
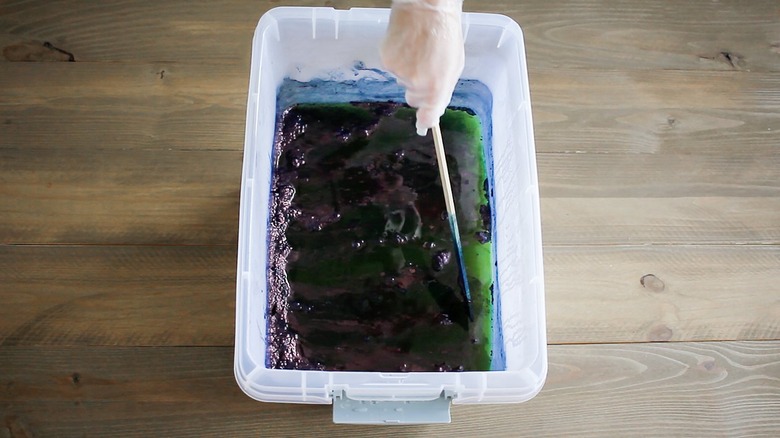
Step 7
Remove the lid from the dye bath and use a paint stick to gently push the foamy, filmy layer to one side. For indigo aficionados, this layer is called "the flower."
 Trisha Sprouse for Hunker
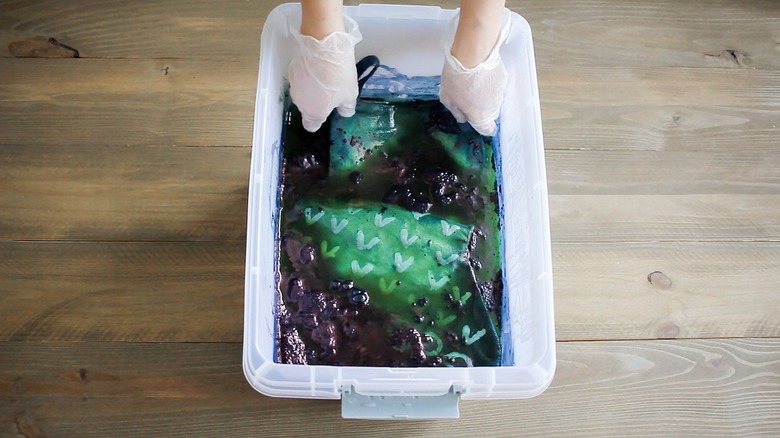
Step 8
Put on gloves and slowly submerge the stocking in the dye bath. Leave it submerged for one to five minutes, depending on your desired level of indigo saturation. We dipped one stocking for 30 seconds, one for two minutes, and one for five minutes. If you'd like the fabric to be dyed evenly, gently massage the fabric while it's submerged. We preferred a more uneven, somewhat "splotchy" look, so we didn't massage the fabric.
 Trisha Sprouse for Hunker
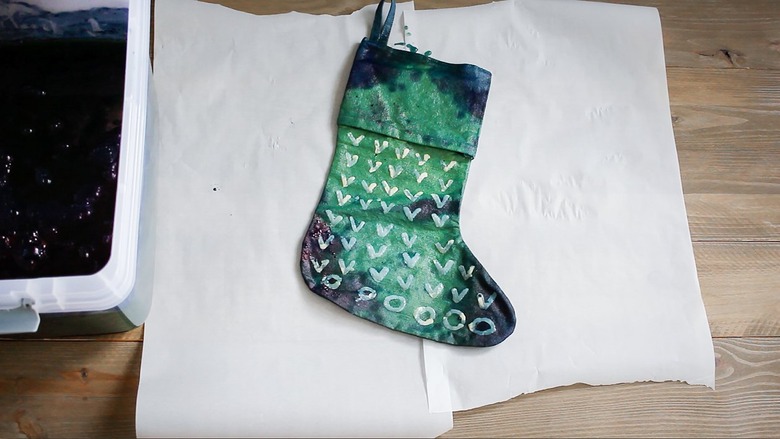
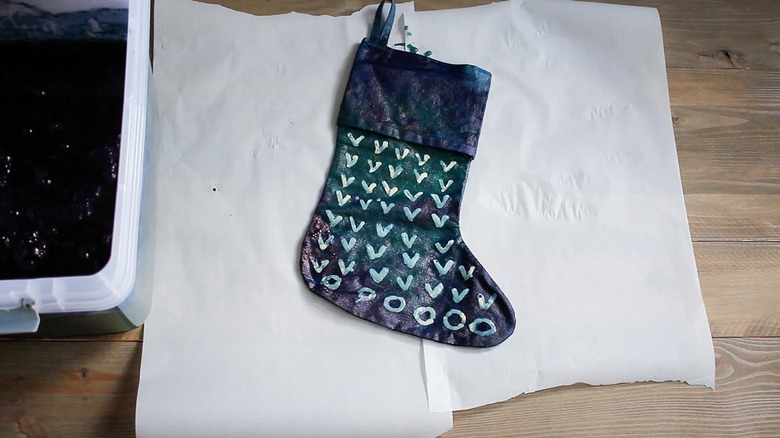
Step 9
Cover your work surface with parchment paper (or a waterproof tarp). Remove the stocking from the dye bath and place it on the parchment paper to let it oxidize for about ten minutes. It'll turn from green to blue once it has fully oxidized.
 Trisha Sprouse for Hunker
 Trisha Sprouse for Hunker
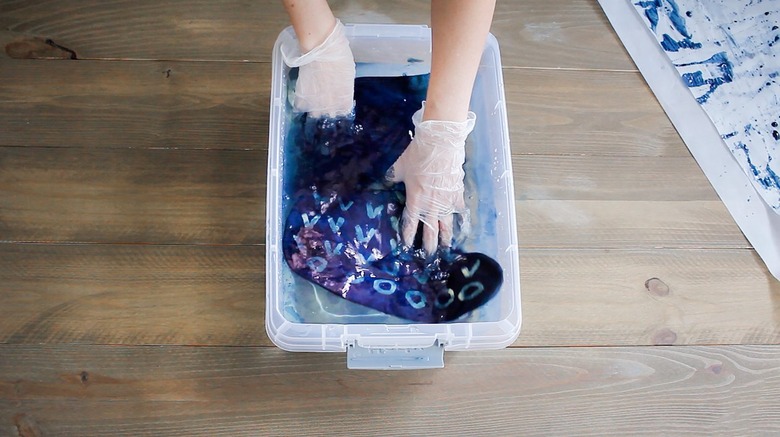
Step 10
Rinse the stocking in room temperature water to remove the excess dye, and then lay it flat to dry.
 Trisha Sprouse for Hunker
Step 11
Once the stocking is completely dry, place a sheet of parchment paper on top of the wax design and press down with a hot iron. The heat will melt the wax, which will stick to the parchment paper when you pull it away from the fabric.
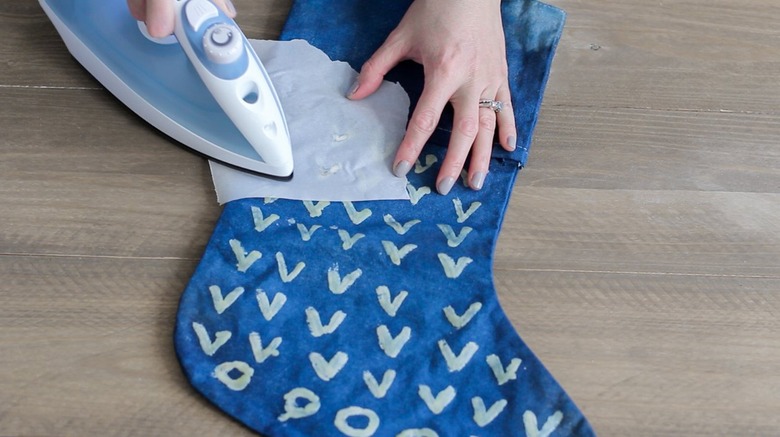 Trisha Sprouse for Hunker
'Tis the season for stuffing stockings, and you now have some seriously cool ones to fill.
 Trisha Sprouse for Hunker
 Trisha Sprouse for Hunker
 Trisha Sprouse for Hunker