Concrete Resurfacing: How To Resurface A Concrete Slab
The difference between a brand new concrete surface and one that has cracked and faded after years of exposure to weather is dramatic. Cracks can develop due to moisture-deficient concrete or land settling, and spalling (flaking or peeling of the surface) develops when the original concrete mixture had too much water when it was poured and finished. Combine that with tannin stains from leaves and twigs, and the slab may become something of an eyesore. Cleaning may help, but giving the slab a like-new appearance by resurfacing isn't much more difficult.
Pros can give your concrete a facelift efficiently and quickly, and they guarantee the results, but you can also do the job yourself rather easily. Resurfacing materials from concrete manufacturers such as Quikrete and Sakrete are easy to use, and you can lay them on in multiple thin coatings or a single thick one, depending on the condition of the slab and the effect you want to achieve. As always, preparation is the key to great results. You'll want to clean the slab thoroughly and etch it if it's super smooth. Etching is a process by which a smooth concrete surface is opened up and roughened so it will accept a sealer or resurfacing material.
Large slabs usually have control joints and expansion joints, and it's important to keep the resurfacing material out of these. The best way to do that is to fill them with weather stripping before you resurface.
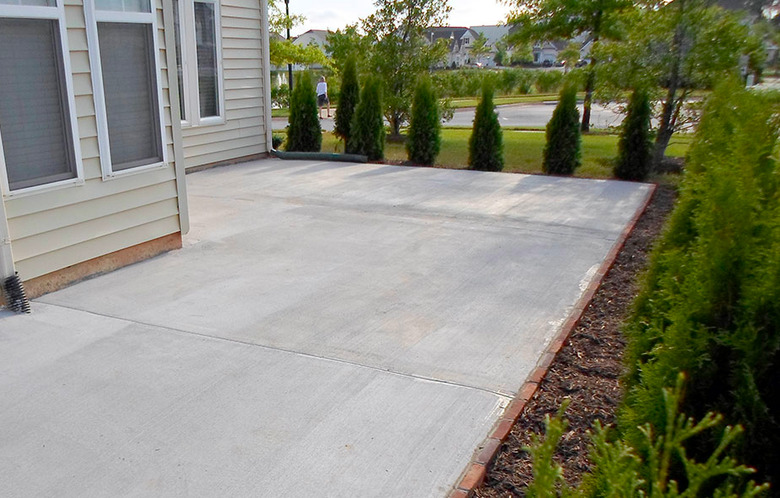
 Gaddis & Son
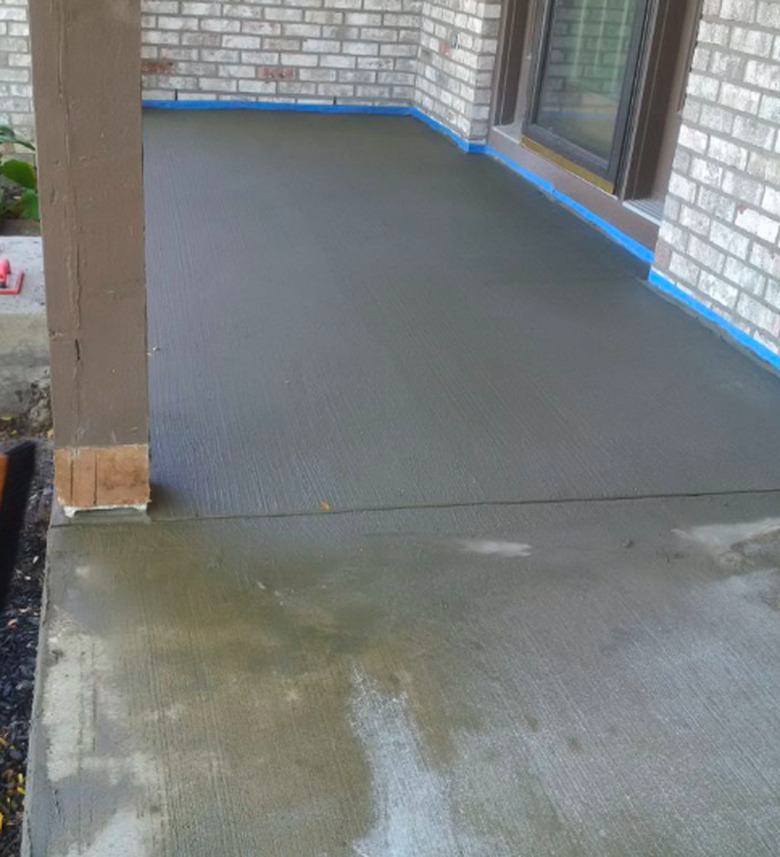
Choose Your System
Choose Your System
You have your choice of four different resurfacing systems, and the one you need depends not only on the condition of the slab but also on the effect you want to achieve.
Microtoppings
Microtoppings are designed to be applied in very thin layers, no more than 1/8 inch thick. You can purchase products that combine a polymer-based adhesive premixed with heavy of fine aggregate, or you can mix your own. This is the best system for revitalizing a pad that is in otherwise good condition, and you can also use it for a slab in not-so-good condition by troweling the mixture on in layers. More serious problems should be remedied before you attempt resurfacing.
Stampable Overlays
Stampable overlays are designed for patterns. The mixture is cementitious—not polymer-based—and can be laid out in thicknesses from 1/4 to 1/2 inch. You create the pattern, such as faux bricks or wood, by stamping the concrete before it hardens.
Multipurpose Overlays
Multipurpose overlays contain a mixture of large sand and/or pea gravel and can be applied in thin layers with a broom or by spraying. Their main purpose is to provide a texture. You would use one of these, for example, if you want to create a non-slip surface.
Self-Leveling Overlays
Self-leveling overlays are designed for resurfacing badly cracked or pitted concrete. Although some spreading is required, which you usually do with a metal squeegee, they flow out on their own to create a flat, level surface.
Preparing the Slab
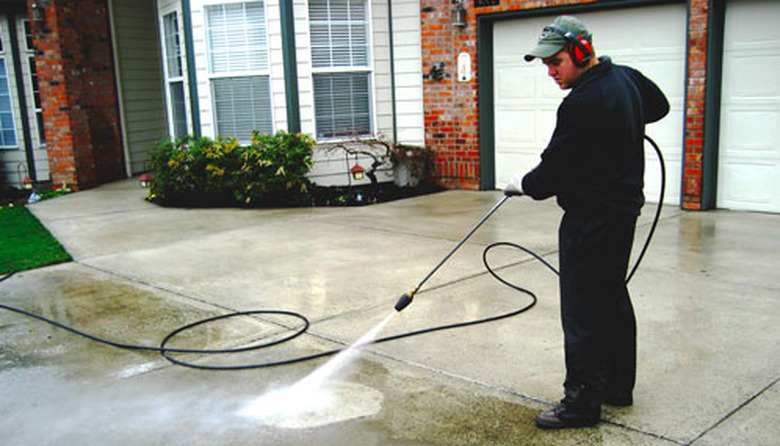
Preparing the Slab
The Concrete Network calls surface preparation "hands down the most important part of any overlay project." Thorough cleaning is necessary, of course, and you should do that with a pressure washer working at a pressure of 3,500 psi. You'll also want to fill cracks and spalls with a quality epoxy concrete mending compound.
On top of that, it's usually necessary to etch the surface—especially if it has been polished—so the resurfacing material will bind to it. Most pros do this mechanically, using diamond cup wheels or a diamond pad. You can also do it chemically, using muriatic acid—a substance that is corrosive enough to be dangerous. As an alternative to spreading it in its liquid form, consider using a gel product. It's a little more expensive, but not as expensive as mechanical grinding.
Applying the Resurfacer
Applying the Resurfacer
Things Needed
-
Garden hose
-
Foam weatherstripping
-
5-gallon bucket
-
Long-handled squeegee
-
Trowel
-
Concrete broom
 Sakrete
The procedure for applying the resurfacer depends on the product you use. You'll want to read the container for specific details, but the following general procedure should get you off on the right foot.
1. Rinse the Slab
After completing the preparation steps (see above), flush the concrete with water, using a garden hose. This is especially important after etching with muriatic acid since the water will help neutralize the acid. Let the concrete dry out before proceeding.
2. Fill the Expansion Joints
Stuff foam weatherstripping into the control joints within the slab. It's crucial to keep material out of these joints, which are there to control the direction of cracks (if and when they occur). Push the weatherstripping deep enough into the joints so that the paper packing is flush with the concrete or a little below it.
3. Mix the Resurfacing Material
Mix the resurfacing material with water in a 5-gallon bucket, following the instructions on the container to ensure you use the proper amount of water. Note the open time on the container—the amount of time the product stays workable when mixed. You don't want to mix any more material than you can use during the open time, but you also don't want to come up short. Measure the slab dimensions and check the coverage information on the package to be sure you have enough.
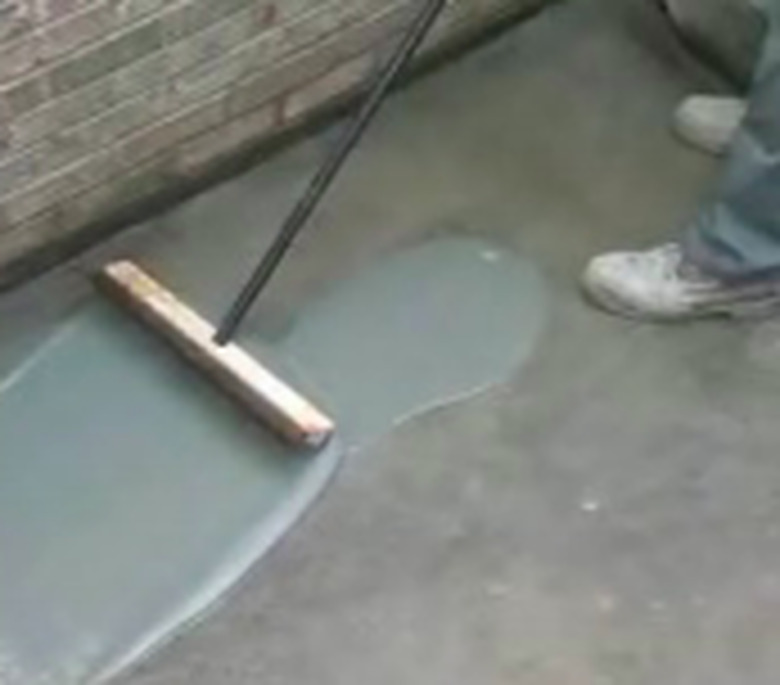
4. Spread the Resurfacer
Pour the material directly from the mixing bucket in 1-foot-wide strips onto the slab. Spread it with a long-handled squeegee if you're using a microtopping or multipurpose overlay. Use a trowel if you're spreading a thicker material, such as a self-leveling compound or a stampable overlay. It is crucial that the resurfacer is applied in a flat layer without dips or shallow areas.
5. Texturize
Wait for about 5 minutes (or as directed) and texturize the surface, if desired, using a concrete broom. This procedure is a way to add a non-slip finish to your pad. Make the broom stokes in the same direction, with each stroke parallel to the others. Omit this step if you're going for a smooth, polished finish. If you're stamping a pattern, wait until the material stiffens, which could take an hour or two. Check the container for details on how to do this.
6. Keep the Surface Moist
Moisten the surface of the slab with a fine spray from a garden hose at regular intervals for the next 24 to 48 hours. This prevents the mixture from drying out too fast and cracking.
Adding Color
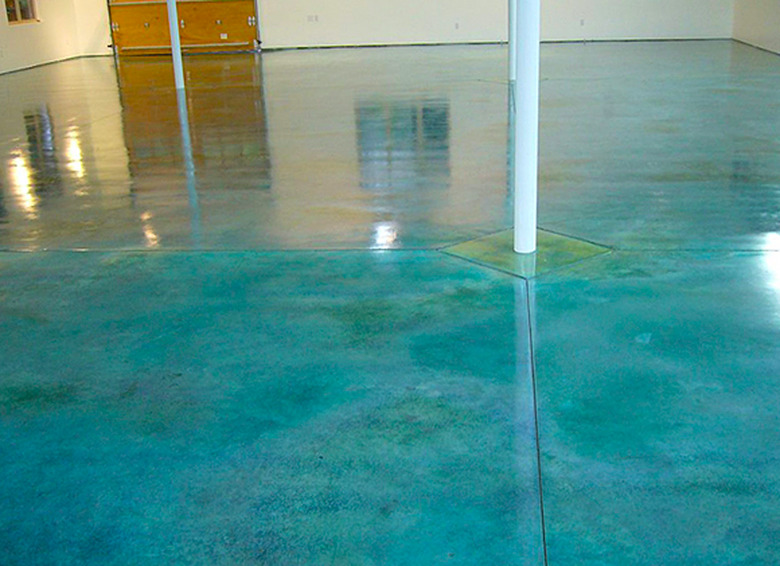
Adding Color
Fancy a color other than gray? You can buy pre-colorized resurfacing material, or you can add your own color to the mix by adding pigments. If you forget to add color to the fresh material, you can stain or dye the resurfacing material after it sets. Stains react with the chemicals in concrete to produce permanent earth tones, whereas dyes penetrate and add pigmentation. Dyes are the better choice when your tastes run to primary colors, such as various shades of red, green, or yellow.