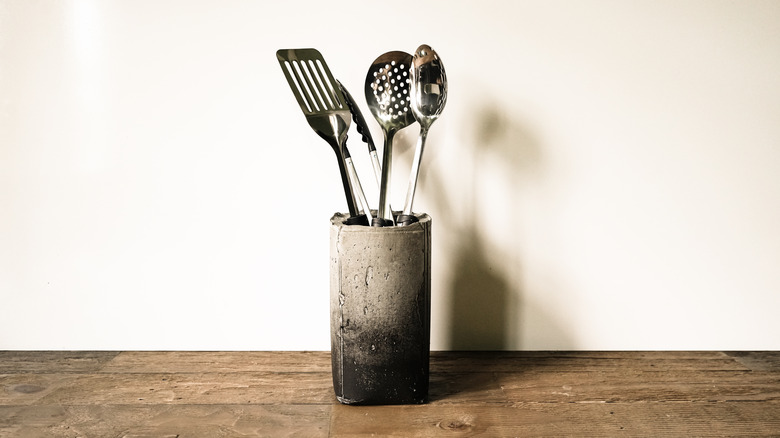
This Concrete Kitchen Utensil Holder Feels More Industrial Art Than DIY
We may receive a commission on purchases made from links.
Two things we love at Hunker: storage solutions and concrete (see exhibits A, B, C, and D). With this simple DIY project, we're bringing our two faves together, creating the coolest storage container for your cooking utensils. This painted concrete utensil holder is not only 100 percent practical, but it's a quick way to give your kitchen that industrial edge. Set it up next to your stove for easy access during cooking, and you're good to go.
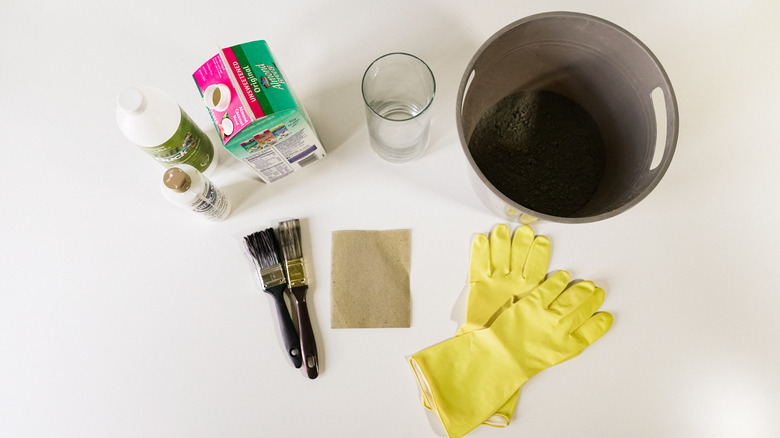
Things Needed
-
Empty half-gallon beverage carton, or similar tall cardboard or thin plastic container as a mold (must be easy to tear or cut off)
-
Tall cylindrical glass vase or plastic vase, approximately 3.5 inches in diameter
-
Concrete mix of your choice or Quikrete Quick-Setting Cement
-
Protective gloves
-
Dust mask
-
Tap water
-
Bucket or large bowl for mixing concrete
-
Disposable mixing tool
-
Fine sandpaper
-
Varnish brush
-
Heavy-body acrylic paint and flat paint brush
-
Four small adhesive felt pads, circular or square (optional)
 Maya Marin
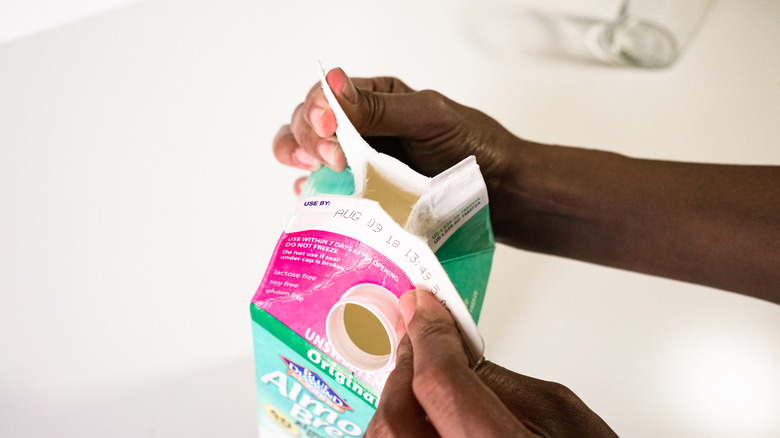
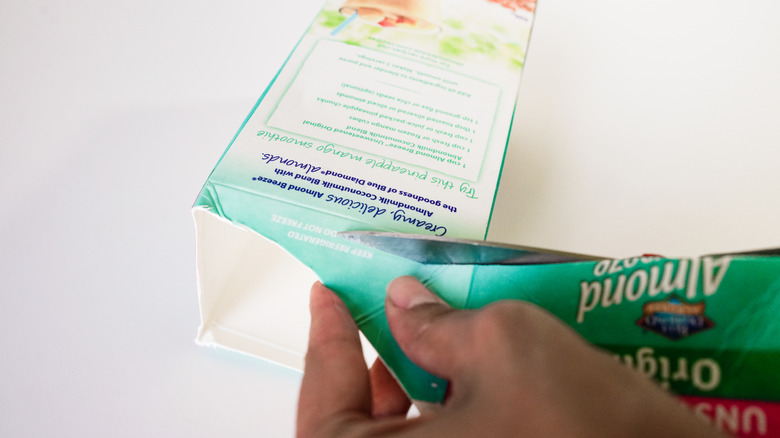
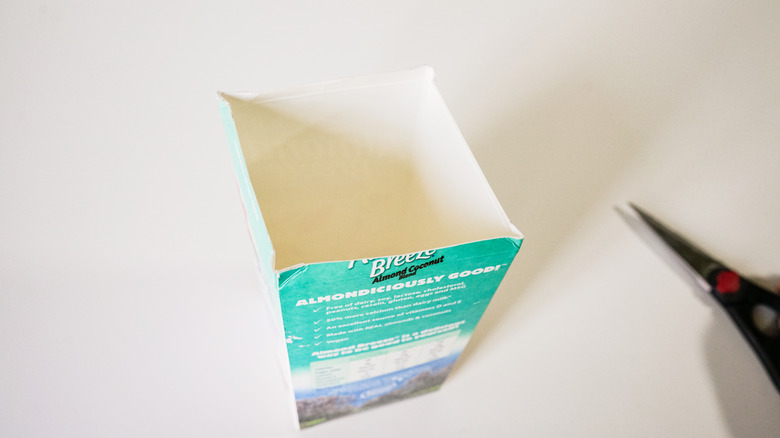
1. Prepare your carton or container.
If using a standard half-gallon beverage carton, pull apart the top to create a tall, straight-sided box as shown.
 Maya Marin
If needed, trim around the top of the box or container so it is about 1.5 inches taller than your vase. This will be your outer mold.
 Maya Marin
 Maya Marin
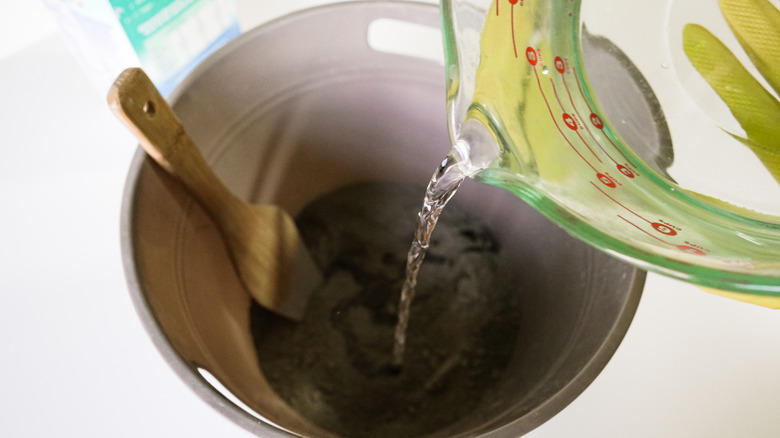
2. Mix the concrete.
Before mixing your concrete, put on your dust mask and protective gloves. The amount of concrete you'll mix depends on the size of your container. Aim to mix enough concrete to fill your container to the halfway point or slightly higher.
Add dry concrete or Quikrete to your mixing vessel and gradually add water, about half a cup at a time. Thoroughly mix after each pour to ensure that all the dry mix is being incorporated.
 Maya Marin
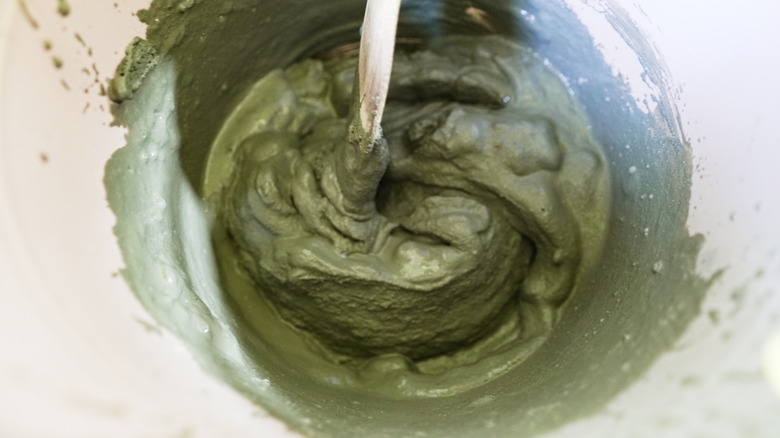
Continue adding until you achieve a thick cake batter consistency. It should be pourable, but NOT runny. As a general rule, the less water used, the stronger your concrete vessel will be.
 Maya Marin
TIP: We recommend using either a fast-setting concrete mix or Quikrete Quick-Setting Cement. We prefer this product for three reasons: it's available in smaller quantities than regular concrete; it can be sculpted with your hands before completely set; and it's strong. Unlike regular cement, it can be used on its own without adding an aggregate like sand or gravel. Do NOT use ordinary cement (i.e. Portland cement) on its own, as it will be prone to cracking.
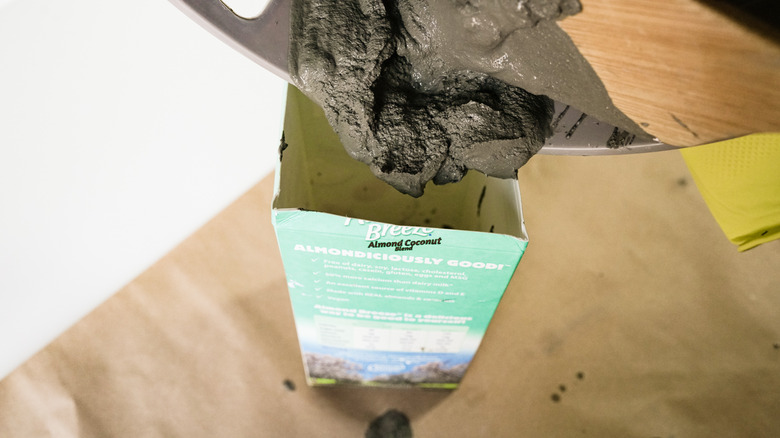
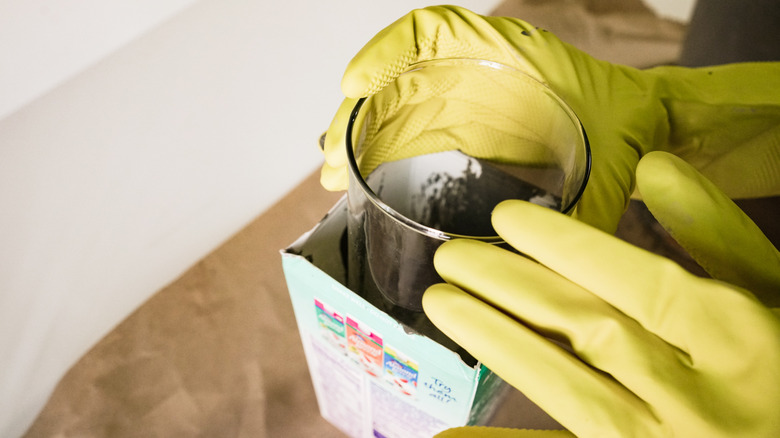
3. Pour the concrete and insert vase.
Working very quickly, pour the concrete mix into the carton or thin plastic container. Stop once it's halfway filled.
 Maya Marin
Press the glass vase firmly down the center of the poured concrete. The concrete will be displaced and the level will rise as you do so. Keep pressing until the level of the concrete is about flush with the top edge of the vase. If there isn't enough concrete to reach the top edge of your vase, use your gloved hands to pack more concrete down the sides of the container.
 Maya Marin
 Maya Marin
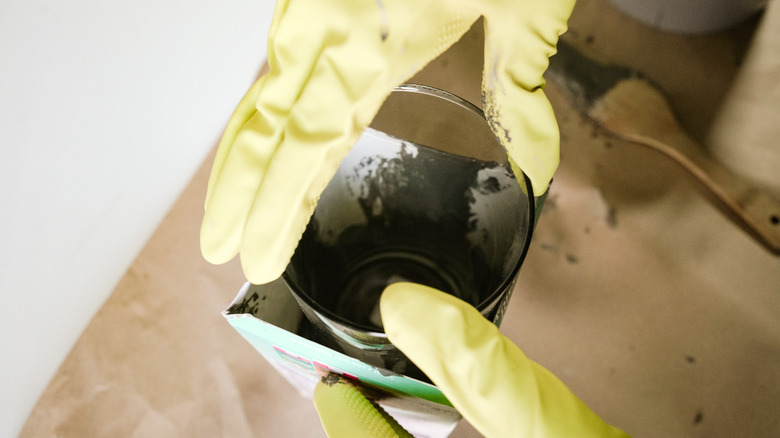
Hold the vase down firmly in place. While the concrete is setting, the vase will slowly rise, causing the top edge of the vase to protrude from the concrete. If you're using quick setting concrete or Quikrete cement, the vase will be secured into place within a matter of minutes, so be patient and hold it down until it's no longer moving upward. If you're using regular concrete, you'll probably want to insert weighted objects (like stones) into the vase to make sure it stays down until the concrete has set enough to hold the vase in position.
4. Release trapped air bubbles (optional).
We love the texture that trapped air bubbles provide, but if you want a more crevice-free surface, pat the container vigorously around the sides so that any trapped air rises to the surface. Continue do this until no more bubbles rise to the top.
 Maya Marin
TIP: Bear in mind that, if using fast-setting mix, you're almost assuredly going to have a few bubbles in there, as you'll probably not be able to agitate the wet mix enough to free all of the trapped air before it sets. So if you're dead set on a totally smooth, bubble-free surface, use regular-setting concrete and agitate well until no more bubbles rise to the surface. Then, allow enough time to cure (typically 72 hours) before painting.
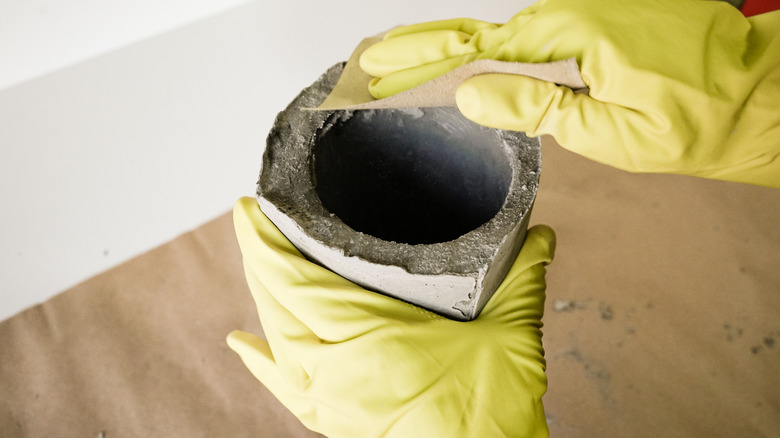
5. Allow concrete to set.
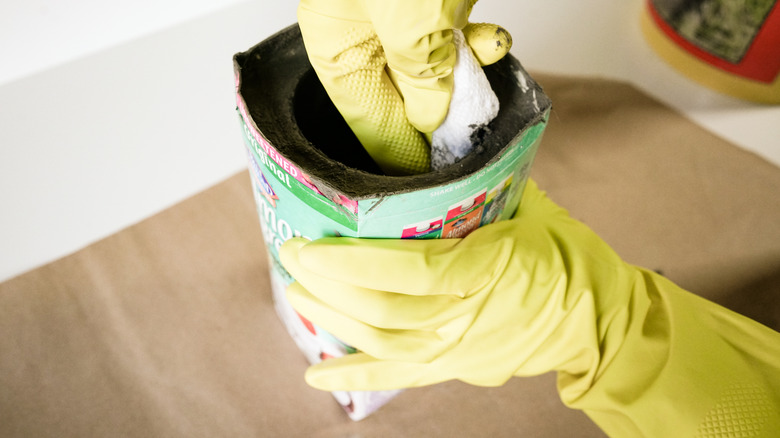
Use a damp paper towel or rag to wipe the inside of the vase to remove the majority of any concrete mix that may have dripped down the sides and to the bottom of the vase. Don't worry about getting it perfectly clean; just ensure that there are no large chunks of concrete remaining. You should be able to easily remove any thin film of dried concrete that may still be inside the vase.
 Maya Marin
Now, wait until the concrete is set. Depending on the type of mix used, this could be either a few hours or a few days (see tip above in step 4).
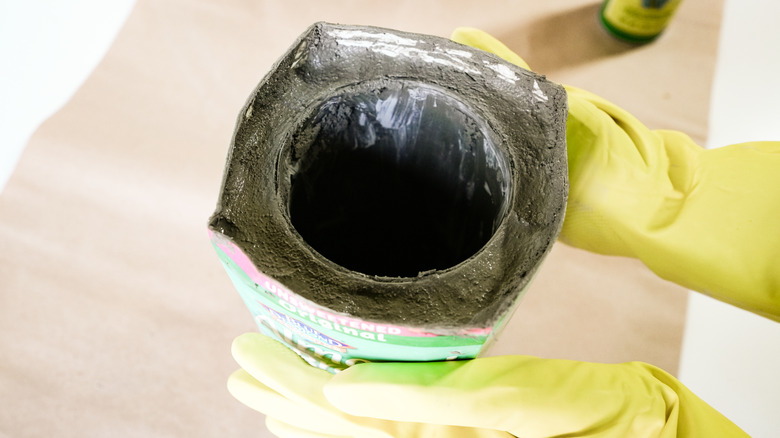
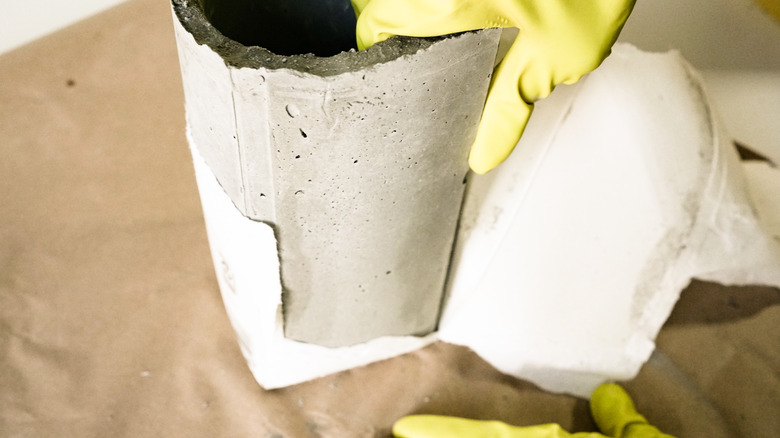
6. Remove the mold.
Here's the fun part! Rip the carton off your newly-set concrete container. If you've used a plastic container, use a sharp utility knife to score the outside and tear it open.
 Maya Marin
The entire surface of your container should be a uniform light gray color. If there are still dark patches on the surface of your container, it hasn't set completely. If so, you can still proceed to the step 7 (sanding) but don't move on to step 8 (sealing) until your concrete is set and uniform in color.
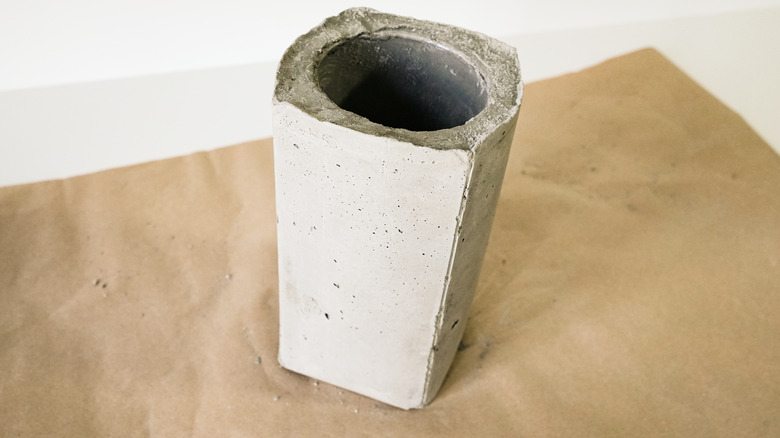
7. Sand.
Using fine-grain sand paper, smooth out the surface as much as you'd like. We sanded enough to remove any sharp or excessively jagged edges along the top, but wanted to leave it rough around the edges.
 Maya Marin
 Maya Marin
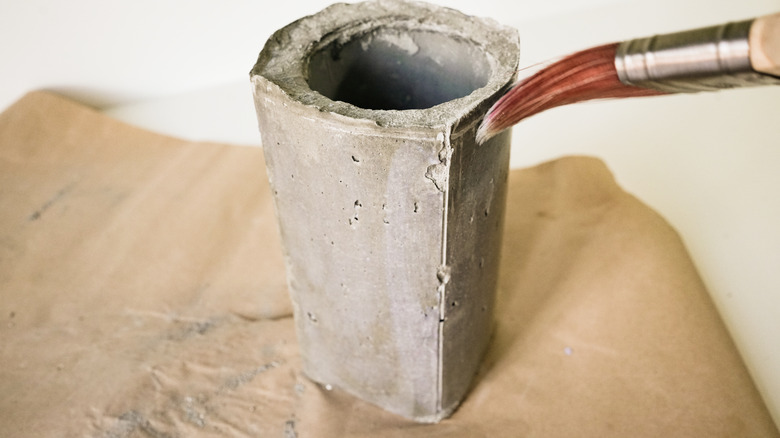
8. Apply concrete countertop sealer.
Wipe it free of all dust created while sanding. Use a chip brush to apply a thin coat of food-safe countertop concrete sealer according to the manufacturer directions. Since you'll be using this in your kitchen, we highly recommend that you use a non-toxic, indoor concrete sealant as opposed to a sealant for outdoor use.
 Maya Marin
 Maya Marin
Allow to dry for the time recommended on the product label, then repeat for a second coat. Allow to completely dry before the next step.
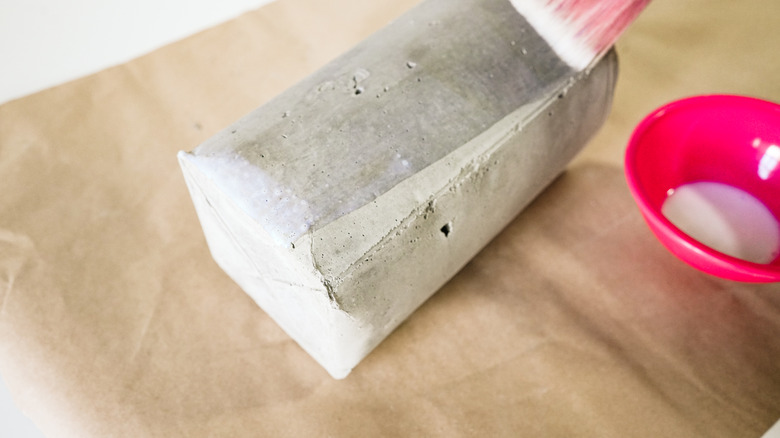
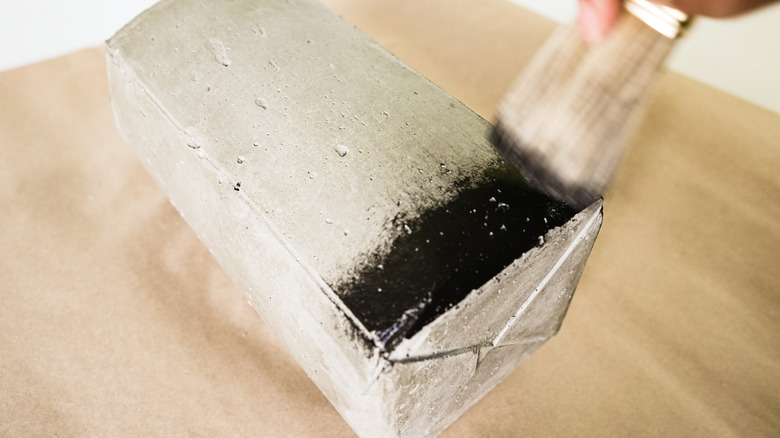
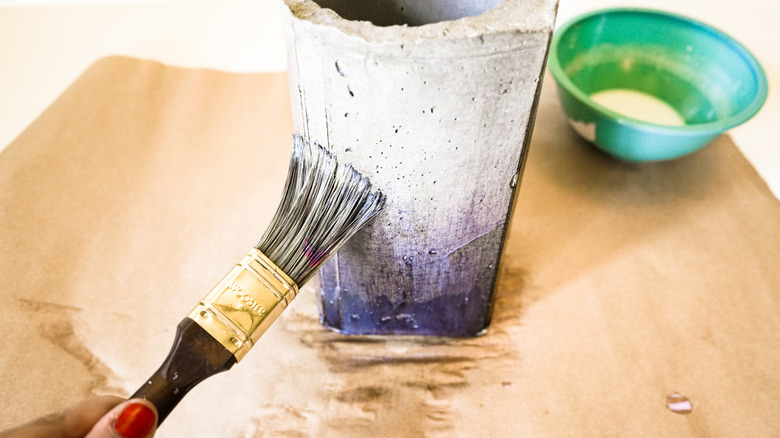
9. Paint and seal (optional).
You can choose to leave your utensil holder as is, or paint it for more visual interest. We chose a dry brush technique using thick-bodied acrylic paint to create a gradient effect around the base. As with the countertop sealer, we chose a non-toxic acrylic paint which is a safe option for kitchen use. As for color, we chose black for a smoke-stained look (which pairs perfectly with cast iron cookware!), but select any color that'll coordinate well with your decor.
To mimic our look, use your paint brush to paint a thick, solid line at the base of the container on one side, as shown.
 Maya Marin
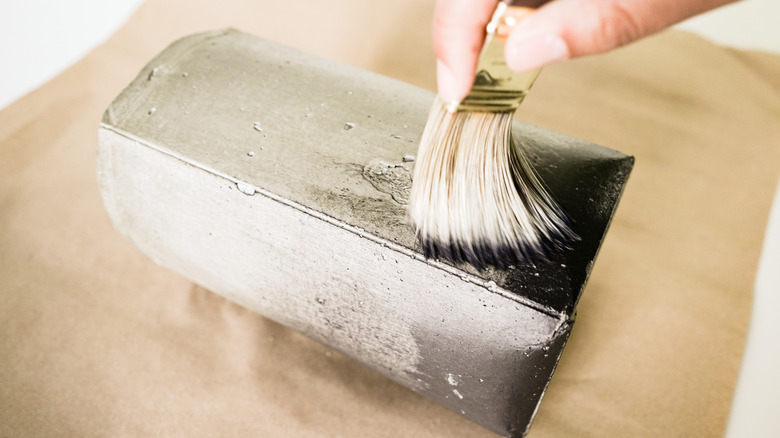
Remove any excess paint off the brush with a dry rag, then use upward strokes to drag the paint from the bottom of the base upward. Apply less pressure as you brush upward, to create an increasingly lighter shade. No need to do a perfect job! Jagged and uneven strokes work particularly well with this dry brush technique, but do whatever you'd like to make it entirely yours.
 Maya Marin
 Maya Marin
 Maya Marin
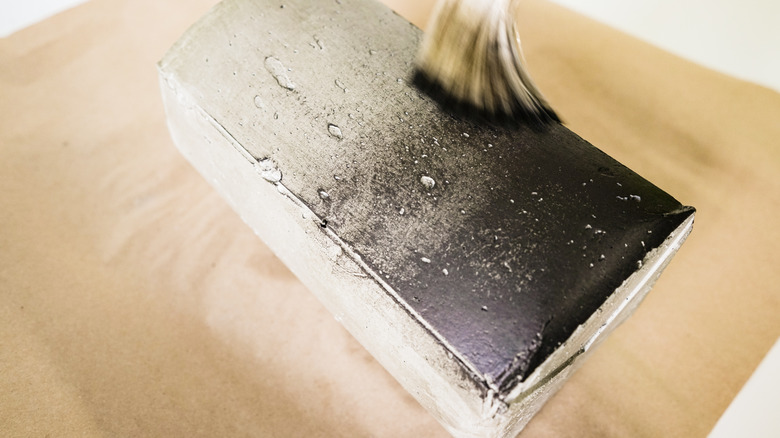
Repeat this for all sides of the container. Once the paint is completely dry, repeat step 8 to seal and protect your final design.
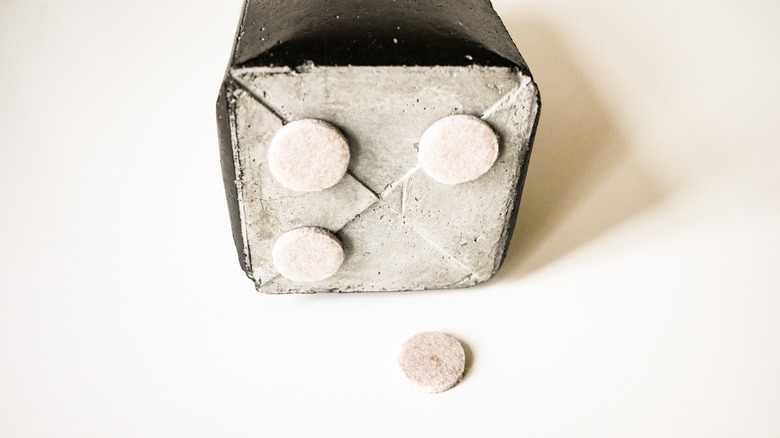
10. Apply protective felt pads.
Depending on where you place your utensil holder, you'll probably want to add felt pads to the bottom to prevent the concrete from scuffing up any surface below it. Simply apply four small adhesive pads underneath, about a half inch from each corner. Don't place them right at the edge of the corners or they'll be visible when your container is upright.
 Maya Marin
Your one-of-a-kind concrete creation is now ready to do double duty in your kitchen as both a handy utensil holder and as a hand-painted, sculptural work of art!
 Maya Marin