How To Troubleshoot And Repair Fluorescent Light Fixtures
Fluorescent lights are less common in today's homes than they were a generation or two ago, but few homes do not have at least one fixture that features the familiar long, tubular bulbs. It might be in a garage or basement workshop, or perhaps underneath your upper kitchen cabinets, but fluorescent lights still fill their role. They are efficient, making them inexpensive to operate. And even though they have become largely relegated to task lighting, knowing how they work and how to keep them working is far from a lost skill.
Warning
Because you will be working on a part of your home wiring system, it is very important that you follow all electrical safety practices when repairing your light fixture.
Fluorescent tube technology has been around for decades—not as long as the incandescent bulb, of course, but it has provided an important and more energy-efficient alternative. Recent technology has given us the compact fluorescent light (CFL) bulb, and even though the "pigtail" bulb is being eclipsed by LED bulbs configured to work in standard screw-in bulb fixtures, they have played an important transitional role in weaning us off the inefficient tungsten filament of the incandescent. Because CFL's work just like screw-in incandescents on the user end, working with them is no different: when they burn out or dim by more than 30%, replace them and dispose of the old bulb properly.
Tip
A handful of states specifically prohibit adding bulbs containing mercury vapor (as all fluorescents do) into your waste stream. But even if your state is OK with it, the EPA strongly recommends that all used fluorescent tubes and CFL bulbs be dropped off and recycled at an authorized facility. You can check the EPA or environmental websites for local information. For most of us DIYers, though, the most convenient drop-off spot is any building center and hardware store. Most of these retailers have recycling containers for these bulbs, although some may charge a small disposal fee.
How Fluorescent Lights Work
How Fluorescent Lights Work
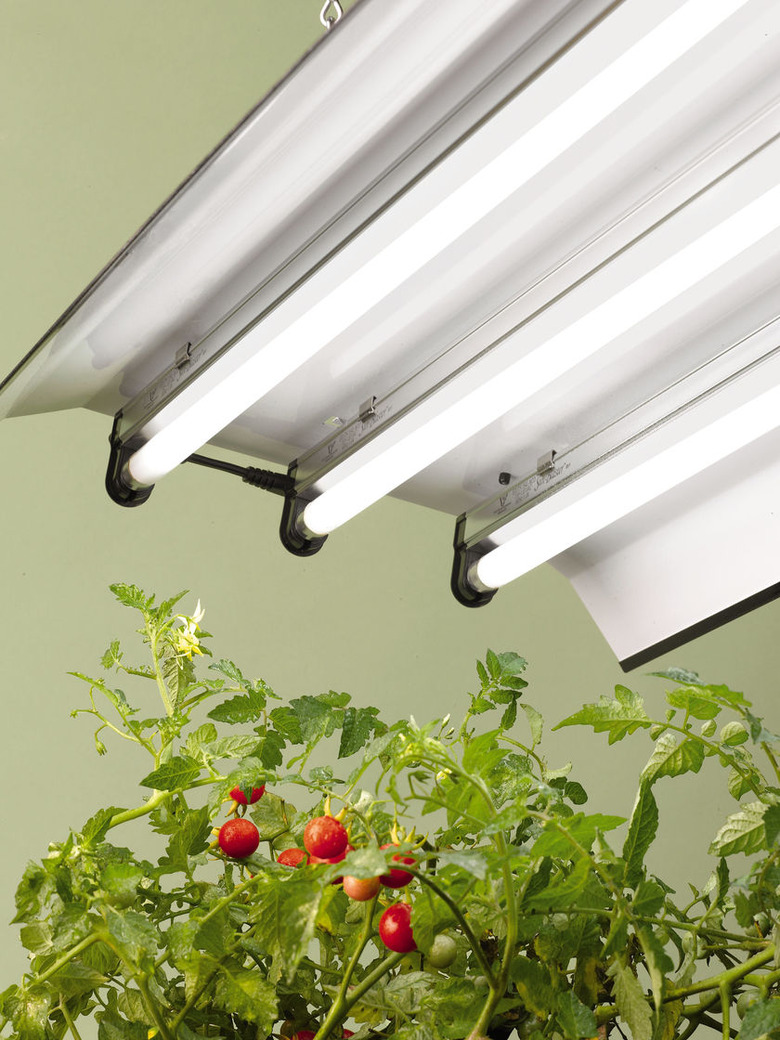
Fluorescent tubes work on a similar but different principle from incandescents. In the latter, the filament is electrified and provides high resistance to the current, which causes the filament to glow inside a confined glass globe. This creates light, but also a lot of heat. With fluorescents, the electrical current is directed through a sort-of transformer called a ballast, then redirected to a starter (if your fixture is more than 15 to 20 years old) that excites gases contained in the tube (argon and mercury vapor), a little like a spark plug. The excited gases react with the coating on the inside of the tube to glow at controllable rates, and with much less energy loss via heat. The tubes (technically called "lamps") are twisted into sockets in the fixture, through which the "spark" flows. In most fixtures, a diffuser protects the fluorescent tube and softens the light.
Fluorescent lights are normally hardwired in the ceiling, often in recessed fixtures called troffers. The ones that you see hanging over workbenches or in garages or as grow lights for gardeners more often have plug cords so they can be moved around easily. Regardless, fluorescent fixtures all have the same basic parts and are treated similarly when it comes to maintenance.
Replacing the Ballast
Replacing the Ballast
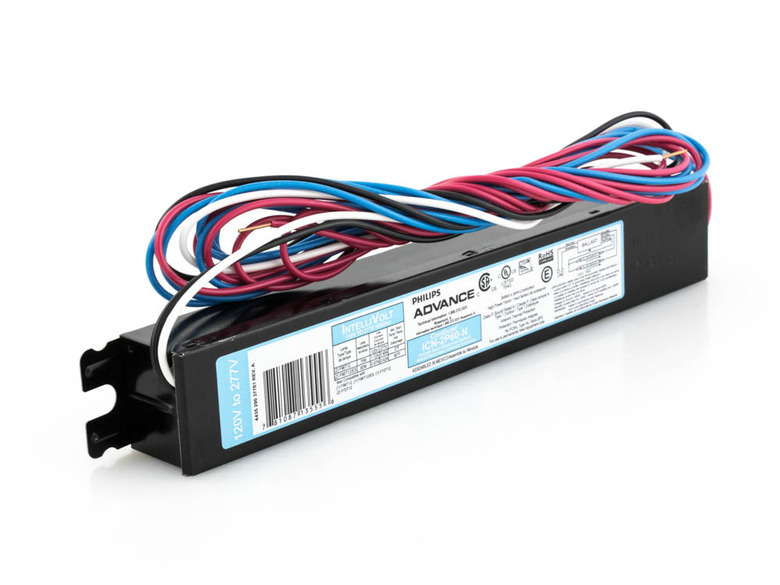
Inside the fluorescent fixture, a cover plate protects a special transformer, called a ballast, which has preattached wires for hooking up to your electrical supply. The ballast passes 120‑volt household current to the fixture's sockets, to which the tubes are connected. The sockets transfer power to metal pins that extend into the tube.
 Bulbs.com
All fluorescent fixtures have a ballast, which is both the heart and brains of the fixture. In the old days, magnetic ballasts were the standard. Most required a starter to finish the job of talking to the bulb. It is these magnetic ballasts that cause most humming sounds in a fixture, as well as the delay and flicker when a fluorescent light is turned on. They are relatively inexpensive to replace and should last 10 to 20 years, at least.
In more recent years and in higher quality fixtures, the magnetic ballast has been replaced with an electronic ballast. These "instant on" ballasts generally eliminate the delay when the light is turned on and they do not usually require a starter. The absence of the magnetic system also eliminates the buzz. It is possible to replace a magnetic ballast with an electronic one as long as the color-coded wiring configuration is the same. But in many cases a standalone electronic ballast can cost as much or more than a new, modern fixture, so it may not be worth it. If you go to the hardware store you will find dozens of ballasts. The surest advice for getting the right one is to bring the old one to the store with you. Pay special attention to the color of the wires connected to the ballast, and look for a replacement that has the same colors and configuration.
How to Replace a Ballast
How to Replace a Ballast
Things Needed
-
Voltage detector
-
Screwdriver
-
Ratchet wrench/Nut driver
-
Wire connectors
-
Replacement ballast
1. Shut off power to the fixture.
Do this by turning off power at the main circuit breaker. Once you have removed the diffuser to gain access to the bulb sockets, test with a touchless voltage detector to confirm that power has been shut off.
2. Remove the Diffuser and Cover Plate
To access the parts of the fixture, you'll need to remove the diffuser, usually done by pressing lightly on the sides of the diffuser. Also remove the tubes by twisting the pins out of the sockets. This will allow you to access and remove the metal cover plate, also fitted into the fixture with compression tabs, not screws.
3. Disconnect the Sockets
The end of each tube is connected to a socket that is attached to the fixture with screws or, in some cases, snap-in hardware. You'll need to detach the sockets to access the wires attached to them. Disconnect these wires if they come directly from the ballast. If the wires are connected to wires from the ballast with wire connectors, you do not need to disconnect them from the sockets.
4. Remove the Old Ballast
The old ballast will be attached to the body of the fixture with screws or nuts. Remove these screws or nuts and withdraw the ballast. Bring it to your local hardware store and find a replacement unit. See above.
5. Replace the New Ballast
Attach the new ballast to the fixture using the same method and fasteners as the old one employed. Once it is secure, attach the ballast wires to the sockets in the same fashion as the old ballast/socket connections.
6. Reassemble the fixture.
Reinstall the sockets securely and then replace the cover plate. Install the fluorescent tubes (inspect them first-if there is darkness near either end replace them now). Restore power and test the fixture and, if all is functioning properly, reattach the diffuser panel.
Replacing Sockets
Replacing Sockets
The sockets that hold the tubes in the fixture, like any other part, can fail. This is seldom the cause of fluorescent fixture problems, but it does happen, and new sockets are easily found. As always, remove the old sockets (see How to Replace a Ballast, above) and bring one to the hardware store to locate suitable replacements.
 Lowes
Lowes
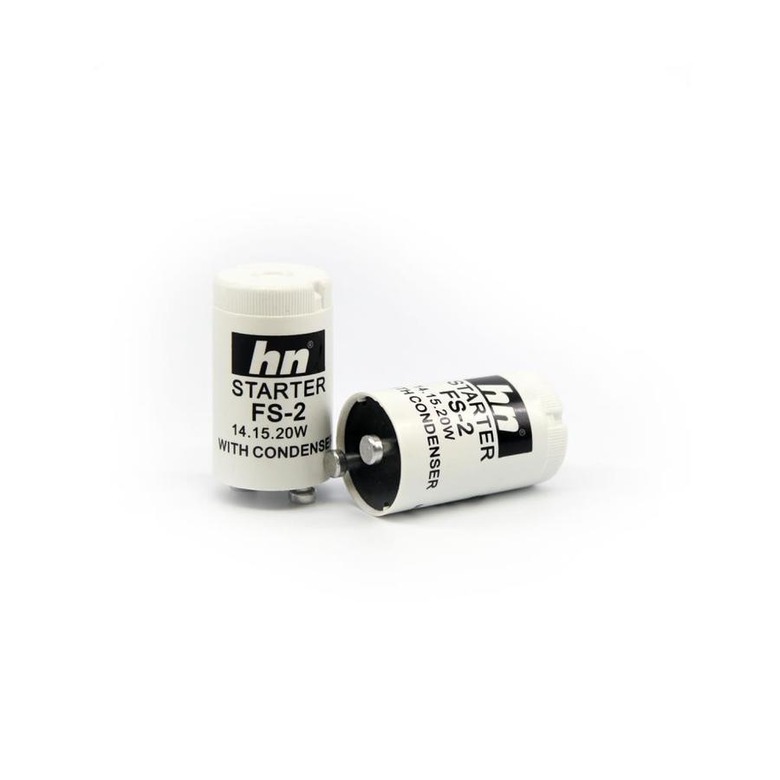
Replacing Starters
Replacing Starters
Starters are small metal cylinders (in some cases, as small as dime-sized) that transmit the electrical current from the ballast to the sockets. Most modern fluorescent fixtures do not have them, as they have been replaced by instant-on electronic ballasts. But if your fixture does has them, you'll need to replace them from time to time. In most cases the starter is located on the interior of the fixture near the end of one tube. It is not really possible to visually inspect them, but if you know your tubes and ballast are sound, it is worth taking a shot at replacing the starter. Simply twist and pull on the old starter to remove it. Find a suitable replacement and reinstall it the same way.
 Lowes
Lowes
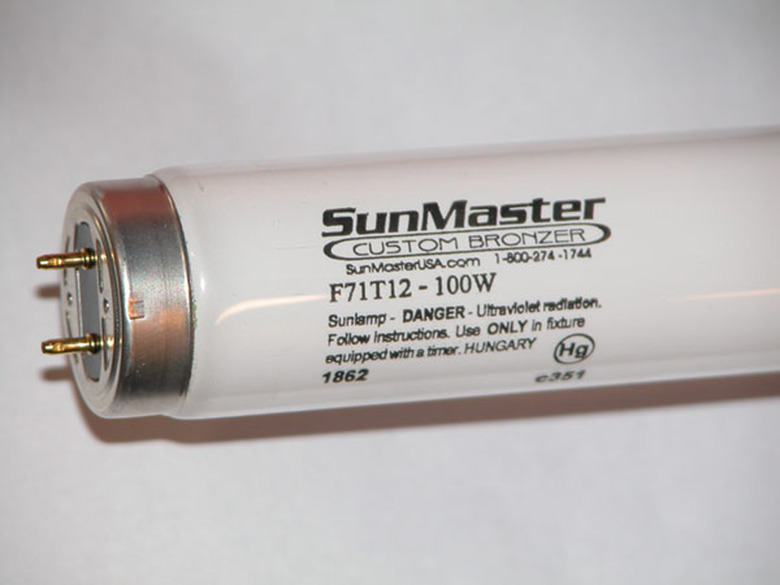
Replacing Fluorescent Tubes
Replacing Fluorescent Tubes
A burnt-out lamp is the most common reason any light fixture does not light. A fluorescent tube that is failed or failing usually has darkened areas near one or both ends of the tube. To replace, remove the old tube and bring it to the hardware store. Or, you can read the printing on the tube to identify the correct replacement type. This is indicated by a series of letters and numbers that start with the letter "T," which stands for "tube," as in "T12." The number following the T indicates the diameter of the tube expressed in eighth-inches. A T12 tube, for example, is 12/8 inch in diameter (or 1 1/2 inch). Before the T rating you will normally see an "F" and a number. This is the length of the lamp given in inches. A 48-inch lamp will be labeled "F48." If you are measuring the bulb yourself, include the length of the pins. A tube with matching F and T ratings should fit.
 Dennis Brown
Troubleshooting a Fluorescent Light
Troubleshooting a Fluorescent Light
- Fixture does not light. Check for power and test to see if the bulb is seated properly in the sockets. Next, replace the tube or tubes. If the new tubes do not light, use a multimeter or voltage detector (at the switch and the sockets) to confirm that the fixture is getting power. If power is confirmed, try replacing the starter (see above), if your fixture has one. The last step is to try replacing the ballast.
- Tube flickers: First, check to make sure the tube is securely seated in the sockets. Next, inspect the tube to make sure it is not burned out (indicated by darkening at the ends). If you have a multimeter tool, you can also check it for continuity. If replacing the tube does not correct the flickering, replace the starter. If flickering still persists, replace the ballast. As a last resort, replace the fixture.
- Fixture hums or buzzes: Replace the ballast (see "How to Replace a Fluorescent Ballast," above).