Make This Cute DIY Doormat This Weekend (Free Printable Included)
We may receive a commission on purchases made from links.
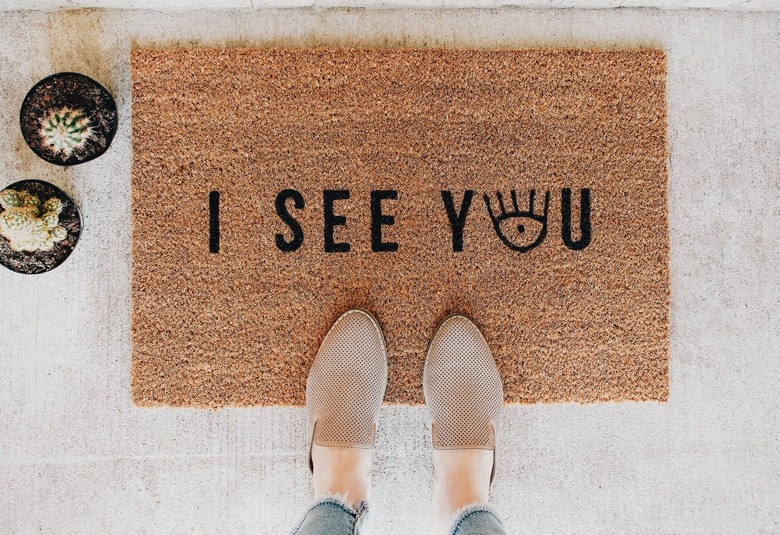
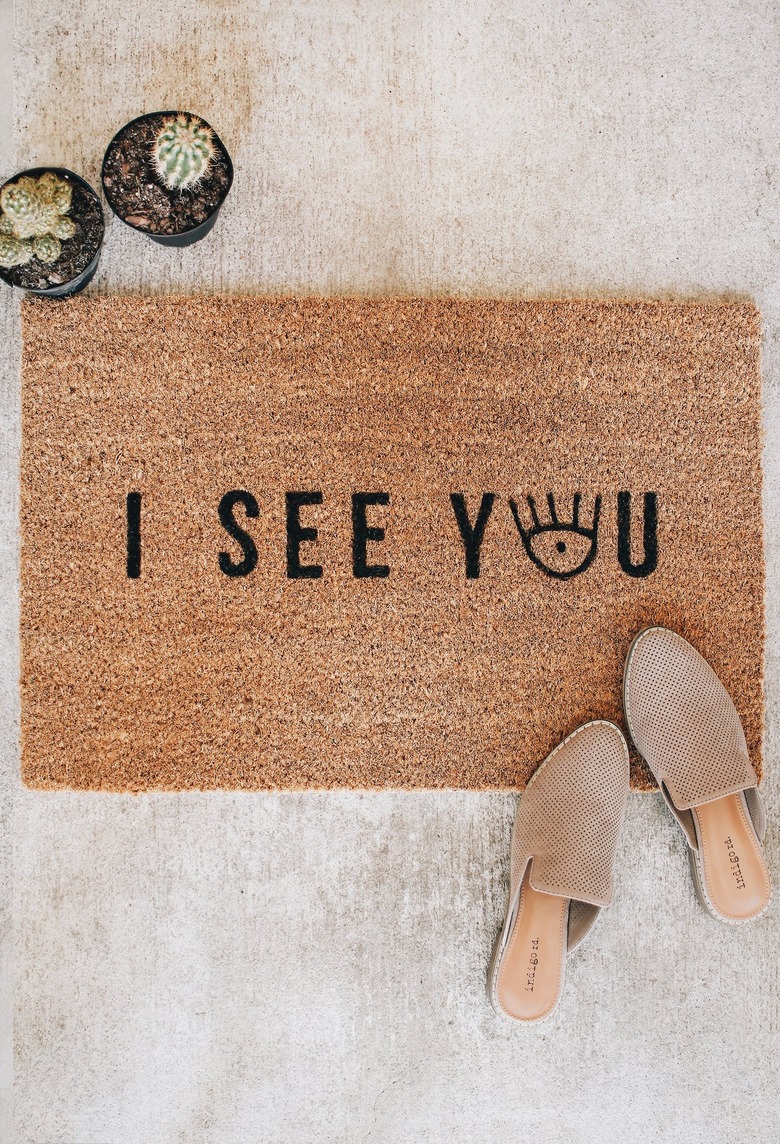
Want a cheeky welcome mat that sets the tone for your home? We've got a DIY (and free download) that'll do just that — while also leaving dirt at the door. Ideal for entryways, mudrooms, patios, or porches, this custom doormat is the perfect mix of fun and function. And thanks to the modern minimal eye graphic, it also happens to be majorly on-trend. We foresee (wink, wink) instant curb appeal wherever you place it.
 Trisha Sprouse for Hunker
Things Needed
-
Plain doormat (we used this IKEA one)
-
Free template
-
Cardstock, 8.5 inches by 11 inches
-
Painter's tape or masking tape
-
Stencil brush or foam brush
 Trisha Sprouse for Hunker
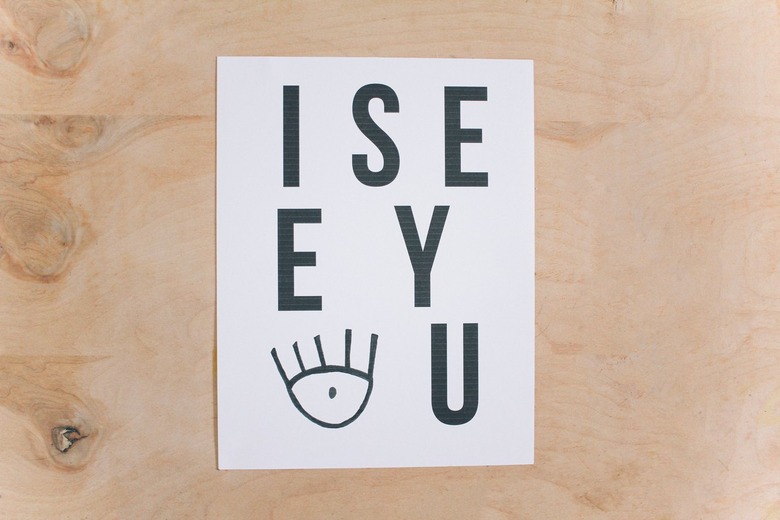
Step 1
Download and print the free template onto cardstock. If you'd prefer the letters to be smaller or larger than what we used, simply adjust the scale size in your print settings prior to printing. (For reference, we used font type Bebas Neue with a font size of 250 pt.)
 Trisha Sprouse for Hunker
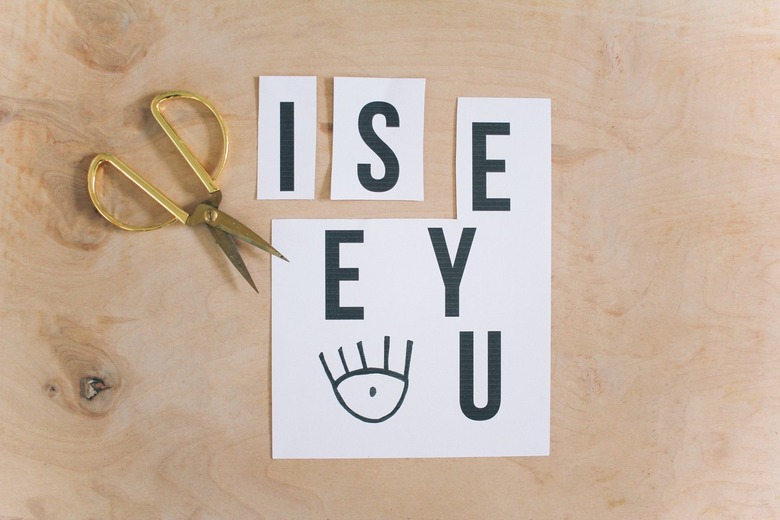
Step 2
Use scissors to cut out the individual letters and eye shape from the template, leaving about a 1/4-inch square border around each letter.
 Trisha Sprouse for Hunker
Step 3
Use a utility knife to carefully cut around the lines of the letters and eye shape to create stencils.
 Trisha Sprouse for Hunker
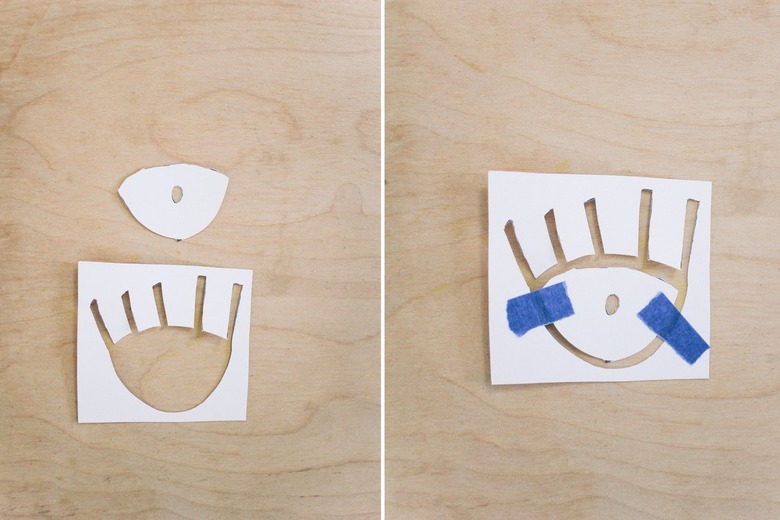
Step 4
For the eye shape, you'll need to cut around the outline first and then cut out the center part of the eye. You'll be left with two pieces, which you'll then need to tape back together to form the stencil.
 Trisha Sprouse for Hunker
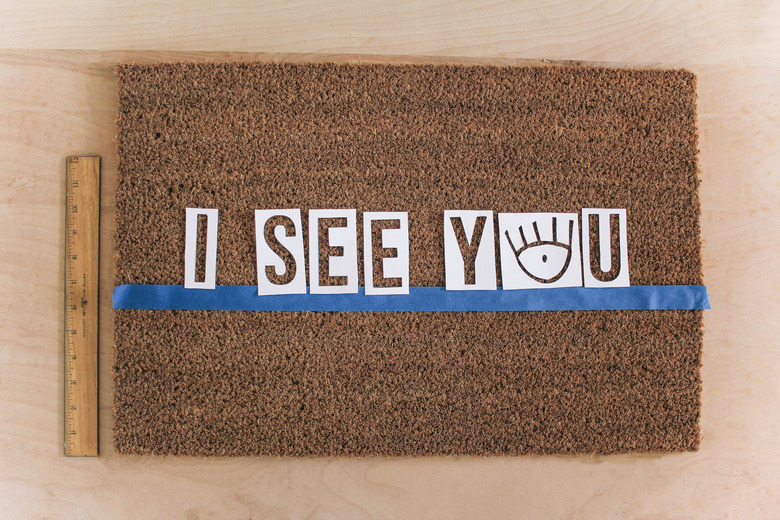
Step 5
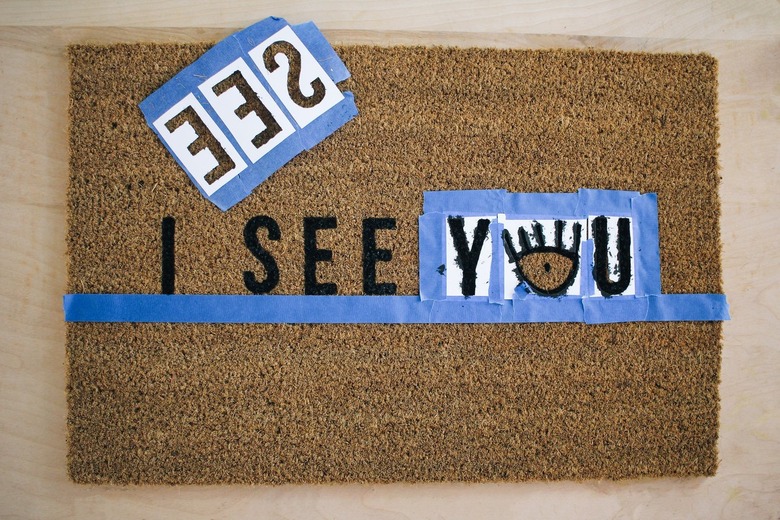
Use a ruler to find the center of your doormat so that you can center and space the words evenly. Then place a long strip of tape across the doormat to form a guideline so you can ensure the bottoms of all the letters will be lined up and straight.
 Trisha Sprouse
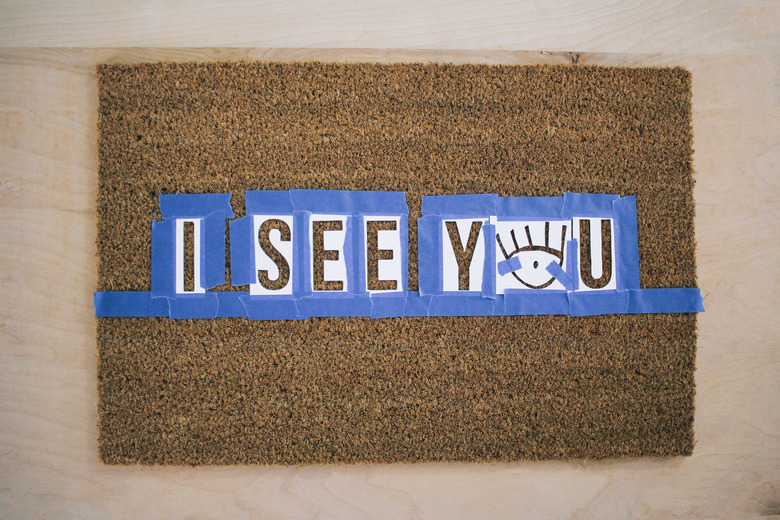
Step 6
Tape all four sides of each stencil in place on the doormat. Trust us, you'll want to err on over-taping rather than under-taping to ensure a nice clean paint job. Be sure to keep the letters straight and aligned on the guideline as you tape them.
 Trisha Sprouse
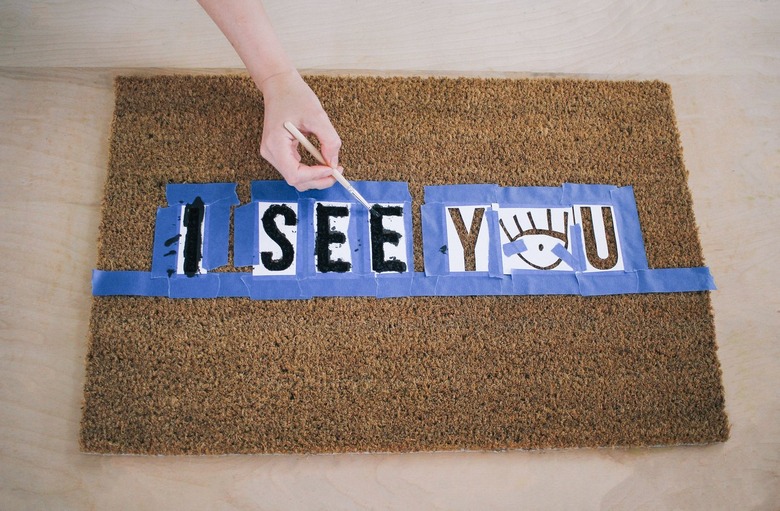
Step 7
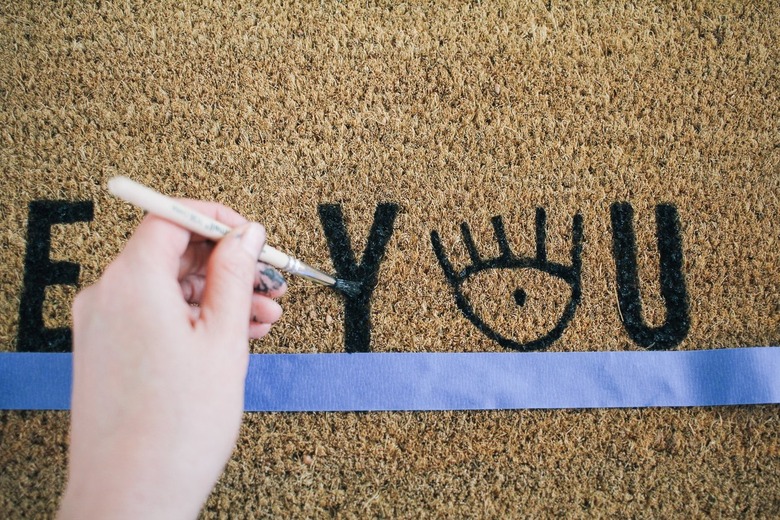
Saturate either a small stencil brush or foam brush with black paint and gently press it into the exposed bristles within the stencils. Avoid using a paint stroke motion like you would if you were painting a wall; a dabbing/tapping motion works best for this project to avoid smearing paint outside of the stencil lines.
 Trisha Sprouse for Hunker
When you get to the eye stencil, paint around the entire outline and allow it to dry completely. You'll be left with two blank spots within the eye shape where the two pieces of tape are holding the stencil together. Remove the tape pieces and re-tape the stencil back together either above or below the blank spots. Fill in the blank spots with paint.
 Trisha Sprouse for Hunker
Step 8
The mat is going to soak up a lot of paint, so allow at least an hour or so for it to dry completely.
 Trisha Sprouse for Hunker
Step 9
Once the paint is completely dry, carefully remove the stencils from the doormat.
 Trisha Sprouse for Hunker
If needed, touch up any spotty areas with more paint.
 Trisha Sprouse for Hunker
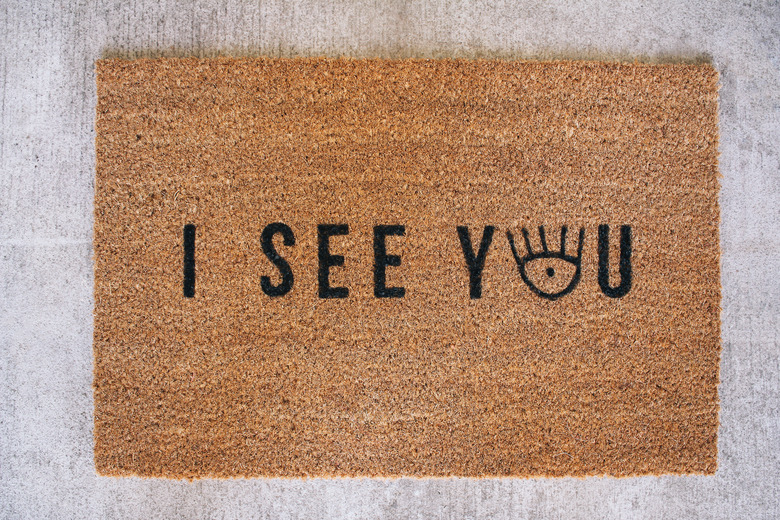
Place your new doormat in a high-traffic spot to greet and amuse everyone as they come and go.
 Trisha Sprouse