How To Revive A Bonsai Tree
We may receive a commission on purchases made from links.
Wilt, dropped leaves, drooping, and brittle branches are true signs of an ailing bonsai, and it can take some time to revive these beloved and funky indoor houseplants. Whether it has been neglected or infected, a dying bonsai requires immediate attention if you intend on saving it. Not every bonsai can be saved from a dying state, but with some care and attention, your bonsai may have a chance. Once you revive your plant, follow the basic care processes carefully to keep your bonsai tree healthy.
How to Revive a Dying Bonsai Tree
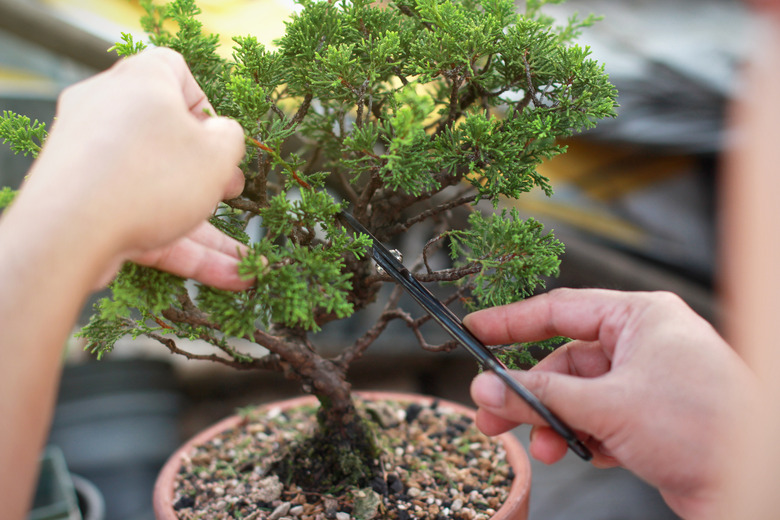
1. Prune Dead Sections
Use sharp, sterile pruning shears to remove any areas of the bonsai that cannot be saved, such as dead or broken branches and wilted foliage and stems. Cut back the branches to the trunk or leader.
2. Check the Inside
Look to see if the insides of the cut stems are green and fairly healthy. Expect for your bonsai to recover if the insides of stems are green and healthy as this shows that the tree is still viable. Do not panic if the interior of the stems in some areas are dry while others are not.
3. Prune the Roots
Remove your bonsai from its container to root-prune and repot it. Inspect the root system thoroughly. Use sharp, sterile shears to prune away dead and wilted roots. Remove all infected, dead and damaged roots from the plant.
4. Place in Water
Place the bonsai in a clean glass container filled with tepid water that covers the root system. Allow the bonsai to rest in the water while you clean your potting container and create your soil mixture.
5. Prepare Container and Soil
Wash your container with a mild detergent and warm water. Be sure to remove any particles that are stuck to the insides of the container. Choose an open and porous soil mixture that has good water retentive qualities. You can use a commercially prepared mix or make your own by incorporating equal amounts of nutrient-rich potting mix, perlite and pure sphagnum moss. Mix the items thoroughly for a balanced loam.
6. Repot Your Bonsai
Cover each of the drainage holes with wire mesh or a coffee filter, and then fill the container a third of the way with your soil mixture. Position the bonsai in the container and fill it the rest of the way with soil. Take your bonsai, and place it in a sink or bucket if it is fairly large. Fill the sink with tepid water so that it reaches about 1 inch above the container's surface. Allow your bonsai to sit in the water until the bubbles cease to rise.
7. Choose a Prime Location
Remove your bonsai from the water and allow the water to flow from the drainage holes. Place the bonsai in a warm, partially shaded location with morning sun and afternoon shade, ideally with 4 to 6 hours of sunlight each day or a different amount needed by your particular plant if these recommendations vary. Choose a well-ventilated location to promote good cell development. If the overnight temperature stays above 40 degrees Fahrenheit, your bonsai can go outdoors. In winter, place it in a south-facing window if possible.
8. Water Your Bonsai
Irrigate your bonsai regularly with tepid water when the soil dries on top. Allow the soil to dry slightly between irrigations to avoid overwatering. If the soil is dry about 1/2 inch deep, water the bonsai to ensure the roots don't dry out. Check the soil daily, especially on hot, dry or windy days.
9. Give Your Bonsai Time
Give your bonsai some time to regenerate. Be patient as the bonsai may wait until the following growing season before it shows true signs of revitalization.