How To Waterproof A Wood Planter Box
We may receive a commission on purchases made from links.
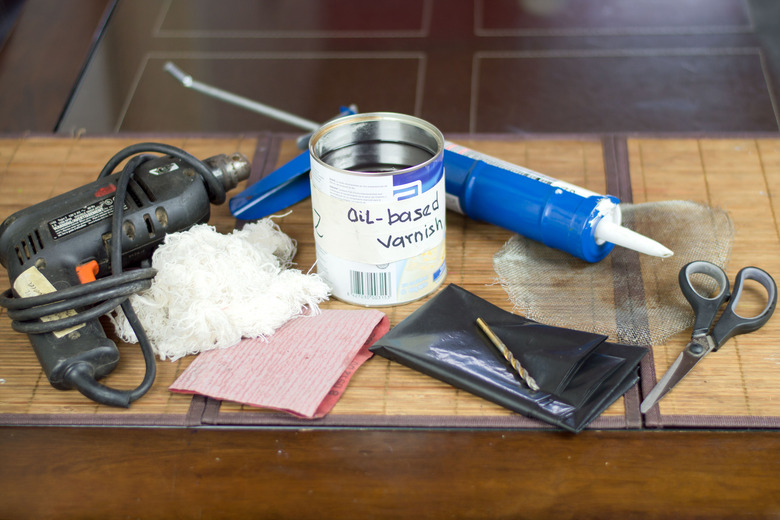
Things Needed
-
Power drill
-
1/4-inch drill bit
-
Silicone caulk
-
Oil-based varnish
-
Paintbrush or cloth
-
Clean cloth
-
220-grit sandpaper
-
6 mil plastic sheeting
-
Scissors or precision knife
-
Landscaping fabric or mesh screen
-
Sterile potting soil
Tip
Oil-based varnish penetrates deeper into the wood than water-based varnish, providing superior waterproofing protection. Additionally, oil-based varnish offers UV protection to prevent sun bleaching.
Warning
Never coat the inside of a wooden planter box with roofing cement or tar to waterproof the wood. While it might be effective against water damage, the chemicals in the roofing cement can leach into the soil, which is particularly hazardous if you grow edible plants in the planter.
Apply varnish in a well-ventilated area, preferably outdoors, or in your garage with the bay doors open. Wear protective gloves when applying varnish to protect your skin.
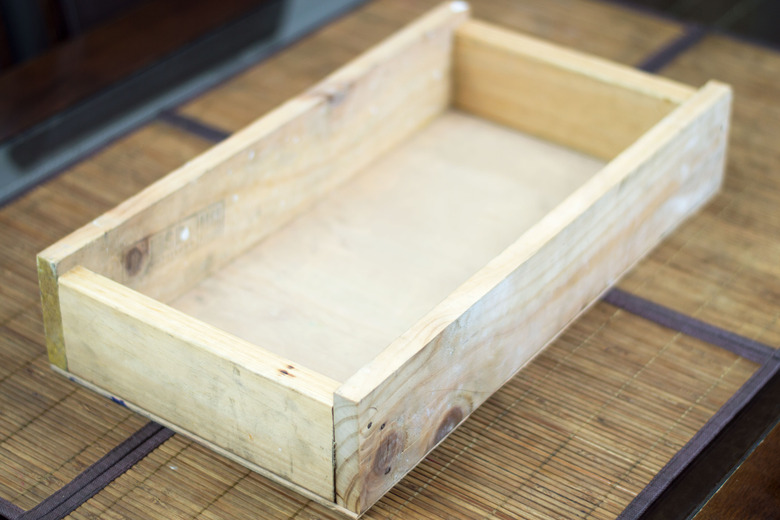
The organic look of wood planter boxes complements plant foliage while balancing the soft plant features with an element of rustic hardness. Wood naturally degrades over time, and exposure to moisture softens wood and hastens decay. Even pressure-treated lumber can warp and become weathered with moisture exposure. Extend the life of your wood planter and preserve its natural beauty by waterproofing to protect it from exposure to elements on the outside and from exposure to moisture in the soil on the inside of the planter.
Step 1
Set a wooden planter made from pressure-treated or untreated lumber in a spot where it can rest for two to three weeks after assembly. This waiting period allows the wood to dry properly so you don't seal in moisture. Wood shrinks as it dries, which can make any joints between lumber pieces increase in size; the waiting period prevents the need to seal joints twice if they expand. Note: A wooden planter box made from pressure-treated lumber will last longer, but the wood contains chemical preservatives and care must be used when cutting the wood; whereas, an untreated wooden planter box will not last as long, but there is no concern about chemical preservatives.
Step 2
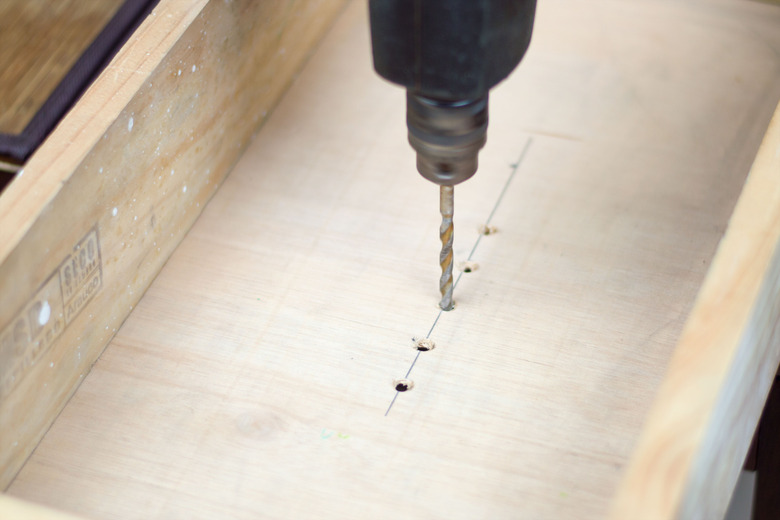
Drill one or more 1/4-inch drainage holes in the bottom of the new planter to allow excess water to drain from the soil.
Step 3
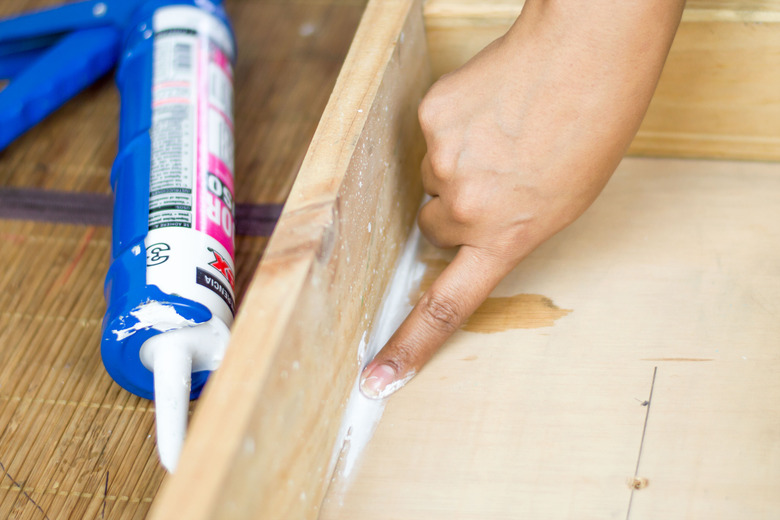
Apply a bead of silicone caulk to fill in any cracks in the wood and the joints where two pieces of wood meet. You might consider wearing tight-fitting, disposable gloves to avoid getting caulking on your skin. Wet your finger or glove and drag it along the uncured caulk to remove excess caulk and create clean lines. Allow the caulk to dry completely — some products require several days to cure before you apply stain or water sealant.
Step 4
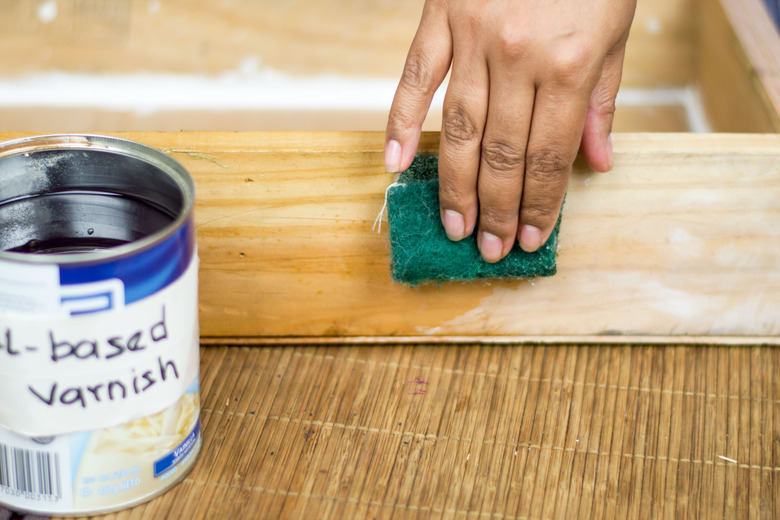
Brush an oil-based varnish on the outside of the planter box, or rub it on the wood with a cloth. You might consider wearing a protective glove to avoid getting varnish on your hand. Apply varnish to the exposed wood where the drainage hole(s) were cut. Keep applying more varnish until the wood stops absorbing it, keeping the wood surface continuously wet for about 10 minutes. A number of oil-based varnish products are labeled specifically as water sealers, but the protection level is the same regardless of labeling.
Step 5
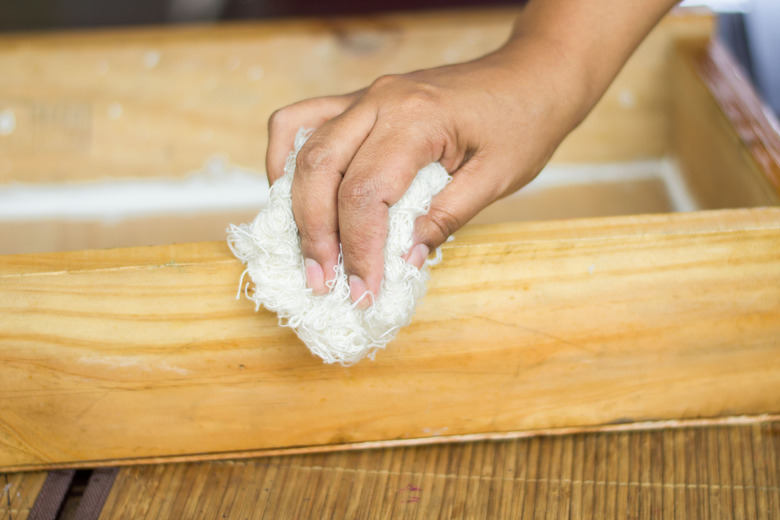
Wipe off the excess varnish with a clean cloth. Allow the varnish to cure for one day.
Step 6
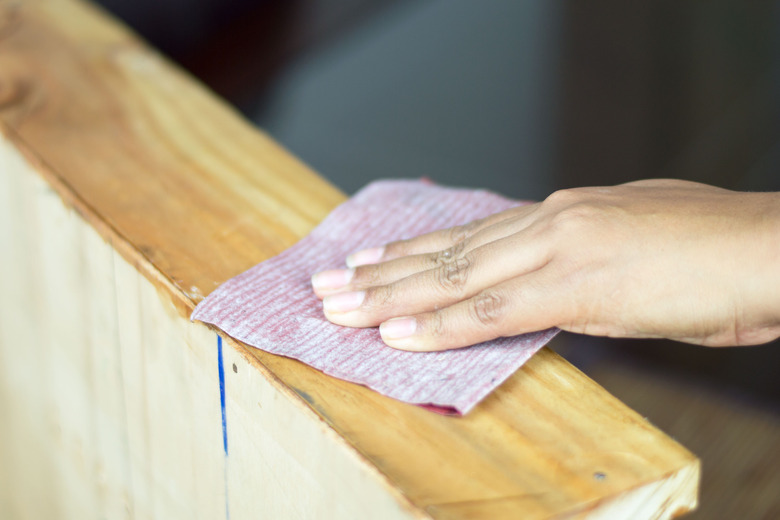
Sand the varnished surface lightly with fine-grit sandpaper, such as 220-grit. Apply one or two more coats of varnish, allowing it to cure for a day between applications.
Step 7
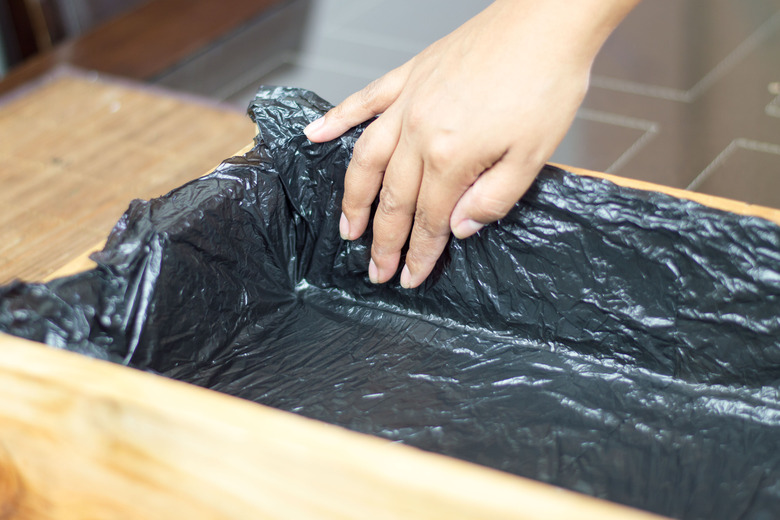
Line the inside of the wooden planter box with thick plastic. Thick, 6 mil polyethylene sheeting, commonly used for greenhouses, works well — but even a plastic trash bag can be used to waterproof the inside of the planter. For best results, fold the trash bag in half to double the thickness of the liner. Trim any excess plastic from around the top of planter.
Step 8
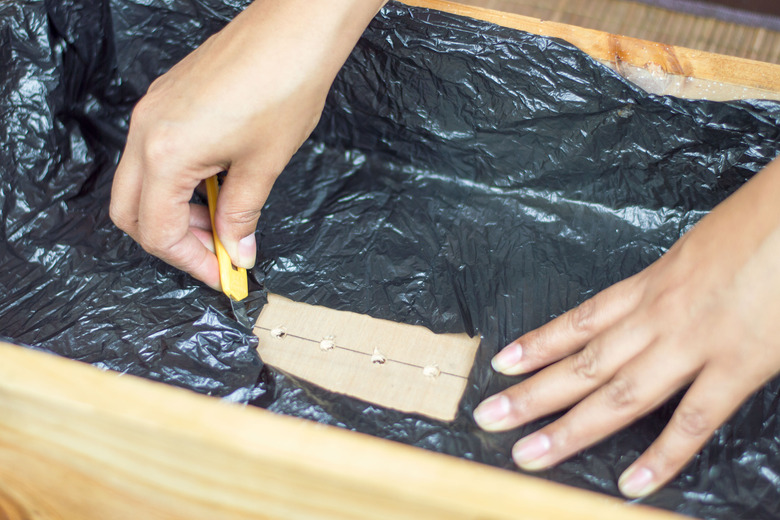
Find the point in the plastic above the drainage hole(s) at the bottom of the planter. Cut a hole in the plastic so water in the soil can drain through the hole(s).
Step 9
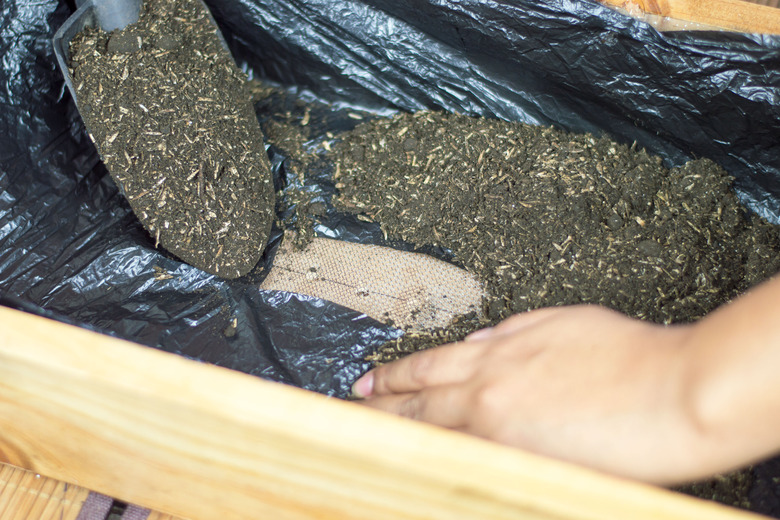
Lay a small piece of permeable landscaping fabric or mesh screen inside the planter to cover the drainage hole and prevent soil from falling through. Fill the planter with sterile potting soil. The potting soil pushes the plastic liner tight against the inside walls of the planter, eliminating the need to staple the plastic in place. Water can potentially seep through staple holes and damage the wood.
References
- Popular Woodworking Magazine: Oil Finishes: Their History and Use
- Iowa State University Extension: Beating the Elements
- The Home Depot: Pressure Treated Wood
- University of Illinois Extension: Constructing and Caring for Container Water Gardens
- Purdue Extension Consumer Horticulture: Container and Raised Bed Gardening
- Woodworkers Institute: Oil Finishes