How To Make Concrete Fence Posts
We may receive a commission on purchases made from links.
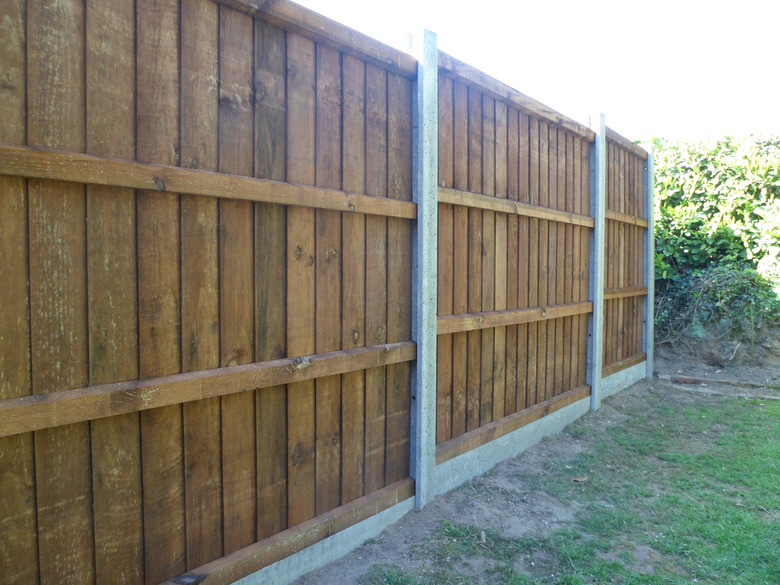
Making concrete fence posts is a fast weekend project once you have the easy-to-build forms. These pine concrete post forms can be used over and over again. The forms do not take up much room for storage, and you can make multiple forms by following a few simple steps.
Things Needed
-
12-inch by 96-inch plywood (1/2 inch thick)
-
2 1-by-4s, 73 1/2 inches long
-
2 1-by-4s, 6 inches long
-
6 2-by-4s, 12 inches long
-
8 1 1/4-inch wood screws
-
12 2-inch wood screws
-
Tape measure
-
Pencil
-
Square
-
6-inch by 72-inch piece of plastic
-
2 1/2-inch diameter pieces of rebar
How to Make Concrete Fence Posts
1. Cut Wooden Parts
Cut the above wooden parts listed using the circular saw, always wearing those safety glasses. Measure each piece with the tape measure and square a straight line for cutting.
2. Lay the Base
Lay the piece of 12-inch by 96-inch plywood on a flat surface; this will be the base of the concrete form. Assemble the 1-by-4s into a rectangular form by screwing all four corners with two of the 1 1/4-inch screws in each end. Place the 6-inch boards inside the two longer 73 1/2-inch side form boards. The inside measurement of the post form should be 6 inches wide by 72 inches long and 3 3/4 inches deep.
3. Secure the Parts of the Base
Center the rectangular post form on the piece of plywood by measuring all sides from the edge of the plywood. Lay three of the 2-by-4s equally spaced down the length of the 1-by-4 form. Attach the 2-by-4s, wide face down, to the plywood with the 2-inch long wood screws. Two screws per 2-by-4 will be more than adequate to hold them in place.
4. Continue Securing the Base
Attach the other three 2-by-4s down the other side of the form. Use the tape measure to keep the inside measurement of the post form at 4 inches. The wooden concrete post form should be able to freely move in and out of the 2-by-4 side supports.
5. Mix the Concrete
Lay the piece of 6-inch by 72-inch plastic under the post form and insert the form between the 2-by-4 supports. Mix the concrete according to the directions on the bag and fill the post form. Level the concrete to the top of the form by using a piece of scrap wood.
Warning
Be sure the concrete post is fully cured before placing it in the ground.
6. Insert the Rebar and Set Overnight
After the concrete has set up for a few minutes, insert the two pieces of rebar into the post at an equal-width distance of 3 inches from each other, approximately 1 1/2 inches from the long side of the form. Allow the concrete to set overnight.
7. Remove the Supports
Lift the post form from in between the 2-by-4 supports and lay it on its side with the 1-by-4 facing up. Unscrew the four screws and remove the post from the wood form. The post should still cure for a few days by laying it flat on a solid surface. Reassemble the wood form, and you are ready to make another post.
Tip
You can use a full sheet of plywood and attach many forms to the base by alternating the 2-by-4 supports in between each wooden form.