How To Convert A Chain-Link Fence To A Wood Fence
We may receive a commission on purchases made from links.
The old chain-link fence, while still sturdy, is not the prettiest way to keep pets and kids in your yard and the neighbors out of it. Converting a chain-link fence to a wood fence provides much-needed privacy with a sturdy wood barrier. Changing your fence requires careful planning to ensure a satisfactory result.
Planning Your Fence Conversion
Planning Your Fence Conversion
Before you begin, check the local building codes and homeowners' association rules. There may be specific height requirements and an approval process that must be incorporated into your fence plan. Double-check the property lines to make sure the fence is yours; you can't take down or change a fence on your neighbor's property without their permission.
Measure the distance between the metal posts. While most fencing is built with posts spaced 6 to 8 feet apart, a chain-link fence may be installed with 10 feet between the posts. To increase the strength of the fence, consider installing extra metal posts between the originals, which results in a post every 5 feet. Alternatively, if you're making your own fence panels, the lumberyard may have 10-foot-long rails available but consider the additional weight and pressure of strong winds against a solid fence and the metal posts.
Make a diagram with the locations of the posts and gates, decide on the board or picket widths and the spacing, and then use an online fencing calculator to determine the number of boards and rails you will need. The style of fence will make a difference in your costs; a solid 6-foot-tall fence is significantly more costly than a 3 1/2- to 4-foot-tall picket fence.
Removing the Old Chain-Link Fencing
Removing the Old Chain-Link Fencing
Put on your safety gear, including safety goggles and heavy work gloves. Clear weeds and debris from around the fence and cut back shrubs and trees that may interfere with the removal. Start at a corner if possible, unbolting and removing the clamps that hold the chain link and vertical tension bar to the post. Drop the bolts in a bucket and pull out the tension bar.
Remove the fence tie wires that hold the chain link to the top and bottom rails using heavy-duty pliers and drop the ties into the bucket. Lay the chain link on the ground and after removing the section, roll it up and secure it with heavy-duty bungee cords or rope. If necessary, cut the chain-link fencing into 20- to 50-foot sections to make it easier to move.
At this point, you can either leave the rails or remove them. If removing top-mounted rails, take the cap off the corner post and then begin twisting and pulling the rails away from the post. Sometimes, the rails are held by bolted-on brackets; unbolt and remove the hardware and rails. If they're frozen together or the rails are welded, protect yourself with a face shield and cut the rails with a reciprocating saw equipped with a metal-cutting blade or a hacksaw.
Preparing the Metal Posts
Preparing the Metal Posts
Test the posts to make sure they're solid. If they are loose or damaged, remove the old post and set a new post in quick-setting concrete. When replacing a 4-foot chain-link fence with a 6-foot privacy fence, chain-link post extensions are available to increase the height of the posts. Put caps on the posts.
If you're planning to paint the galvanized steel posts, clean them thoroughly and then wipe them with a rag soaked in white vinegar. Allow them to dry and then paint them with a primer and two coats of paint. You can also paint the hardware that will attach the fencing to the rails, but you'll probably have to touch them up later.
Constructing Wood Panels
Constructing Wood Panels
If you're constructing wood panels, lay out and align the boards or pickets so the bases and tops are even. Measure and mark the boards for the 2x4 rails. Lay the rails on the boards and then secure them with screws. You aren't limited to vertical fence boards; lay out the panels with horizontal boards if you like and install vertical boards at the center and each end.
If you left the metal rails attached to the posts, you can use 1x4 boards as rails for your fence panels. Measure the height of the existing metal rails and mark the fence boards so the wood panel rails will be centered on the metal rails.
Attaching the Wood Fencing
Attaching the Wood Fencing
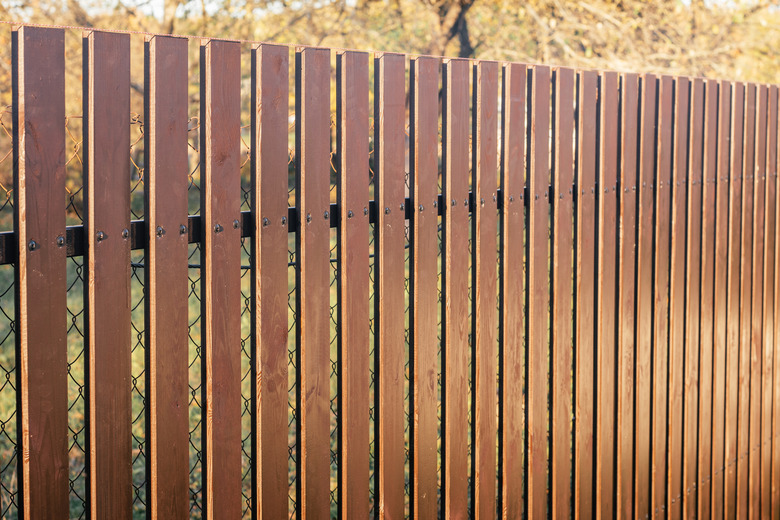
To attach the wood panels to the posts and possibly rails, use wood-to-steel fence brackets or similar U-shaped exterior brackets. The brackets wrap around the round metal posts and are bolted to the fence rails. Similar brackets are available to secure the corners and custom angles. Miter the ends of the wood rails or use butt joints so they fit neatly together at the corners.
If you left the metal rails attached to the posts, add additional brackets every 2 feet along the 1x4 wood rails. This helps secure the wood fence panels to the underlying metal framework.