How To Fix Drywall After Removing Wallpaper
We may receive a commission on purchases made from links.
Drywall damage after the arduous task of removing wallpaper can range from some little nicks and scratches to a disaster of torn drywall paper and deep gouges. If you plan on painting the walls after wallpaper removal, the drywall has to be fixed, and fixed right, to make all your hard work worth it. In the worst case scenario, the easier option may be to simply replace the drywall, but that's no simple task, and damaged drywall can almost always be repaired and painted.
Things Needed
How to Repair Drywall After Wallpaper Removal
1. Wash the Walls
Wash the walls with a mixture of wallpaper paste remover or 1 part vinegar to 4 parts water, to remove all remaining wallpaper glue. Scrub them with a rough cloth or abrasive sponge, then rinse them with clear water and clean rags. Allow the wall to dry.
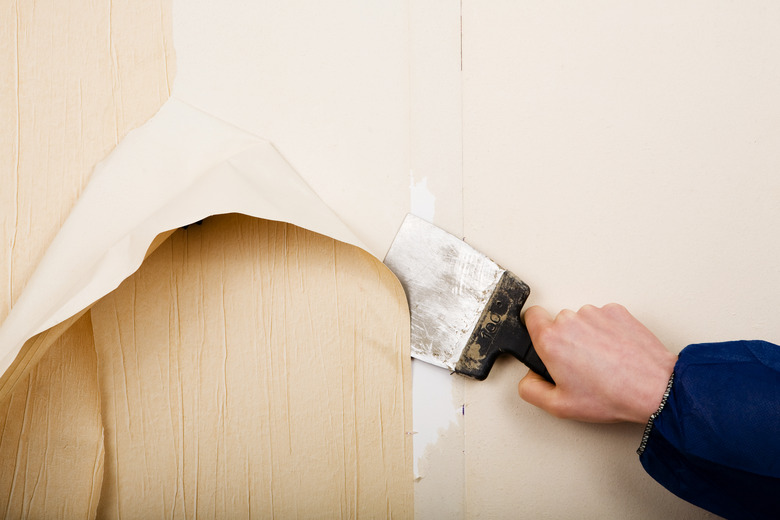
2. Remove Loose paper
Peel or scrape off shreds of loose paper. A drywall knife or stiff putty knife works well. You may have to pick off smaller shreds of paper with your fingers.
3. Apply Primer
Prime every area where the surface drywall paper has been ripped away, exposing the brown paper layers underneath. Use shellac- or oil-based primer. If you skip this step, the exposed paper will wrinkle and bubble up when you apply water-based products such as spackle, drywall compound, or paint.
Warning
Open windows and use fans for ventilation, especially when using oil- or shellac-based primer. The fumes are strong and can make you feel dizzy or nauseated.
4. Smooth the Surface
Sand and scrape the wall after priming to knock off the remaining loose paper or smooth down rough areas. Re-prime if you expose any more drywall paper.
5. Make Additional Repairs
Fill gouges and drywall damage with two or three applications of joint compound. Use a drywall knife that's large enough for you to extend the joint compound several inches past the margins of the damage so you can sand it flush with the surface once you're done.
6. Skim Coat (as needed)
Skim coat joint compound over the entire surface if the damage is extensive. Fill a drywall mud pan with drywall compound and apply a thin, even layer of compound over the entire wall. Don't work from the bucket of joint compound because you'll contaminate it with dried flecks of compound or drywall. It may take two or three applications before the surface is even. Let the compound dry completely.
Tip
Look for "dust-free" joint compound. Instead of floating through the air, the dust falls straight to the floor and is easily swept or vacuumed up.
7. Sand the Surface Again
Sand the wall with a flat drywall sander. Use one attached to a pole to make sanding large areas easier on your arms. Use 100-grit sandpaper or drywall sanding mesh.
8. Apply More Primer
Prime the repaired areas with water-based drywall primer before painting.