How To Take Apart The Inside Of A Shower Faucet
Every manufacturer of shower faucets has its own idiosyncratic approach to design, but on the whole, shower faucets fall into one of three categories: cartridge, ball valve and compression. If your faucet has a single handle, you'll find either a cartridge or ball valve when you disassemble it. A pull-out shower faucet has a cartridge valve. If the faucet has two handles, it has compression valves or two separate cartridges. The shower diverter, if it's built into the wall, usually has a valve somewhere between a cartridge valve and a compression valve.
 yunava1/iStock/GettyImages
No matter which type of faucet valve you have, the process for disassembling it is essentially the same. The job can be more or less complicated, however, depending on the features the manufacturer built into it. Moen, the king of cartridge faucets, offers models with temperature limiters and pressure-regulating mechanisms. Delta also manufactures cartridge faucets, but for many years, its signature product was the ball-valve faucet, and many of these are still around. Other manufacturers, such as Price-Pfister (now known simply as Pfister) offer both cartridge-style and compression faucets.
A general disassembly procedure works for most faucets, but if you're in doubt about the details of your shower faucet, look up the manual on the manufacturer's website. It will alert you to any features that you need to take into account when taking the faucet apart.
Warning
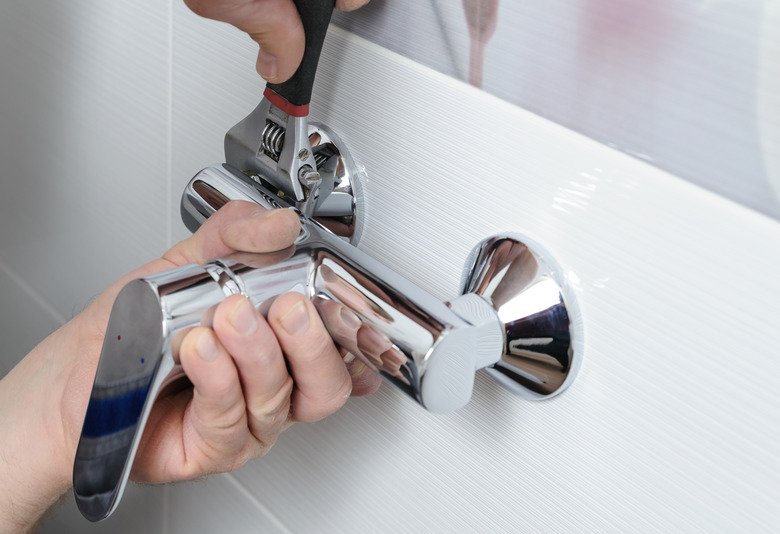
Before disassembling any type of shower faucet, turn off the water supplies to the shower and open the faucet to release water pressure in the pipes.
Disassembling a Pull-Out Shower Faucet
Disassembling a Pull-Out Shower Faucet
If you have to pull out the handle of your shower faucet to turn on the water, the faucet has a cartridge. If the faucet leaks or you can't control the temperature, you usually have to remove the cartridge and clean it or replace O-rings and gaskets.
Pop off the cap covering the handle screw using a flat-head screwdriver. Underneath, you will find a Phillips screw, and after you loosen and remove it with a screwdriver, you should be able to pull off the handle. Lever-style handles are held on by an 1/8-inch hex screw located under the lever. Remove it with a hex wrench.
The next step is to pull the cartridge out of the housing, and the procedure depends on the brand. Moen faucets often have a retaining pin that must be removed with pliers. If you're disassembling a Delta faucet, you usually have to unscrew and remove an outer metal sleeve to expose a large retaining ring that you can unscrew with locking pliers. Once the pin or nut has been removed, you should be able to pull the cartridge out.
Taking Apart a Ball-Valve Faucet
Taking Apart a Ball-Valve Faucet
After removing the handle from a ball-valve faucet, the next thing to do is to unscrew the dome-shaped bonnet. You usually need to grip it with pliers to do this. To avoid damaging the finish, wrap a rag around it first. Once you've removed this, the ball-valve assembly simply lifts out along with the adjustment ring and an O-ring. Inside, you'll find rubber gaskets around the hot and cold inlets, and there are springs underneath them. Lift out the gaskets and springs with a screwdriver and replace them.
Two-Handle Faucet Repair
Two-Handle Faucet Repair
When a two-handle faucet leaks, you must extract the valve stem from the valve housing to fix it. First, remove the handle (if it's broken, a shower handle replacement may be in order). Next, unscrew the valve using a pair of locking pliers and pull it out of the valve housing.
Sometimes, the faucet is leaking because one of the valve seats is cracked. The valve seats are replaceable, and to remove one, you need a seat wrench, which looks a bit like a hex wrench. Insert the wrench into the valve housing and through the valve seat, and then turn the seat counterclockwise to unscrew it.