How To Replace Wood Paneling With Drywall
Things Needed
-
Crowbar
-
Power saw
-
5/8-inch sheets of drywall
-
1/2-inch sheets of drywall
-
Drywall screws, 1 5/8-inch
-
Screw gun
-
Work knife
-
Chalk line
-
Tape measure
-
Pencil
-
Drywall nails, 1 5/8-inch
-
Drywall hammer
-
Drywall saw
-
Mesh tape
-
Drywall tray
-
Drywall compound
-
6-inch drywall knife
-
Sandpaper, medium
-
Dust mask
-
Primer and paint
Tip
Wear a dust mask when sanding drywall.
Though drywall can be installed over wood paneling, this causes problems, such as having to move switch boxes and receptacles to account for the extra thickness of the wall. Removing the wood paneling is fairly straightforward and should also be done before putting drywall on the ceilign. Drywall comes in 4-by-8-foot sheets, and is 1/2-inch thick for walls, and 5/8-inch thick for ceilings. Caution should be used when installing larger pieces of drywall, as 5/8-inch sheets weigh 75 pounds, and 1/2-inch sheets weigh 50 pounds.
Step 1
Remove the wood paneling by prying it away from the wall, using a crowbar. If necessary, look for the screw or nail heads and mark the location of each vertical wall stud. Cut vertical lines between the studs through the paneling from ceiling to floor using a power saw. Set the blade so that it is only the thickness of the paneling. This will make it easier to pry away the paneling. Remove all screws and nails from the wall studs.
Step 2
Apply the first sheet of drywall to the ceiling. Start at one corner. If necessary, cut the sheet in two to make it lighter. Screw the drywall to the ceiling joists every 8 inches with 1 5/8-inch drywall screws. Measure and cut the next piece of drywall. Use a chalk line to create longer cutting lines on the drywall. Run a work knife along the line, and bend the drywall on the line from the other side to break the drywall along the line. Run the knife on the inside of the drywall break, and the drywall will be separated. Continue in like fashion until the ceiling is covered with drywall.
Step 3
Install the first piece of drywall against the wall, in one corner. Use 1 5/8-inch drywall nails to attach it to the wall studs every 8 inches. As before, measure and cut the second piece, and follow in like fashion until all walls are covered. Use a drywall saw to cut out holes for switch boxes and receptacles as needed.
Step 4
Apply mesh tape to all drywall joints, placing the tape sticky-side down to the wall. Run your hands over the tape to make sure it is stuck firmly to the wall.
Step 5
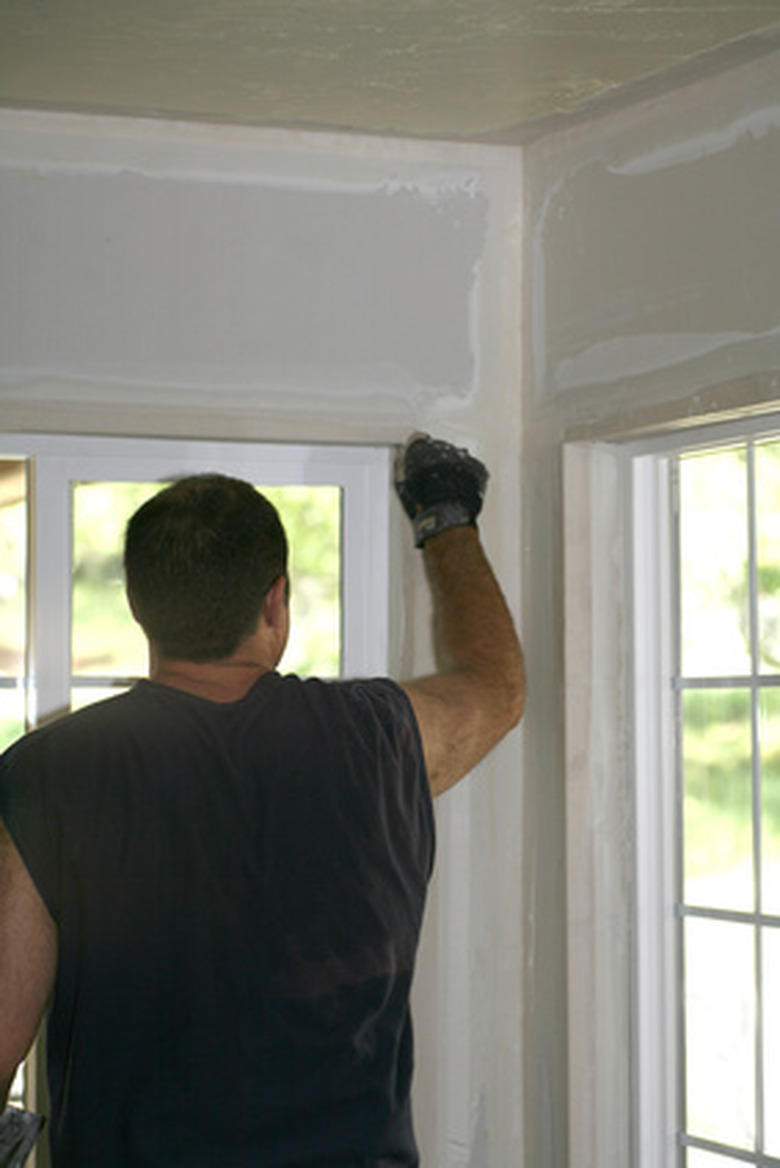
Pour joint compound into a drywall tray. Spread a layer of compound over the taped areas using a 6-inch drywall knife. Feather out the compound by smearing it on the wall past the edge of the tape, decreasing the thickness as you go. Cover all screw and nail heads with compound. Wait for the compound to dry overnight.
Step 6
Sand all compound, getting rid of any bumps or ridges. Apply a second layer of compound over any tape or nail and screw heads that are still showing. Wait for it to dry, and sand again. Apply primer and paint.
References
- "Home Improvement 1-2-3"; Benjamin W. Allen, Christopher Cavanaugh; 1995