How To Mount A Headboard

The headboard can be a functional part of a bed — serving as the head of the bed frame that supports the box spring and mattress — or it can be a decorative element, in which case it may be mounted to the wall as an independent piece that isn't attached to the frame at all. Or it can be both — a part of the frame but also chosen for its contribution as a decor element. This is the most common installation, especially when the headboard is part of a purchased furniture set that includes the bed frame and perhaps a dresser and nightstands.
A headboard can be made of wood, brass, iron or wicker, or it can be a wood or plywood core covered with padding and fabric. The standard headboard is 35 inches tall, from the floor to the top of the headboard. However, custom-design headboards can be much higher, and they may start at a level flush with the top of the mattress instead of measured up from the floor. An aftermarket headboard, or one you build yourself, can be attached either to the wall or to the bed frame.
Attaching a headboard that is part of a furniture set is usually quite easy — you just follow the frame directions. But it can be a little trickier if you are purchasing an aftermarket headboard or making one yourself. Learn how to accomplish both methods — mounting it independently onto the wall or integrating it as part of the existing bed frame.
Things Needed
-
Power drill and bits
-
Tape measure
-
Stud finder
-
Level
-
Mounting brackets (wall mount) or long bolts with wing nuts and washers (bed-frame mount)
-
Screwdriver
-
Machine screws, washers, and wing nuts (as needed)
Wall-Mounting a Headboard
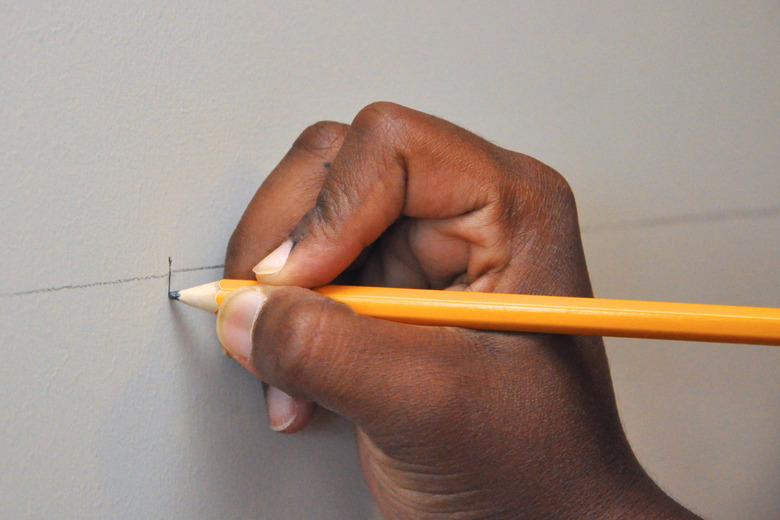
1. Draw a Reference Line
Use a level to make a horizontal line on the wall where the headboard will go. The line should be 1 inch down from the top of where you want the top of the headboard be positioned, and 1 inch in from each side of the headboard. Mark the center point of the line with a vertical mark.
2. Locate Studs
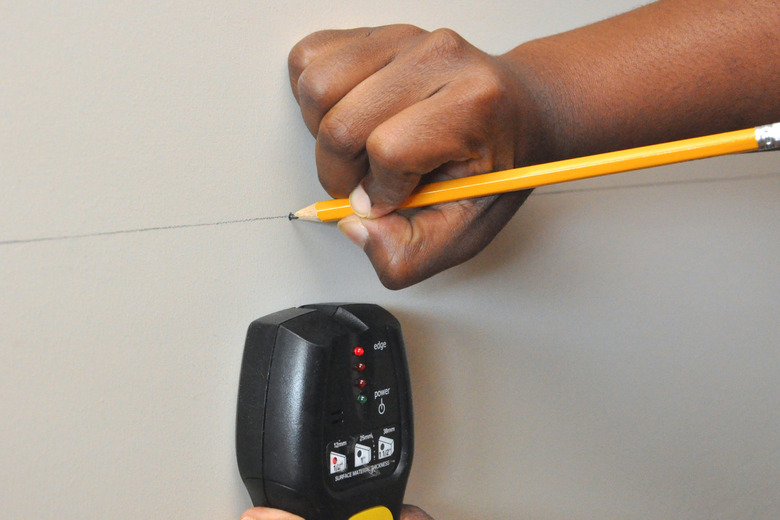
Use a stud finder to locate the studs along this line. Place a dot or vertical line across your horizontal line to show where the studs are positioned.
3. Attach Brackets to Wall
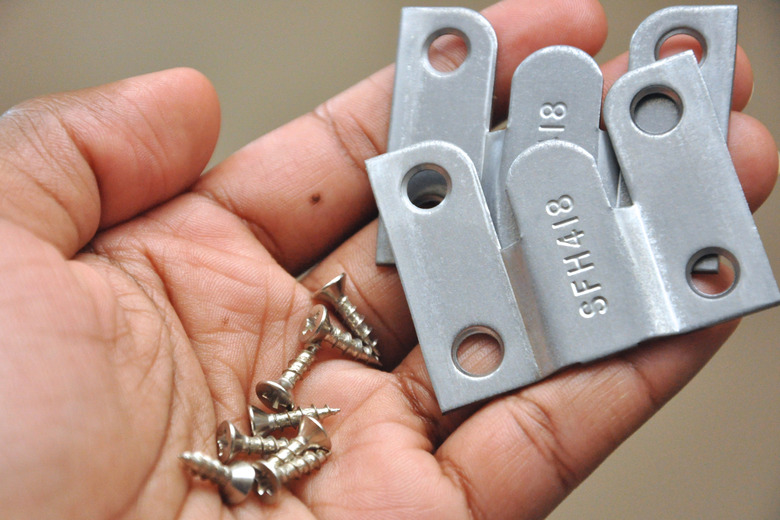
Screw one half of the bracket set into the two outermost studs, using the included screws. Add an additional bracket to the center stud, if needed. Use two brackets for lightweight headboards or twin, double or queen-size beds. For king-size beds or very heavy headboards, use three brackets. You can use either flush mounting brackets or adjustable flush mounting brackets. The adjustable brackets are a little bit easier to use.
4. Mark the Headboard
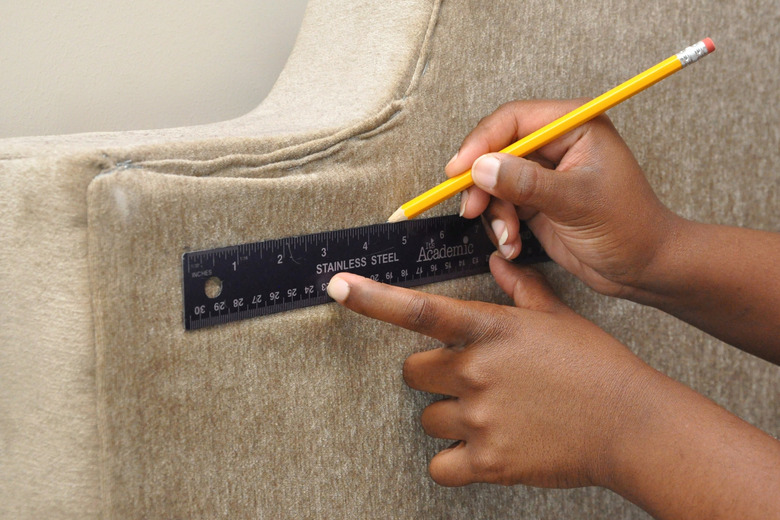
Draw a horizontal line on the back of the headboard, 1 inch down from the top, and mark the center point. This will serve as a reference for attaching the matching bracket pieces.
5. Install Brackets on Back of Headboard
Measure the distance of each wall-mounted bracket from the center line. Use those measurements to mark the back of the headboard. Install the second part of the bracket set onto the headboard at the marked locations.
6. Mount the Headboard on the Wall
Slide the headboard down onto the brackets on the wall to mount it. The headboard brackets should slip over the wall brackets. A helper makes the job easier.
Mounting a Headboard to a Bed Frame
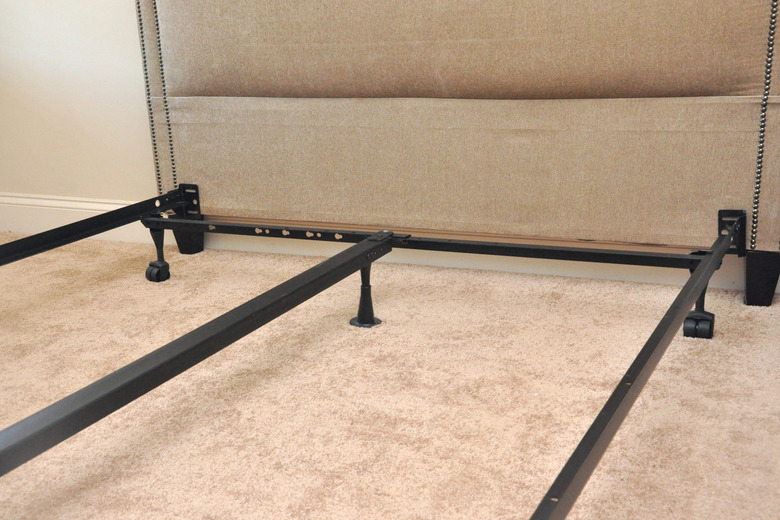
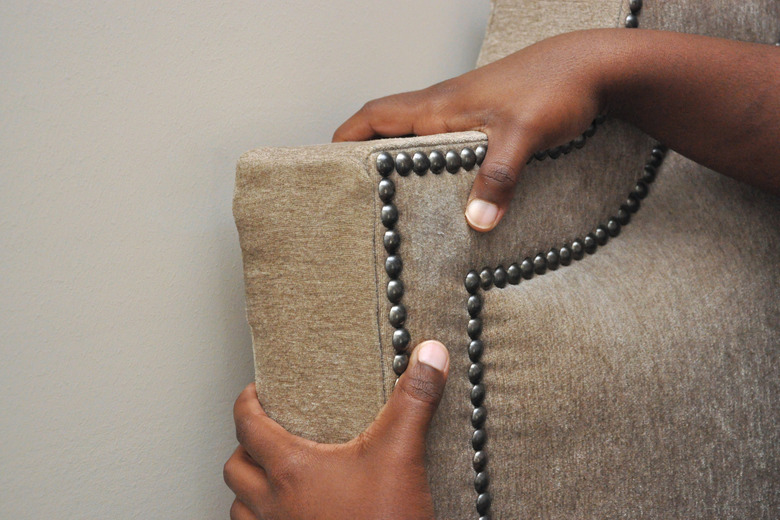
1. Position the Headboard
Position the headboard between the bed and the wall, centering the headboard across the width of the bed.
Tip
When mounting a headboard to the bed frame, it's best to have the box spring and mattress off the frame.
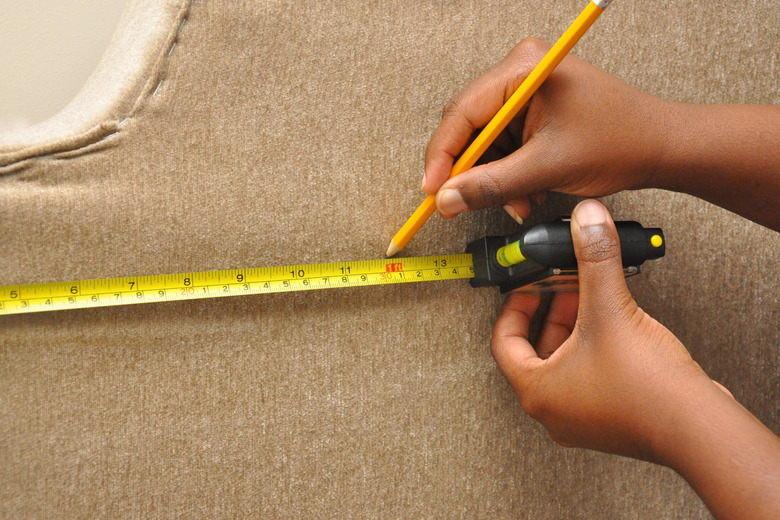
2. Mark the Frame Mounting Holes onto the Headboard
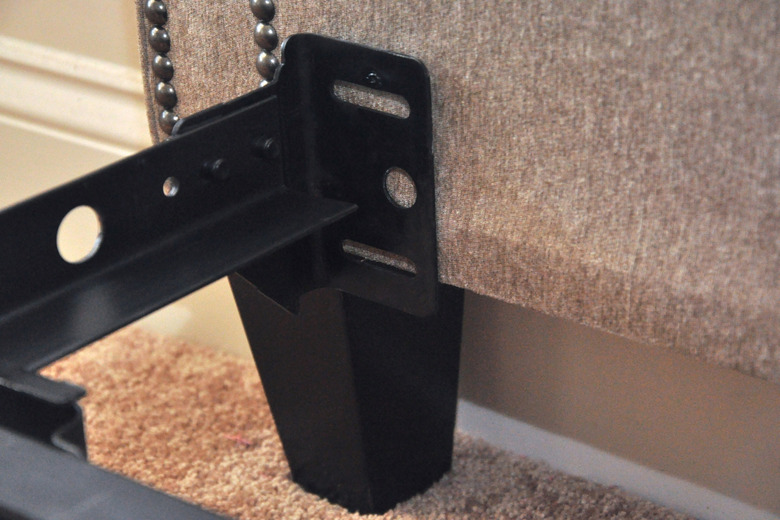
Mark the location of the frame's mounting holes or slots onto the headboard. Some headboards may already have mounting holes in the correct locations, but with others — including a headboard you have made yourself — you need to drill mounting holes.
3. Drill Mounting Holes

Drill a hole completely through the headboard using a drill bit slightly larger than the size of the mounting bolts. Your bed frame may have mounting bolts included. If not, you will need to purchase machine screws, washers and wing nuts or machine nuts to make this attachment.
4. Secure With Bolts and Wing Nuts

Push the bolt through the back of the headboard and through the hole on the bed frame. Add a washer, and then use a wing nut to secure the headboard snugly.
If the bolt head exceeds the size of the opening on the headboard, use an additional washer on the head of the bolt.