How To Get Wrinkles Out Of No-Glue Linoleum
After spending all the time, effort and funds to put down a new expanse of linoleum on your floor, it can be heartbreaking to see tiny bubbles forming in sections across the planks or sheeting. Bubbles in new linoleum are more than likely caused by moisture and air. This anomaly can be repaired with patience, as well as the proper tools and repair methods.
How Bubbles Form in Linoleum
How Bubbles Form in Linoleum
Bubbles can happen on both new and old stretches of linoleum flooring. Moisture can rise from the underlying flooring material, such as concrete, which can cause problems if it hasn't been properly treated.
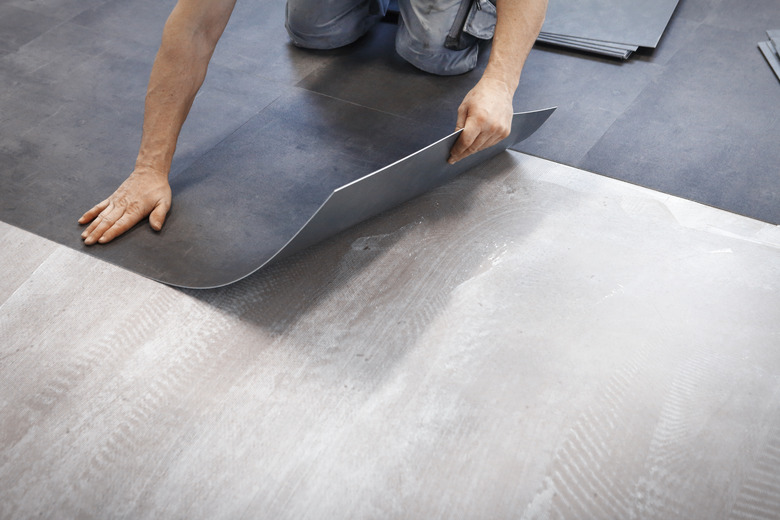
Tile adhesive that wasn't correctly rolled during the linoleum flooring installation is often the culprit behind bubbles. If the linoleum was professionally installed and is less than a year old, then it is more than likely still under warranty. Contact the manufacturer or installer if the bubbles on the new linoleum are rampant.
Bubbles in New Linoleum
Bubbles in New Linoleum
For bubbles that are smaller than an inch across, Illinado Home Solutions recommends using a sewing needle to prick the bubble at the base. Release the trapped air that formed the bubble by gently pressing down and smoothing out the linoleum.
Place a towel over the bubble and run a hot iron over the towel. Press down lightly, keeping the hot iron from touching the linoleum. The towel is in place to protect the unblemished surface.
Remove the iron and cover the now-flattened bubble with a piece of wax paper, then place a heavy skillet or brick over the top. Allow the area to cool for 12 hours before removing.
Stubborn Bubbles on Linoleum
Stubborn Bubbles on Linoleum
If the bubble on the linoleum flooring surface is larger than an inch, it may need an application of adhesive.
Use the towel-and-iron technique to warm the area. While it is still warm, use a sharp knife to create a crisscross on the middle of the affected area. Gently pull back the edges of the crisscross to apply a small and even layer of linoleum tile glue.
Flatten the edges and smooth them down, wiping away any excess glue that oozes from the repair area. Place a piece of wax paper over the repair and use a hand roller to press and smooth out the area. Cover with a heavy object or small stack of books and allow to sit for at least 12 hours.
Linoleum Flooring Installation Tips
Linoleum Flooring Installation Tips
Bubbles and other linoleum floor problems could be due to an improper installation. Laying the material correctly is important to prevent bubbles from forming after the linoleum flooring installation.
It is fine to install new linoleum over old linoleum if the flooring is solid, smooth and in good shape. Wood planks or torn and well-worn linoleum needs to be covered with a layer of a ¼-inch special underlay of plywood. This may raise the level of the floor, requiring the door jambs and baseboards to be raised.
A concrete floor needs to be checked for moisture before installing the entire expanse of installation. Family Handyman suggests that you glue down a 3 x 3 foot piece of linoleum and tape the edges. If it comes up easily after 72 hours, then the moisture level is too high for proper installation of the linoleum.