How To Stagger Wood Floor Planks
Staggering floor planks can really liven up the aesthetics of a home. The direction the grain of the wood runs is one of the most noticeable features of the floor, and it's often chosen to harmonize with the entrance, a large window or a mantel. When one or more joints coincides, they create another line perpendicular to the line of the grain, and it's almost always disturbing.
There's another reason for staggering the joints of wood planks, and this one is structural. Each board that's adjacent to a joint supports the joint and prevents it from separating, bowing or warping. If two joints are adjacent, they undermine that stability.
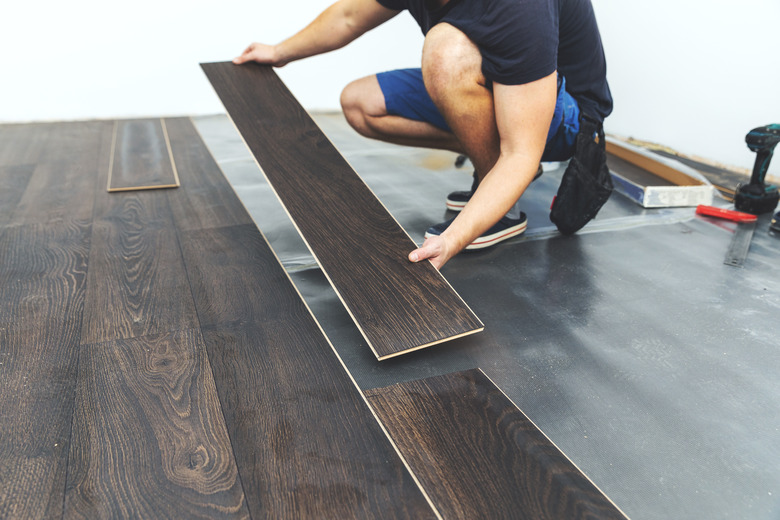
Floor installers refer to planning the layout of the floor, complete with placement of the boards, as racking the floor. A random hardwood floor pattern is easier to achieve when installing random-length boards. Boards that are the same length are bound to look more uniform, but a few basic racking guidelines can help you achieve the ideal of randomness, even when laying boards that are all the same length.
Distance Between Adjacent Joints
Distance Between Adjacent Joints
Two joints don't have to be exactly adjacent to ruin a flooring stagger pattern. Even if they are simply close together, the eye can interpret them as forming a single joint. The National Wood Flooring Association recommends a 6-inch stagger pattern for hardwood strip flooring and an even greater separation — up to 10 inches — for 5-inch-wide wood planks and laminate planks.
When installing engineered or laminate planks that come in uniform lengths, the only way to create this pattern is to begin each row with a plank that has a length that separates its end joint from that of the first board in the previous row by the required amount. For example, if you have one row of full-length boards and you want to stagger the joints between rows by 10 inches, you start the next row with a board that is 10 inches shorter than full length. If you do this, the end joints of other planks will automatically be separated by the desired distance.
Avoid Regular Stagger Patterns
Avoid Regular Stagger Patterns
There are certain racking mistakes you can make that will ruin your random hardwood floor pattern, as well as the layout of laminate floors. The first one is is to make the stagger gap smaller than 6 inches. Another is creating a lightning pattern, also known as a step pattern, which happens when you stagger joints by a fixed amount in each successive row. The effect is to create a diagonal line that cuts across the floor and ruins the flow of the grain.
When end-joints coincide with only a single plank between them, it's called an H-pattern, and a floor with a lot of these looks contrived rather than organic. To avoid this, keep the distance between end joints separated by a middle plank to a minimum of 3 inches.
Staggering Floor Planks That are All the Same Length
Staggering Floor Planks That are All the Same Length
Engineered and laminate planks come in boxes, and each plank in the box is a uniform length, usually 36 inches. When installing them, you typically cut the planks at the ends of each row to length, but no planks in between can be cut, so the randomization depends on the length of the first plank in each row.
Depending on the room dimensions, you should avoid having to cut a separate plank for each row, because that wastes material. To do this, start the first row with a full plank, install the row, cut the last plank to length and save the off-cut. Cut two more fresh boards to start the next two rows, but from the fourth row on, start using the offcuts from previous rows. This randomizes the layout without creating a step pattern.