How To Test A Dryer Timer Motor
Things Needed
-
Screwdrivers
-
Multitester
-
Needlenose pliers
-
Towel
Tip
You SHOULD get a high resistance reading on the tester if the timer switch is OFF and not set to NORMAL DRY, so make sure you set it to NORMAL DRY before testing.
Warning
If your timer motor is bad, be sure to label each wire so you know exactly where it gets connected on the new one. Or better yet, when you get the new timer motor, wire it as you are removing the wires from the old one. Just place them side by side, and as you take one wire off the old timer, simply connect it to the new one in the same place.
How to Test a Dryer Timer Motor. A dryer's timer motor keeps tabs on how long the drying cycles will run when you use your dryer. While most of today's dryers also feature auto shutoffs when the chamber air hits a certain temperature, they still require the use of a timer motor to operate. It is not very often that the timer motor goes bad on a dryer, but knowing how to test it will definitely help rule it out as the source of your dryer's malfunction. Here is how to test a dryer's timer motor.
Step 1
Turn off the power to the dryer. You can do this by turning off the circuit breaker that delivers power to it, or you can simply unplug the machine if it is not direct fed.
Step 2
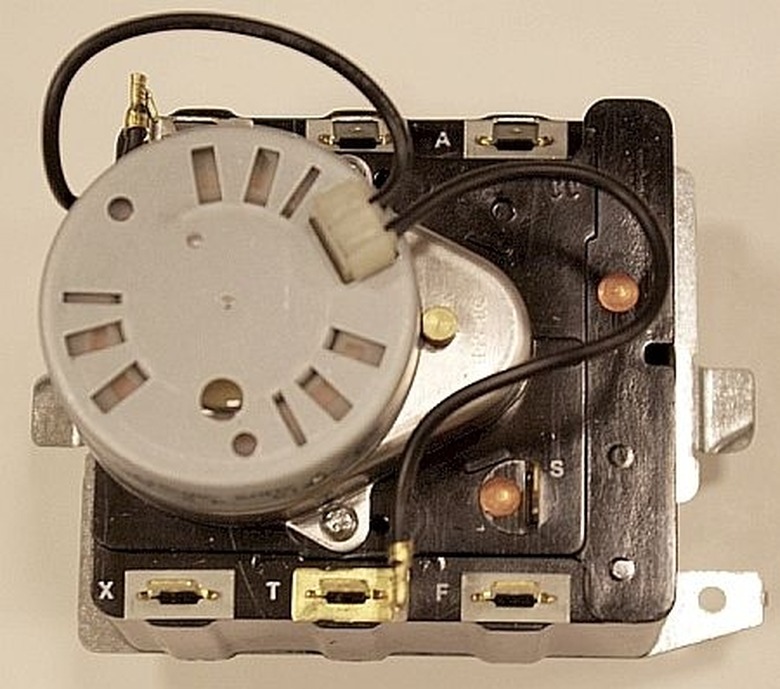
Locate the timer on your dryer's control panel. It is typically the dial with the largest set of options like "optimum dry" or numerical time indicators. On the backside or the top of the control panel, find the screws that you will have to remove to open it up.
Step 3
Set the towel down at the base of the control panel on the dryer. This will help to keep the finish from getting scratched. Then, simply remove the screws holding the control panel in place, carefully open the control panel and let its face rest on the towel.
Step 4
Take a close look at the timer motor control. Depending on your make and model, there may be a number of wires connected to it. Locate the wires that deliver power to the mechanism. These wires should be slightly larger in size than the other ones. Use your needlenose pliers to remove one of the power leads. Pull the connector off the terminal by pulling on the connector, NOT the wire, or it may break the wire.
Step 5
Lift the dryer's control panel up and set your dryer's timer to "normal dry." If your multitester came with alligator clip probe adapters, they will be handy here, so put them on if you have them.
Step 6
Set the multitester to read ohms (usually labeled R1 or RX1). Clip or touch one probe to the terminal from which you removed the wire. Touch the other probe to one of the other terminals. You should get a reading of zero. If you get a high reading, then the timer motor is bad and it's time to replace it.