How Can I Test A Wall Barometer?
Things Needed
-
Chalk
-
Large clear plastic bag
-
Parcel tape
-
Towel
Tip
If you are not sure whether you have a mercury or aneroid barometer, simply conduct both tests. If the barometer fails to respond to either test then it is not working correctly.
Barometers predict what the weather will be like in a day or two's time. They do not record what the weather is like at the present moment. Do not assume your barometer is broken just because its reading is different from the weather outside your window.
The height of a column of mercury inside a glass tube alters depending on the weather. This observation, made in 1643 by Torricelli, a student of the famous scientist Galileo, led to the first barometers. The variations in the mercury were caused by changes in the surrounding air pressure. In the 1840s, the "aneroid barometer" was developed. It had no mercury. Instead, a metal disc set on top of a vacuum chamber detected air pressure changes. It is easy to test whether or not a mercury or aneroid barometer is working correctly.
Mercury Barometers
Step 1
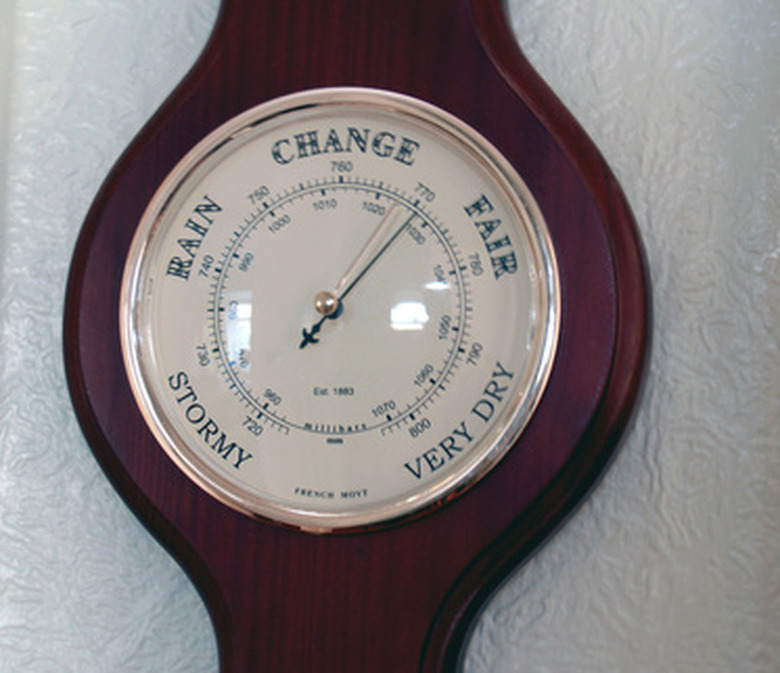
Hang the barometer on the wall, suspended from a hook or nail. The barometer may be wheel-shaped or banjo-shaped with a round dial. Alternatively, the barometer may be long and thin like a stick, with a glass tube instead of a dial. The test is the same for all designs.
Step 2
Slide the bottom of the barometer gently across the wall in an arc, raising it until it is about 45 degrees from its starting point.
Step 3
Hold the instrument at the 45-degree angle and check the dial on a "wheel" or "banjo" barometer. If the barometer is working correctly, the indicator needle will move swiftly in a clockwise direction until it goes past the end of the scale marked on the dial.
Step 4
Hold the instrument at the 45-degree angle and check the the level of the mercury in the glass tube with a long "stick" barometer. If the barometer is working correctly, the mercury inside will rise quickly to fill the very tip of the tube, leaving no air bubble. You may hear a loud "tick" as the mercury hits the end of the tube.
Aneroid Barometers
Step 1
Mark the position of the indicator needle, by placing a chalk line on the dial of the barometer.
Step 2
Place the barometer inside a large clear plastic bag. Trap as much air as possible inside the bag. Seal the neck of the bag using parcel tape to leave the barometer inside along with the trapped air.
Step 3
Put a folded towel on a table to protect the barometer. Lay the barometer on the towel, still inside its bag of air. The dial and the indicator needle should be clearly visible through the bag.
Step 4
Push down hard on the air in the bag to put it under more pressure. Do not press on the barometer itself, just on the air in the bag.
Step 5
Watch the indicator needle on the dial. If the barometer is working correctly, the needle should move quickly around the dial in a clockwise direction. Remove the barometer from the bag and the needle should return quickly to the position shown by the chalk mark.