How To Recover A Director's Chair
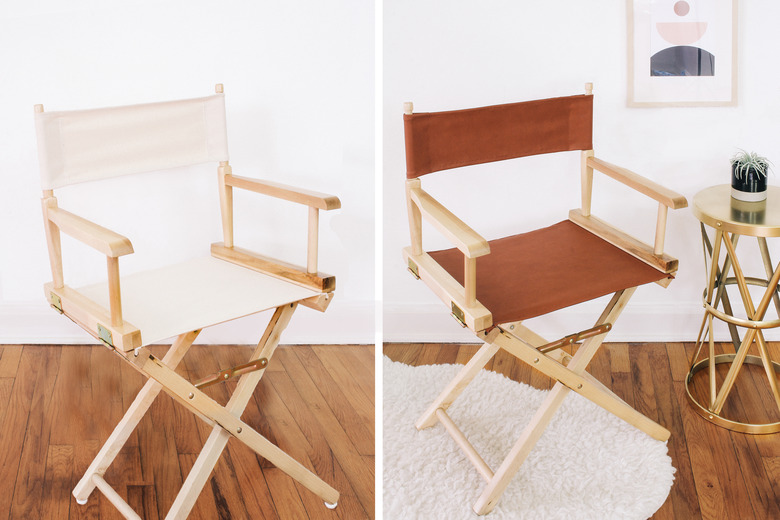
Gone are the days of director's chairs being confined to tacky tailgates or dingy dorm rooms. Thanks to the recent trend of high-end retailers pairing the classic X-frame silhouette with luxe leather covers, the conveniently portable and rather utilitarian seat has seen a modernized makeover (just see here, here, and here). We created a similar version with a cognac-colored faux leather for a less expensive but equally covetable option. The result is a rugged-chic chair that adds style to your digs, and actually looks like it belongs on a glamorous movie set.
 Trisha Sprouse
Things Needed
-
1 yard of 36-inch heavyweight fabric (we used faux leather)
-
Paint or wood stain (optional)
-
Measuring tape
-
Scissors
-
Chalk or fabric marking pencil
-
Sewing machine
-
Universal 90/14 needle
-
Heavy-duty or upholstery thread in coordinating color
-
Straight pins or mini binder clips (binder clips are best for leather or faux leather)
-
Teflon foot or clear tape (optional)
-
5/16-inch wooden dowels, if needed, ( 2 )
Tip: We used faux leather for our chair covers, but you could use any type of heavy or upholstery-weight fabric like canvas or twill. If you plan to use your director's chair outside, opt for an outdoor or weatherproof fabric for better durability.
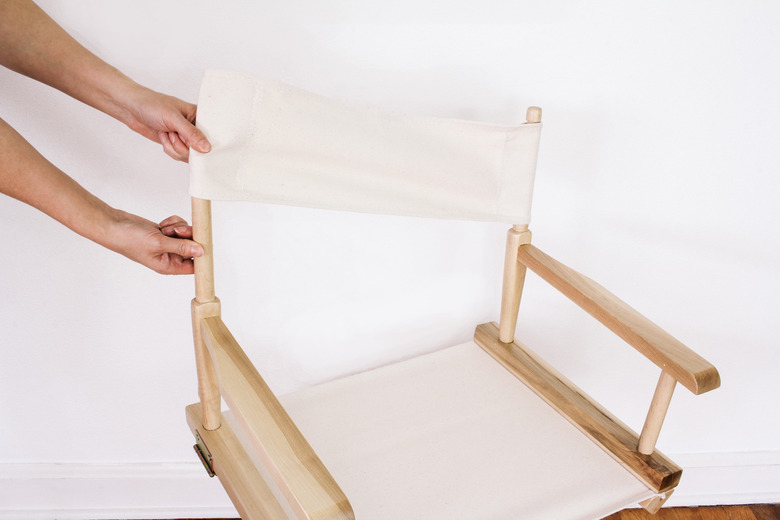
Step 1: Remove the original chair covers.
Step 1: Remove the original chair covers.
Remove the existing chair covers from the chair frame. If you plan to paint or stain the frame a different color, do that now and allow it to dry fully. We chose not to paint or stain our chair frame since we liked the natural wood color, and the finish was also in good condition.
 Trisha Sprouse
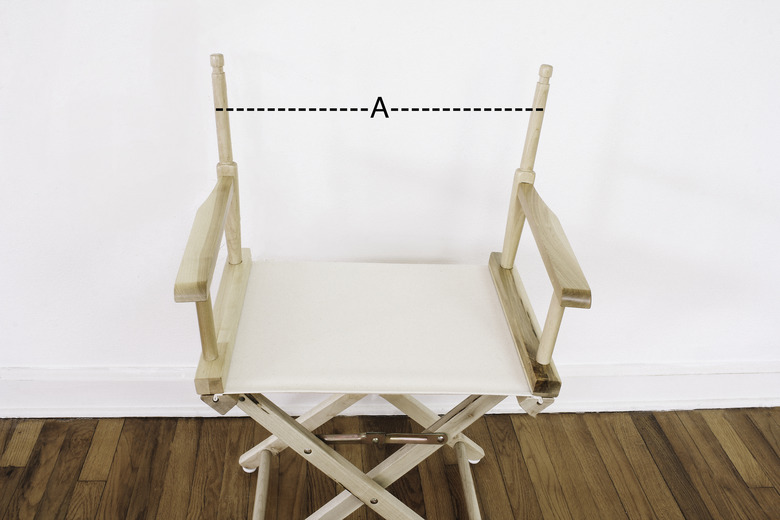
Step 2: Measure the chair frame.
Step 2: Measure the chair frame.
If you have the original chair covers for the chair, skip to Step 3. If you don't, then you'll need to take a few measurements to figure out the dimensions of your new covers.
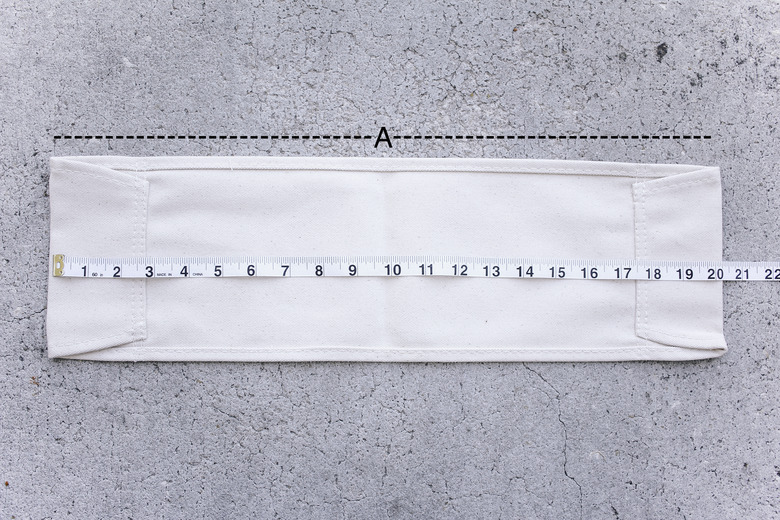
A: Start by measuring the distance from pole to pole on the chair back. Add six inches.
 Trisha Sprouse
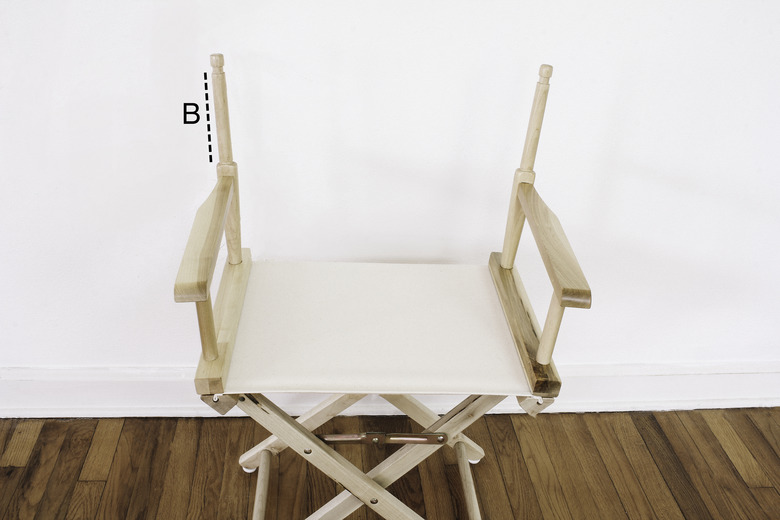
B: Next measure the height of the poles on the chair back and add one inch.
 Trisha Sprouse
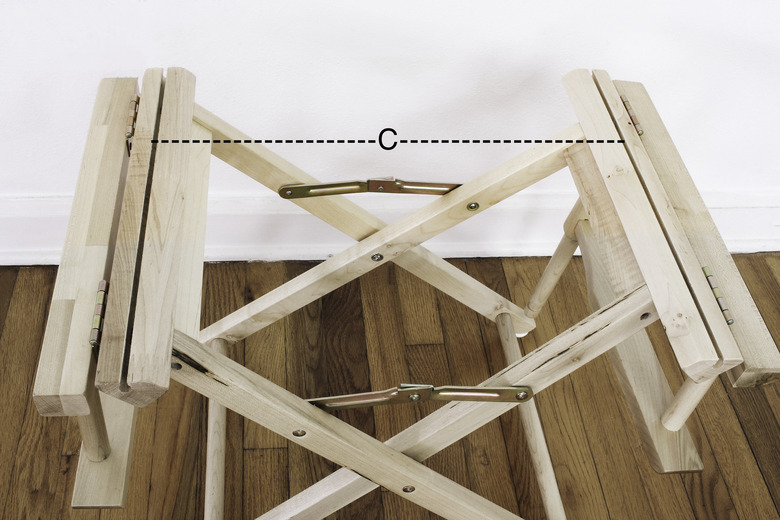
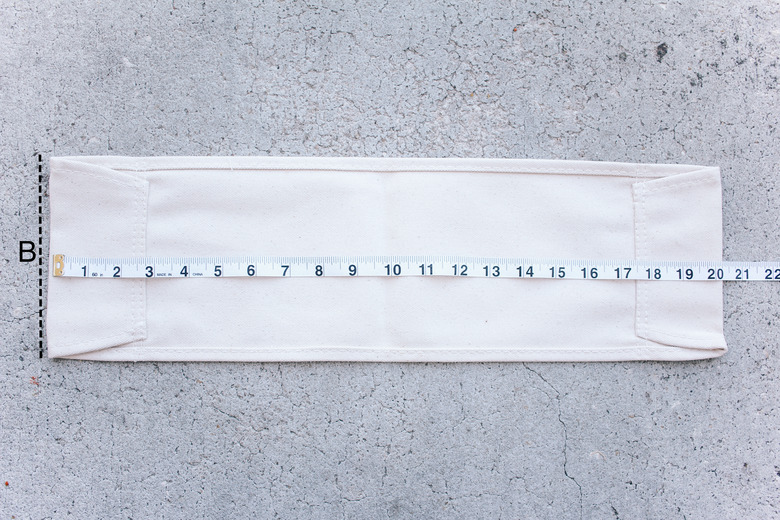
C: Fold down the arms of the chair and measure the distance from one dowel rod slot to the other dowel rod slot. Add four inches.
 Trisha Sprouse
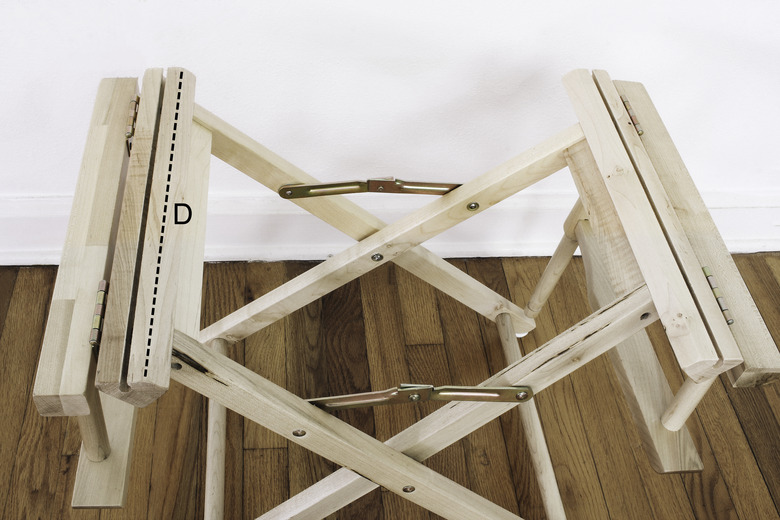
D: Finally, measure the depth of the chair seat from front to back and one inch.
 Trisha Sprouse
Step 3: Measure the original chair covers.
Step 3: Measure the original chair covers.
If you have the good fortune of having the original chair covers, you can easily use them as a pattern. (Insert happy dance.)
A: First, measure the width of the chair back cover and add six inches.
 Trisha Sprouse
B: Then measure the height of the chair back cover and add one inch.
 Trisha Sprouse
C: Next, measure the width of the chair seat cover and add four inches.
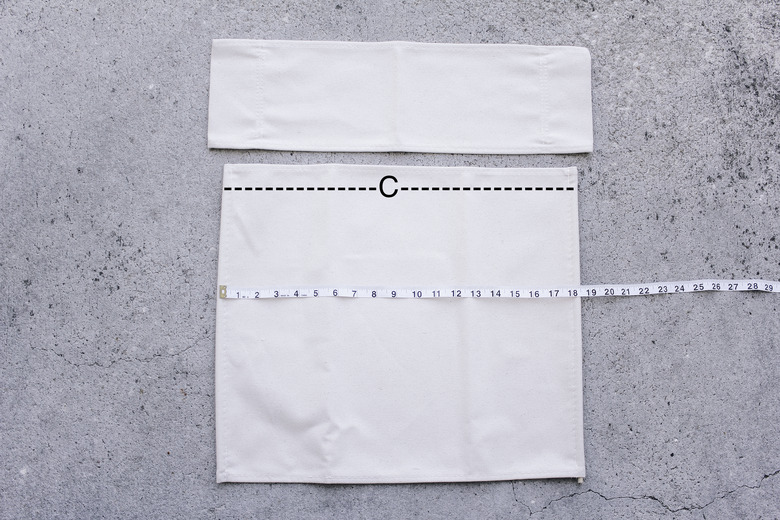 Trisha Sprouse
D: Finally, measure the depth of the chair seat and add one inch.
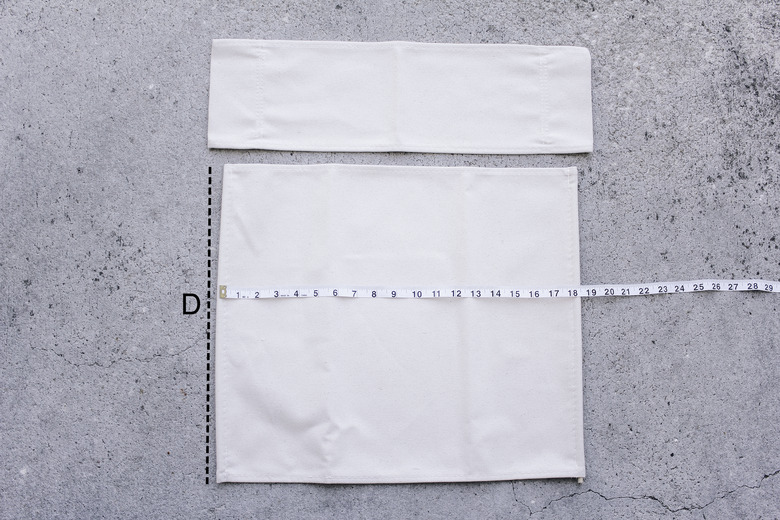 Trisha Sprouse
Step 4: Cut out new chair covers.
Step 4: Cut out new chair covers.
Mark the dimensions of the chair back (A x B) and chair seat (C x D) on your new fabric, and cut out both pieces.
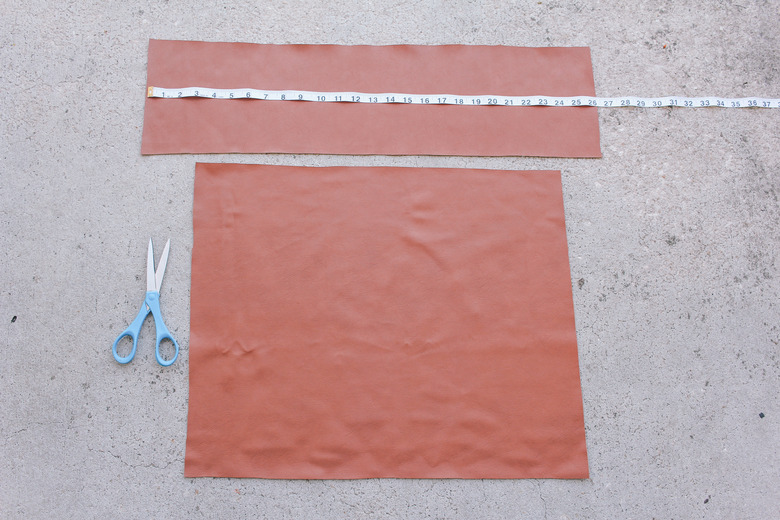 Trisha Sprouse
Step 5: Sew the chair back cover.
Step 5: Sew the chair back cover.
With the wrong side of your new chair back fabric facing up, fold 1/2-inch down along the top and bottom edges and pin in place. If you opted to use faux leather like us, or real leather, use binder clips in place of sewing pins to avoid creating holes in the fabric.
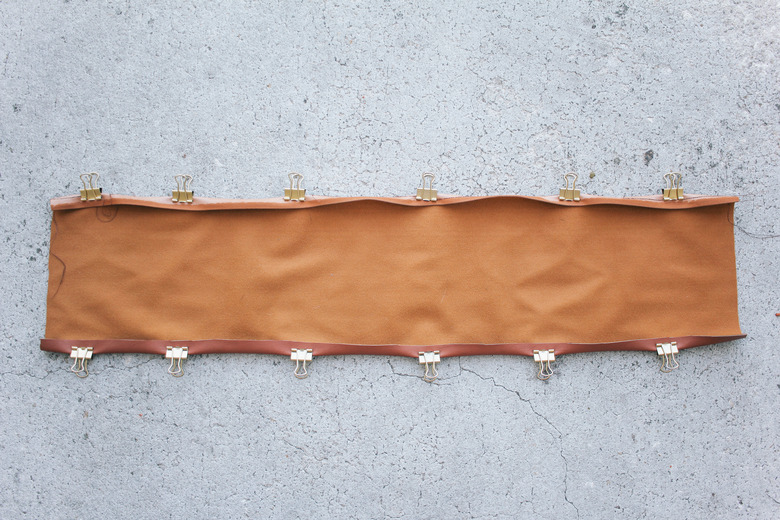 Trisha Sprouse
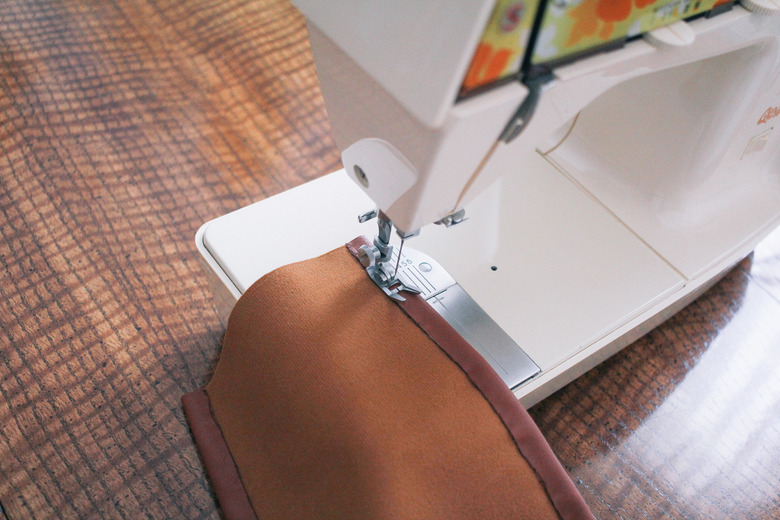
Load your sewing machine with a 90/14 needle, and upholstery or heavy-duty thread, and sew 1/4-inch from the edge along the top and bottom seams you just folded. We found a longer straight stitch worked best for our faux leather fabric, so adjust your machine settings accordingly. It may be helpful to do a few test stitches on scrap fabric first to find what settings work best.
Tip: If you are using leather/pleather for this project, then you'll want to use a teflon foot on your sewing machine to make it easier for the fabric to glide through the machine. If you don't have this type of presser foot handy, you can place a small piece of clear tape underneath your existing presser foot.
 Trisha Sprouse
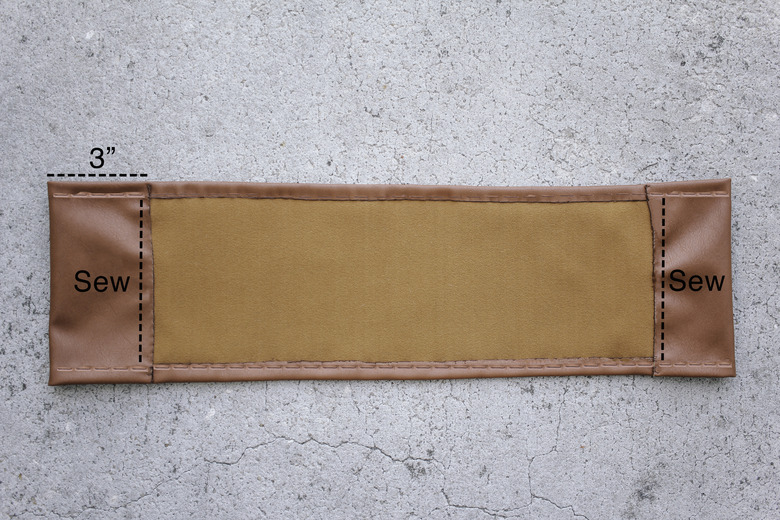
Again, with the wrong side facing up, fold in three inches on each side of the chair back cover and sew the seam 1/4-inch from the edge. This will create "pockets" where you can slide the chair back cover onto the poles of the chair frame.
 Trisha Sprouse
Step 6: Sew the chair seat cover.
Step 6: Sew the chair seat cover.
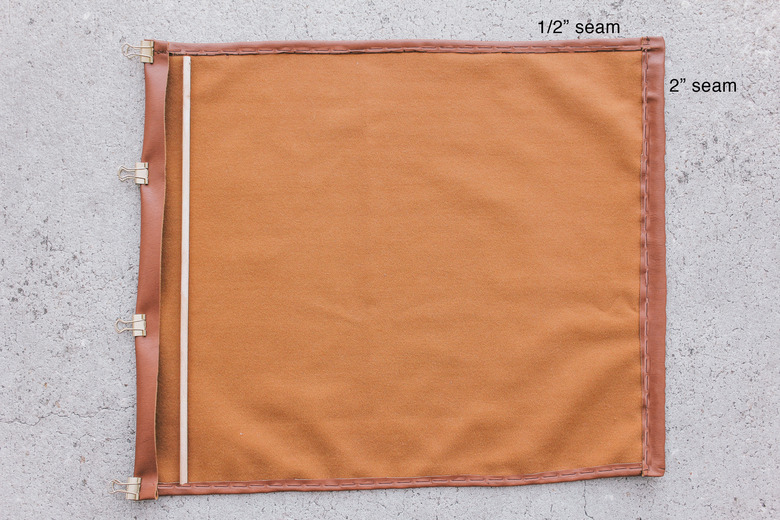
With the wrong side of your new chair seat fabric facing up, fold 1/2-inch down along the top and bottom edges and sew the seam 1/4-inch from the edge. Then fold two inches in on each side of the chair back cover — creating "pockets" for the dowel rods to slide through — and sew the seam 1/4-inch from the edge. To reinforce the chair seat, you could also sew another seam 1/2-inch from the edge (just make sure the dowel rod can fit through the pocket first).
 Trisha Sprouse
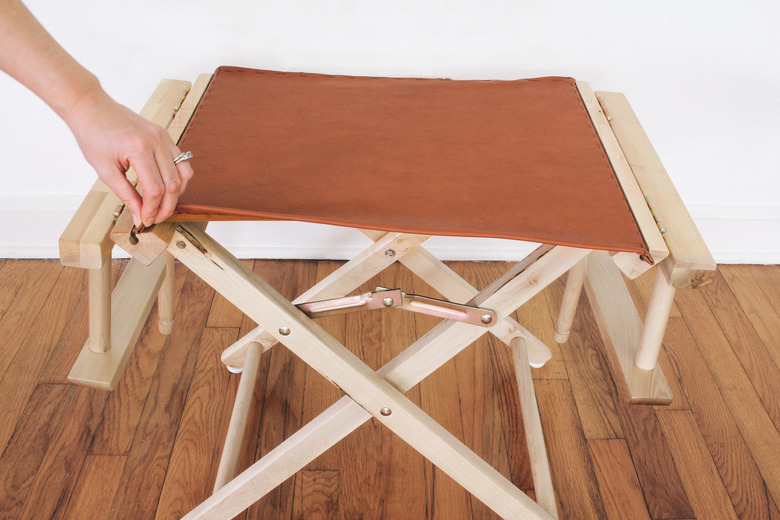
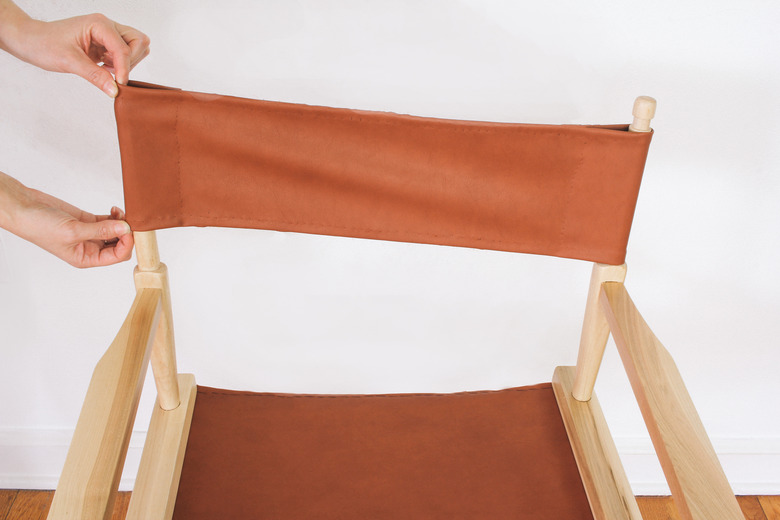
Step 7: Add the new covers to the chair.
Step 7: Add the new covers to the chair.
Collapse the chair in slightly to give it some slack, and fold the arms down to expose the dowel rod slots. Slide the dowel rods into the pockets of the new chair seat cover and then slide the dowels into the slots on each side of the chair frame. Fold the arms of the chair back up.
 Trisha Sprouse
Slide your chair back cover onto the poles of the chair frame and open the chair back up fully, locking the folding hinges in place.
 Trisha Sprouse
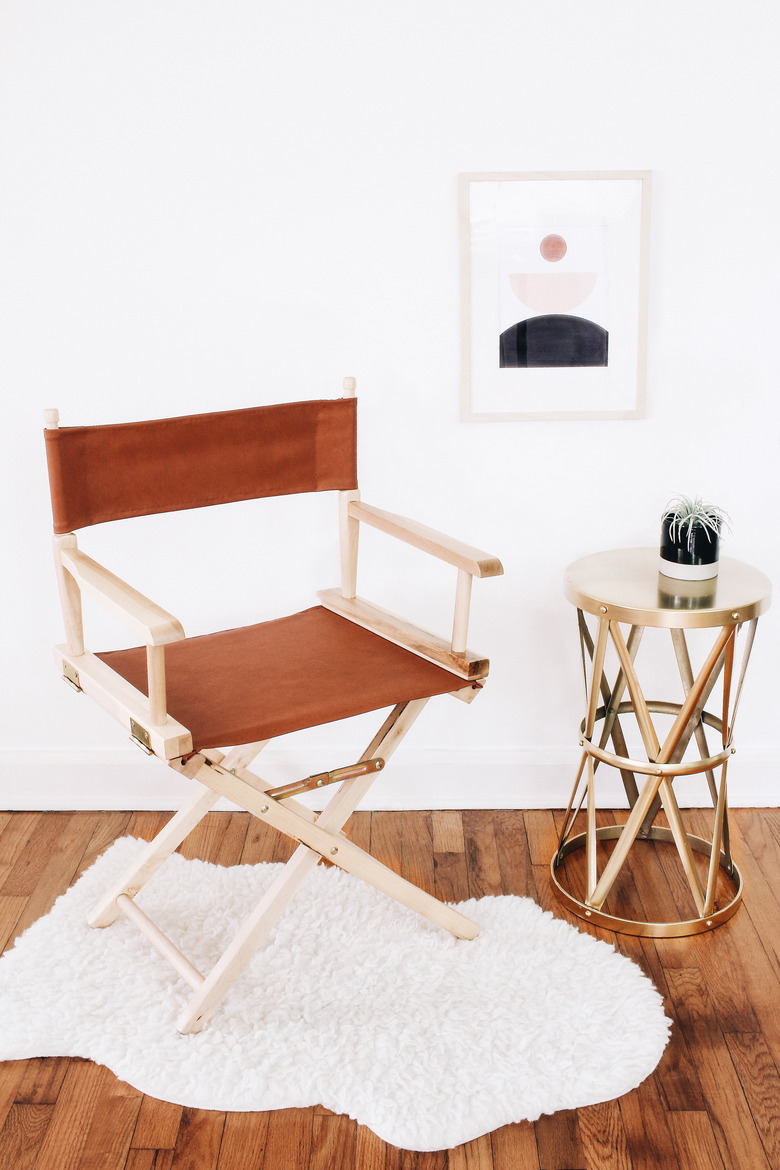
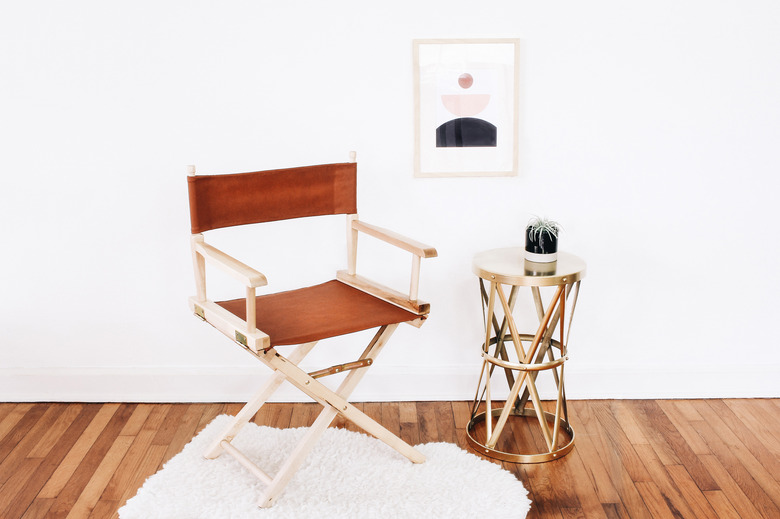
We love how the chair takes on a completely new vibe with just a simple fabric swap — so easy yet majorly impactful. Great for entertaining, conveniently foldable, and just so darn stylish. Plus, you can call the shots like a Hollywood boss from your very own VIP seat.
And action!
 Trisha Sprouse