How To Fill A Gap Between The Wall & The Ceiling
Things Needed
-
Drop cloth
-
Fiberglass mesh drywall tape
-
Utility knife
-
Putty knife
-
Drywall joint compound (mud)
-
Paper tape
-
Sandpaper
-
Cloth
-
Paint
-
Paintbrush
-
Respirator
Warning
Wear a respirator when sanding to avoid breathing in any particles of dried joint compound. They aren't toxic, but they could cause respiratory problems for sensitive individuals.
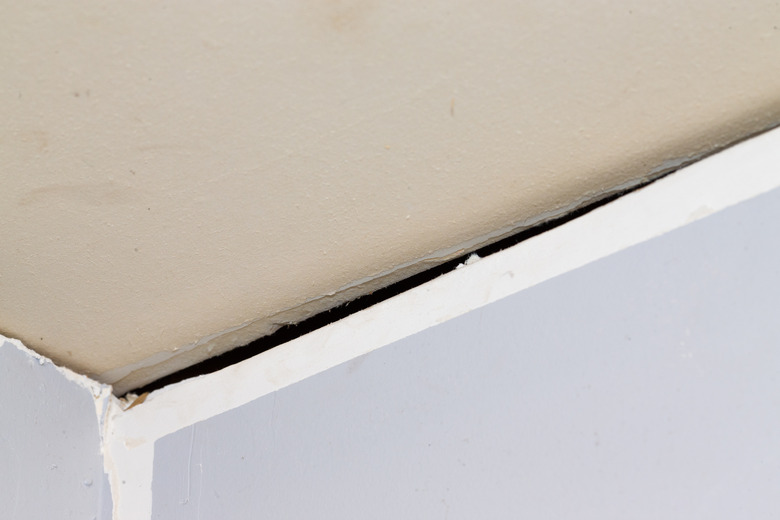
Placing drywall often means dealing with walls and ceilings that aren't exactly plumb in all areas. When the ceiling changes height across the length of a wall, a gap between wall and ceiling can result. Covering this gap isn't a difficult process. All it takes is a quick patching job with fiberglass mesh tape. You can then proceed with normal joint taping techniques, using drywall joint compound, which drywall professionals refer to as mud. In the end you'll create a seamless looking joint between wall and ceiling that conceals the gap completely.

Step 1
Place a drop cloth along the floor at the base of the wall in case any drywall or paint falls during the patching process.
Step 2
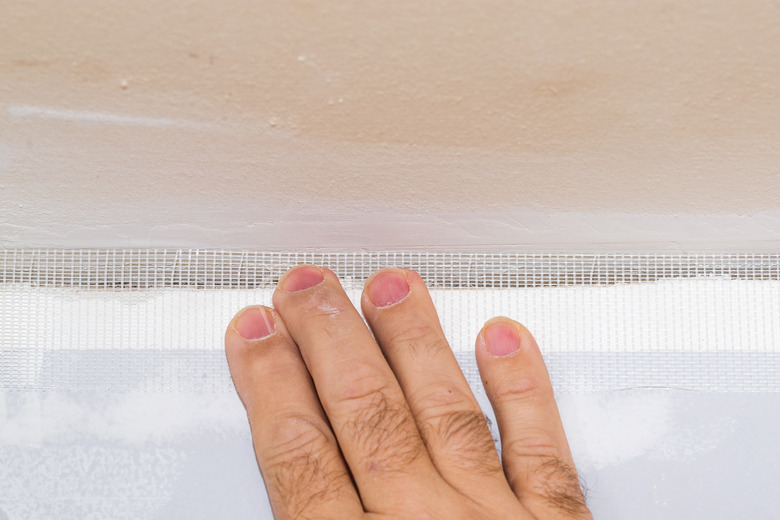
Place a strip of fiberglass mesh drywall tape over the gap so that it butts up against the ceiling line. Cut the tape with a utility knife as needed to fit the gap.
Step 3
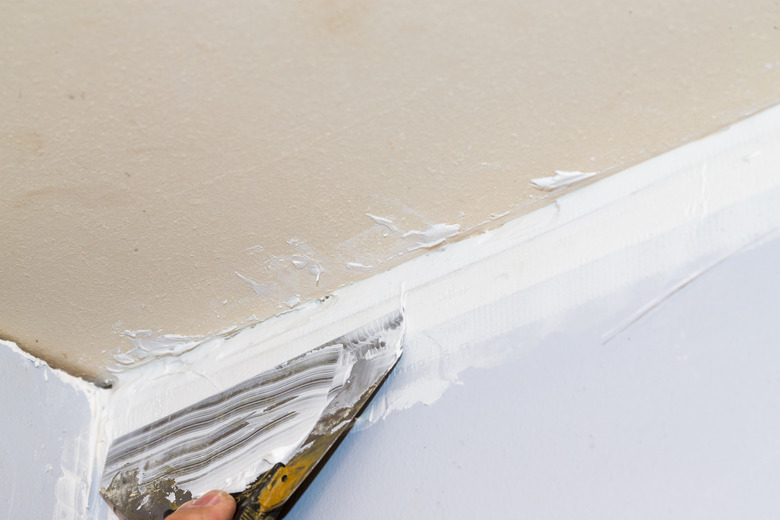
Cover the mesh tape with drywall joint compound, using a putty knife. Press the joint compound firmly into the small mesh holes of the tape, covering the mesh tape completely. Extend the mud beyond the borders of the tape about two inches on both the wall and ceiling surfaces.
Step 4

Place a strip of paper tape over the corner between the wall and ceiling, using the putty knife to crease the tape between the two surfaces to create a sharp edge. Use joint compound on the wall and ceiling to hold the tape in place.
Step 5
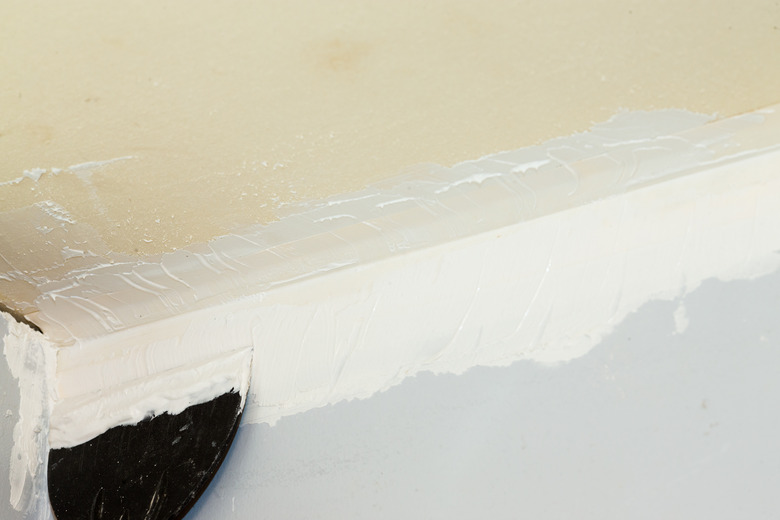
Cover the tape with more joint compound. Spread a light coating over the tape and onto the adjacent drywall about an inch with a putty knife. Feather the edges so that they blend smoothly into the drywall. Allow the mud to dry then repeat the covering process. Wait for the second layer to dry completely.
Step 6
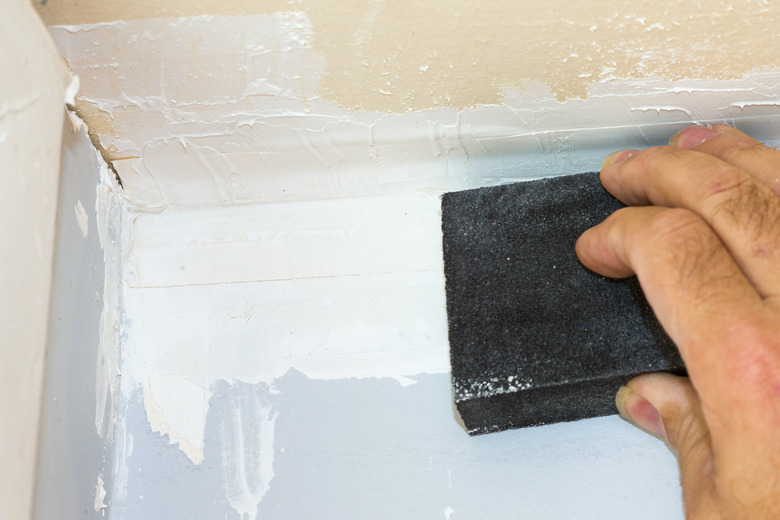
Sand the dried joint compound smooth with a medium grit sandpaper. Switch to fine grit and then sand the edges where the mud meets the drywall to smooth them and blend them further into the adjacent drywall surface. Wipe the area clean with a piece of cloth to remove any sanding residue.
Step 7
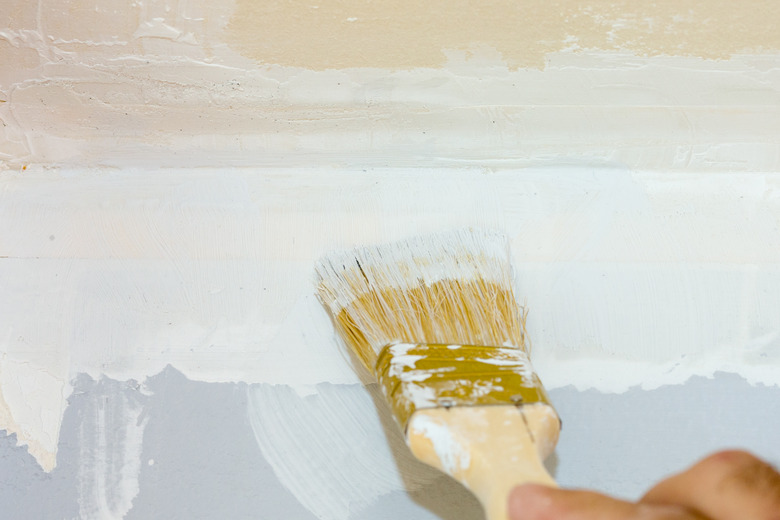
Paint the newly patched area to match the surrounding drywall with a paintbrush. Allow the paint to dry completely and then paint a second coat if needed to conceal the tape and mud.