How To Install A Door Vent
Things Needed
-
Drill/driver
-
Masking tape
-
Utility knife
-
3/16-inch drill bit
-
Straightedge
-
1/2-inch drill bit
-
Jigsaw
-
100-grit sandpaper
-
3/4-inch screws
-
Glue (optional)
-
Clamps (optional)
-
1/2-inch-by-3/4-inch pine strips (optional)
Tip
Depending on the thickness of the veneer, it may be necessary to glue and clamp 1/2-by-3/4-inch strips of pine around the inside of the opening on hollow doors. This is for screws to gain purchase. If cardboard baffles are in the way, slip a putty knife under them. Pull them loose just enough to add the strips.
Warning
Don't attempt to cut a vent in a raised-panel door. This type of door consists of many pieces. Cutting into it could result in the failure of the door.
 Voyagerix/iStock/Getty Images
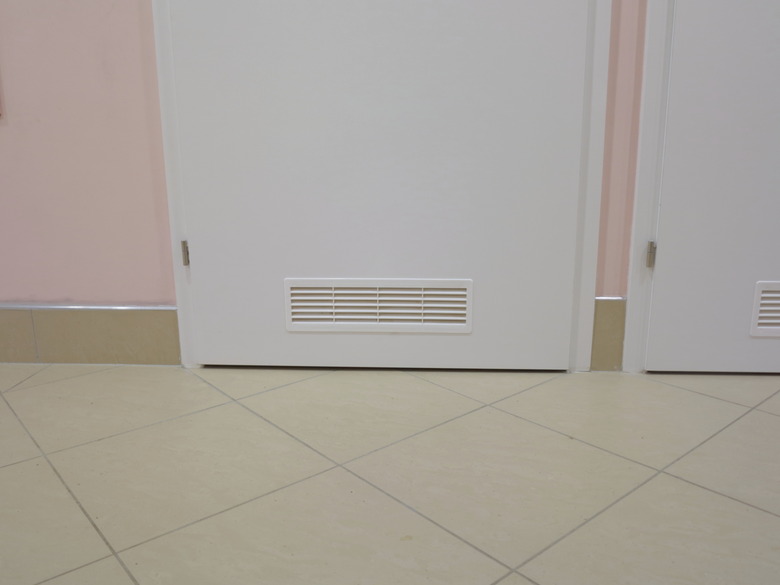
Poor ventilation occurs in a home when climate-control ducts apply unequal pressure to different rooms, causing heating, cooling and humidity issues. Insufficient clearance between doors and floors can cause or exacerbate poor ventilation. In some cases you can restore proper air circulation by installing passive door vents. Air flows through the vents to balance air pressure between rooms. The majority of interior doors are slab doors — most are hollow, but some are solid. Both types can be cut for vents. Cutting solid, raised-panel doors, however, is problematic.
Step 1
Remove the door from the hinges using a drill/driver. Place it across two sawhorses. Use a carpenter's square to draw a line perpendicular to the bottom of the door, 2 inches from the bottom.
Step 2
Center the bottom of the vent on the line. The vent should have a lip around the top with a rectangular base. Trace around the base of the vent with a pencil. Remove the vent. Place strips of masking tape flush around the outside perimeter of the tracing. Score the pencil line to a depth of 1/6 inch with a utility knife.
Step 3
Drill holes vertically through the door at each corner of the tracing. Use a drill/driver with a 3/16-inch bit. Drill the holes as close to 90 degrees as possible. Turn the door over.
Step 4
Align a straightedge with the holes. Connect the holes by tracing a line with the straightedge. Place strips of masking tape around the outside perimeter of the tracing. Score around the tracing with a utility knife.
Step 5
Drill through the door at one inside corner of the tracing with a 1/2-inch bit. Insert the blade of a jigsaw into the hole. Cut along the line. If the door is solid, cut along the line with the jigsaw until you're 3/4-inch from cutting the piece loose. Add a support sawhorse underneath, or enlist an assistant, to prevent the piece from dropping out and damaging the door's veneer. Finish the cut.
Step 6
Sand and round the edges of the opening you've created, using 100-grit sandpaper. Slide the base of the vent into the opening. The lip around the perimeter should be flush with the face of the door. Screw the vent to the door with 3/4-inch screws. Repeat this step on the other side of the door.