How To Make Super Cute Seat Cushions For Folding Chairs
We may receive a commission on purchases made from links.
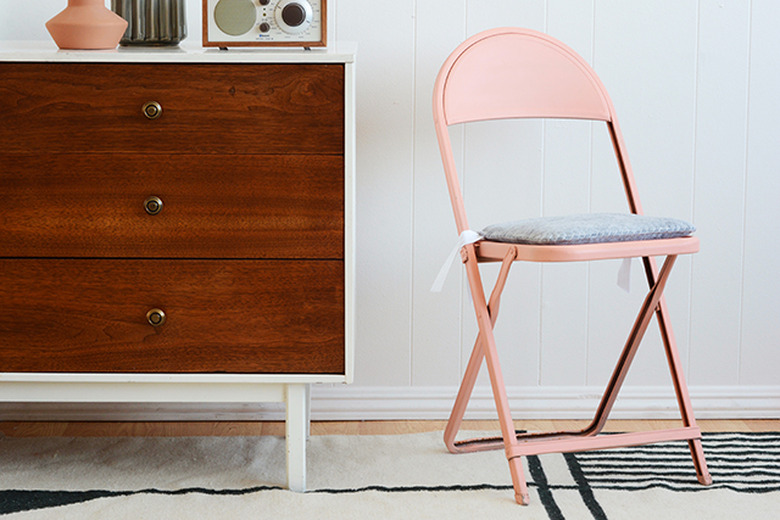
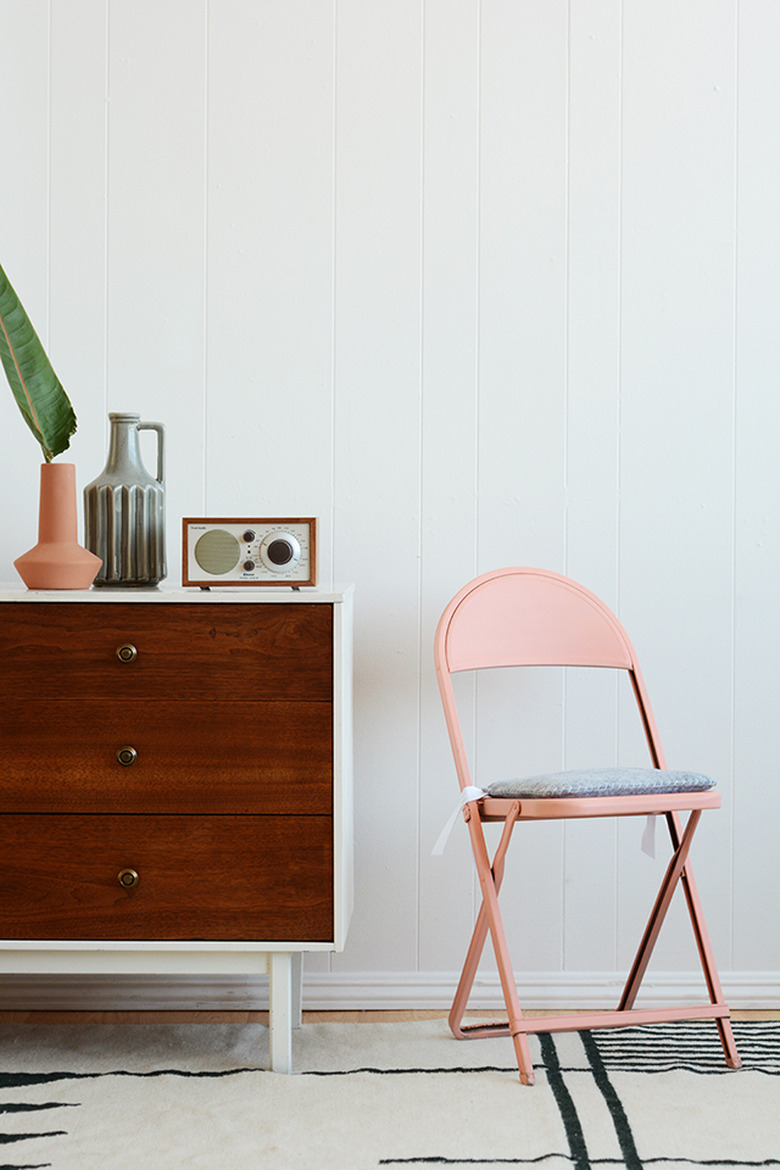
If you have a folding chair that you love, but it's unfortunately not comfortable, why not customize a seat cushion for it? Felt is a perfect material to use for this sewing project. It's a sturdy fabric that is also very forgiving. You don't have to be an expert seamstress to work with it, and it hides flaws and imperfections.
 Jeran McConnel
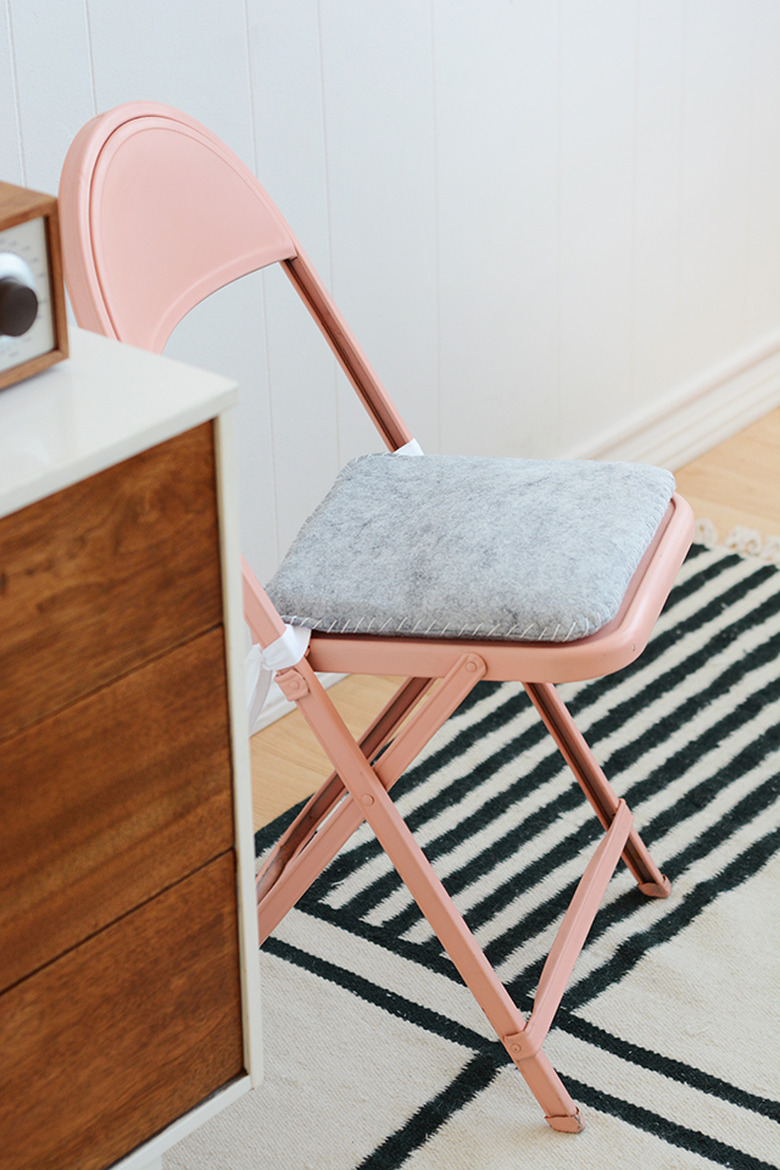
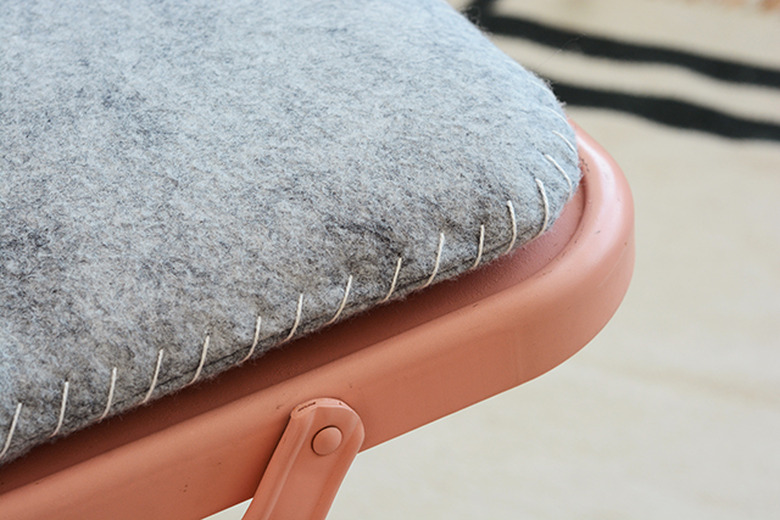
So, even if you can't sew a perfectly straight line, no one will know. With a little stitch detail around the edge, it gives this cushion a nice tailored look.
 Jeran McConnel
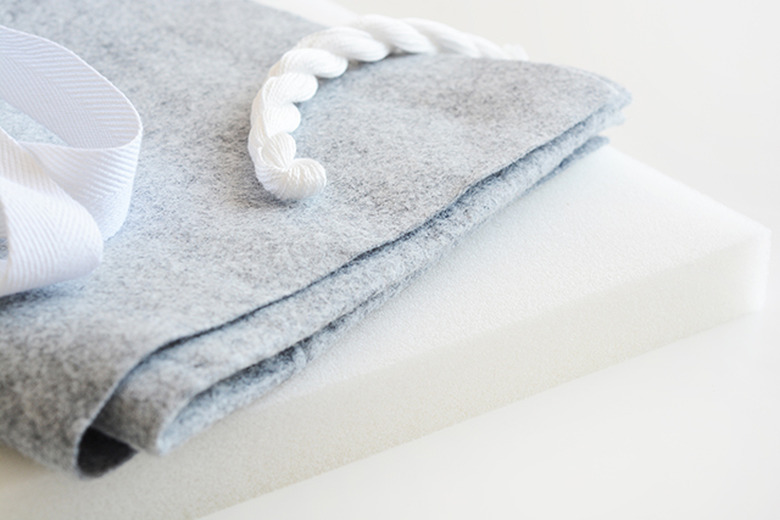
Things Needed
-
Cardboard or paper
-
Wool felt, 1/2 yard
-
Thick foam, 1 inch
-
Cotton webbing or ribbon, 2 feet long
 Jeran McConnel
Step 1
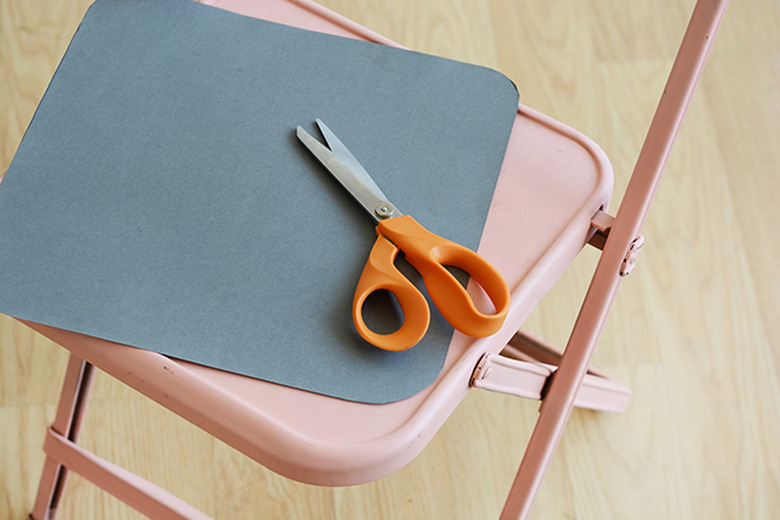
Start by tracing and cutting out a seat pattern for your specific chair.
 Jeran McConnel
Step 2
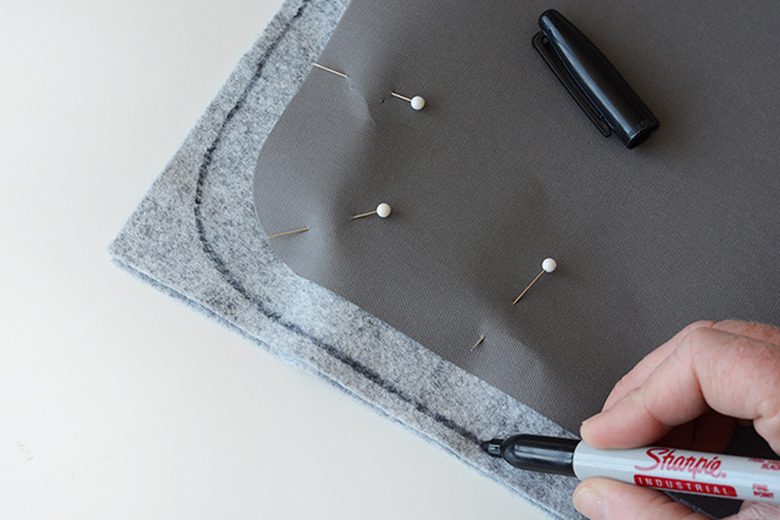
Fold the felt in half and pin the seat pattern to the felt. Using a permanent marker, trace around the pattern, leaving about a ½-inch space.
 Jeran McConnel
Step 3
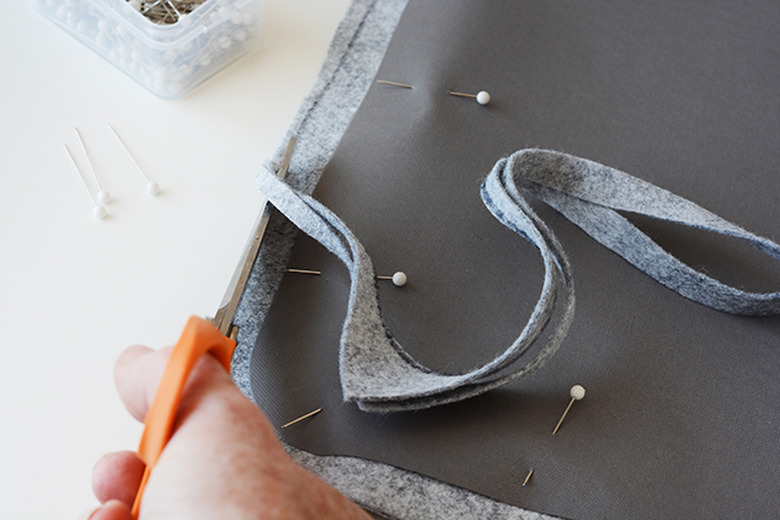
Cut along the line.
 Jeran McConnel
Step 4
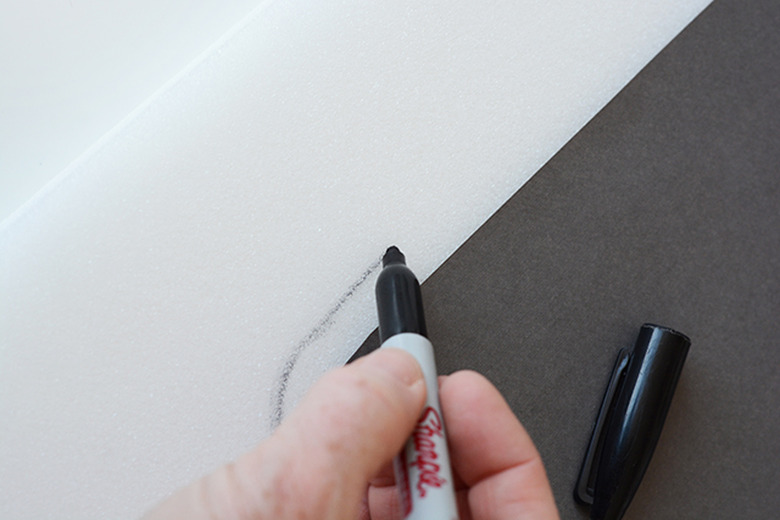
Place the seat pattern on the piece of foam and trace around the pattern, leaving about a ½-inch space, just like you did with the felt.
 Jeran McConnel
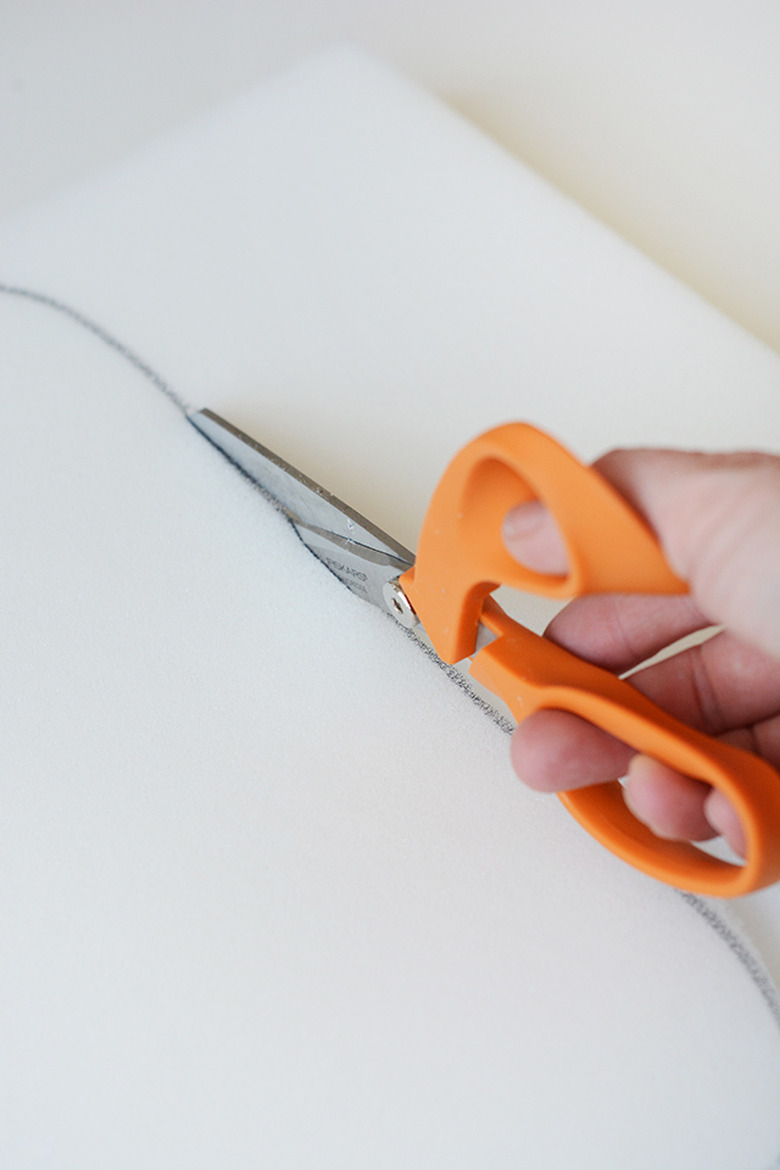
Step 5
Cut out the foam with a sharp pair of fabric scissors.
 Jeran McConnel
Step 6
Place the good sides together, and stitch around the outside of the felt leaving a ¼-inch seam allowance. On the back side of the cushion leave a 6-inch opening.
 Jeran McConnel
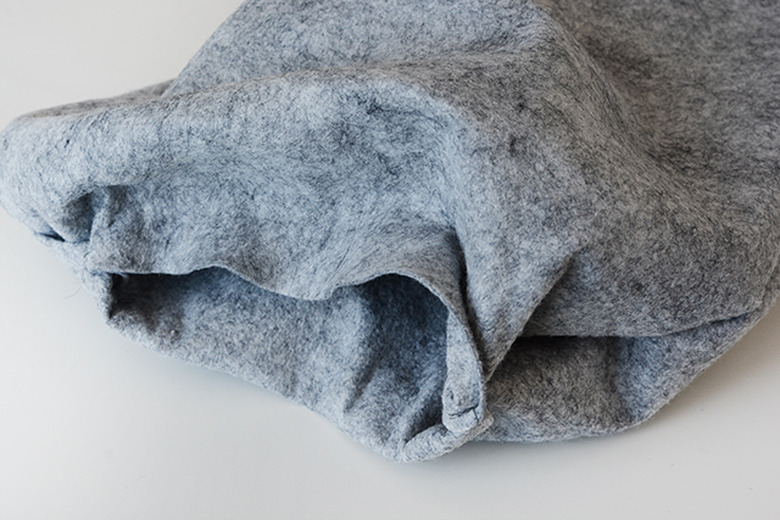
Step 7
Turn the fabric right side out.
 Jeran McConnel
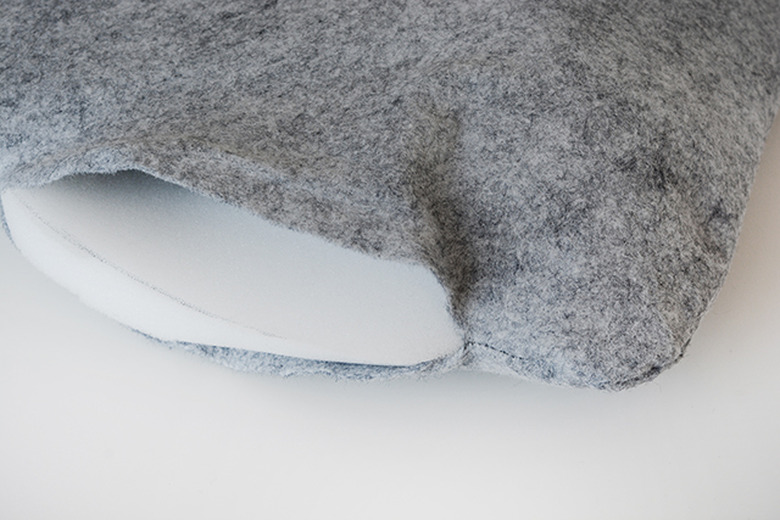
Step 8
Stuff in the foam. It will be tight, but it should fit snugly, without any wiggle room. The cushion will look better without gaps and extra space.
 Jeran McConnel
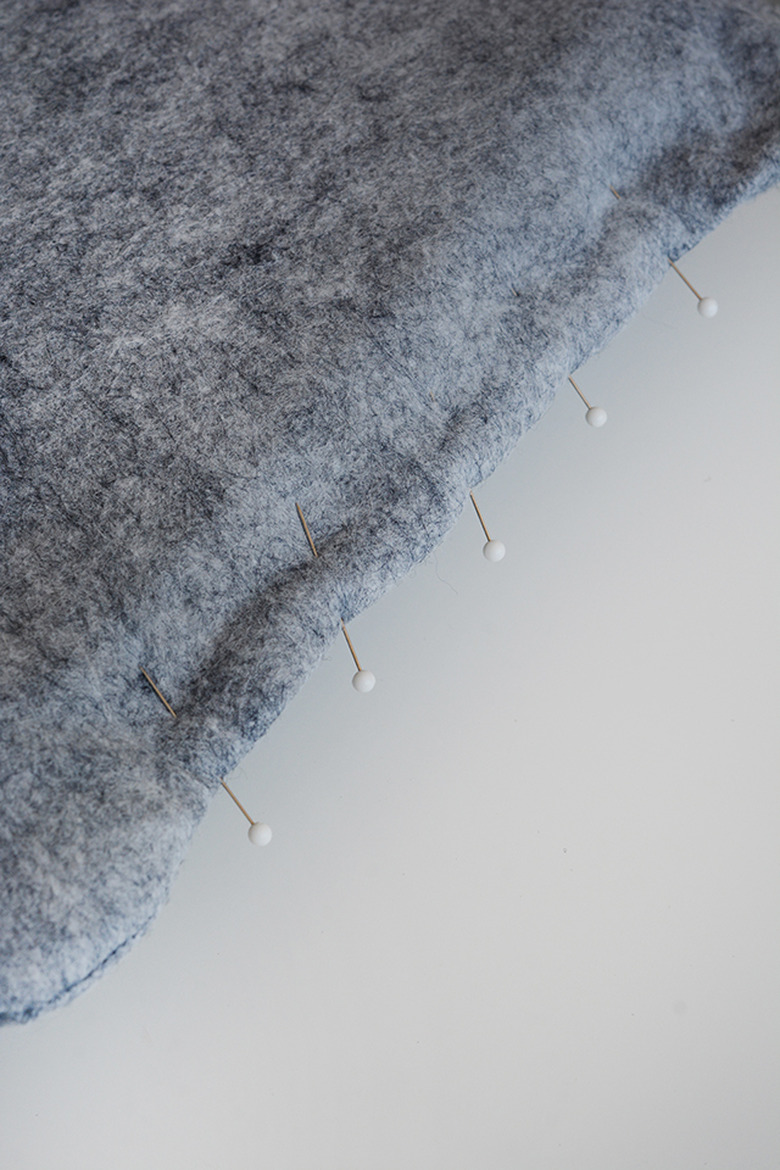
Step 9
Pin the opening in cushion shut, and stitch it closed.
 Jeran McConnel
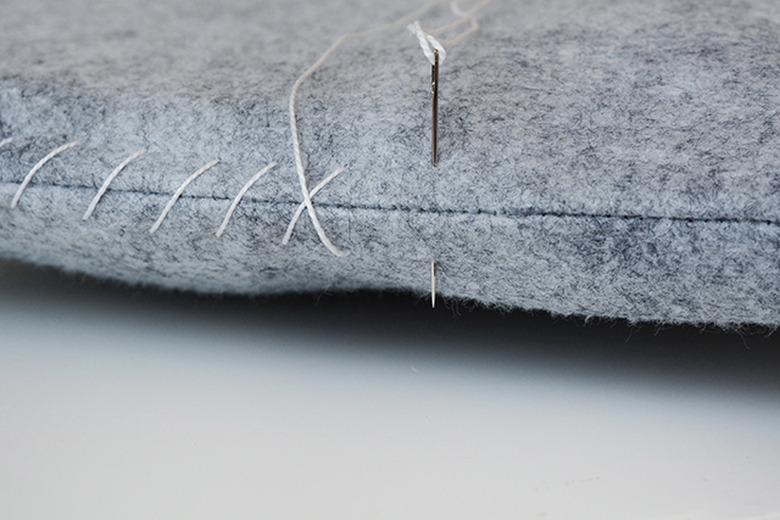
Step 10
Using the embroidery thread and needle, stitch around the outside of cushion. Stitch every half inch on an angle. It's just a little detail that gives the cushion a fun finished look.
 Jeran McConnel
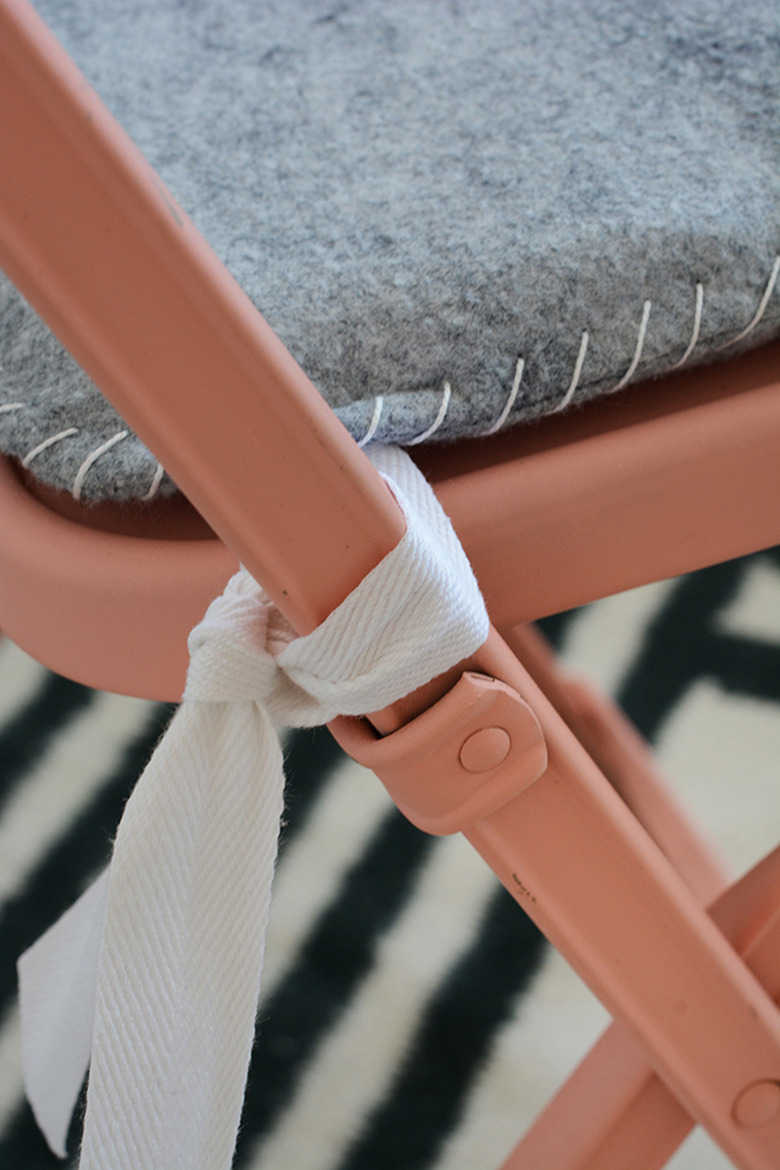
Step 11
And the final step is to stitch on the cotton webbing. This will keep the chair cushion in place. I attached the webbing by simply sewing it on with my sewing machine.
 Jeran McConnel
Now invite some friends over for dinner and pull up an extra chair to the table!
 Jeran McConnel