How To Change A Blade On An Angle Grinder
Things Needed
-
Vice grips
-
Philips head screwdriver
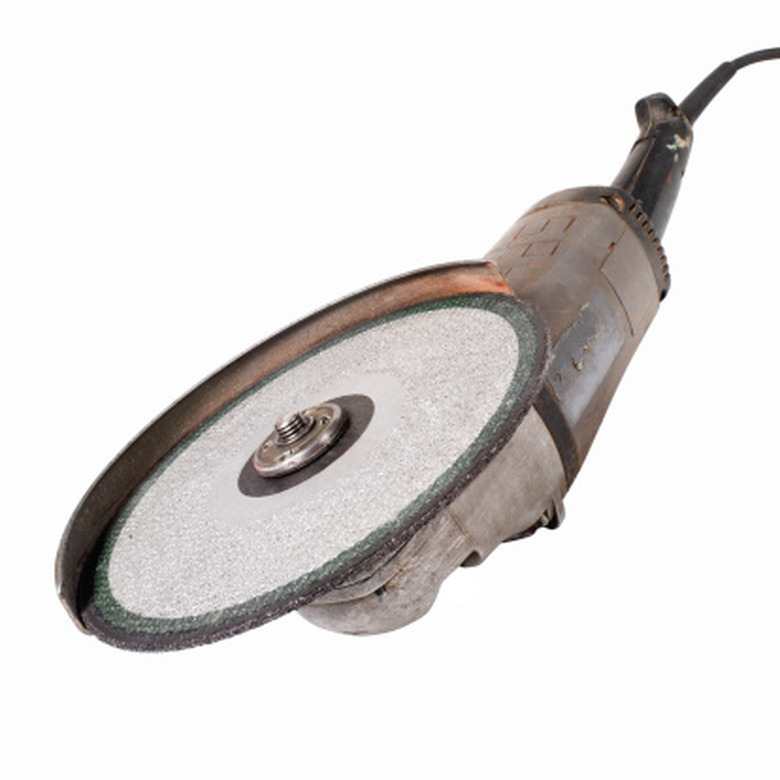
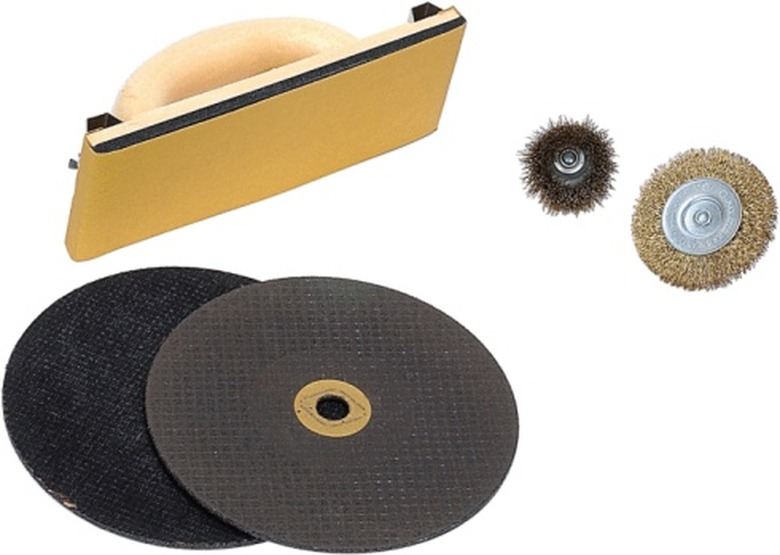
Angle grinders are multi-function tools that are used in construction industries and by homeowners to cut, grind, or sand through hard materials. You can buy several types of blades for an angle grinder, depending on what material you are cutting. The most common materials are wood, concrete, and metal. Always use the right blade, to help avoid personal injury, and replace it when it is worn out.
Step 1
Unplug your grinder or remove the battery before you change the blade. This step should never be skipped because there is always the chance that you could accidentally turn the grinder on while removing the blade.
Step 2

Use your screwdriver to remove the blade guard before you remove the blade. This will make it easier to get the blade off. Loosen the screw that holds the blade guard in place, or push the release latch on the blade guard to remove it. Not all models are made the same. Some will have a screw and others will have a latch.
Step 3
Press the blade lock button and hold it in. While still holding the button, turn the grinder upside down so that the grinding wheel is facing up. Use your other hand to attempt to turn the wheel. The wheel is locked if it will not turn. If the wheel turns you will need to press and hold the lock button again. The lock button is often located on the top right or left side of the grinder, but it could be found near the trigger, or on the bottom side.
Step 4
Use the provided wrench to turn the arbor nut counterclockwise. Most grinders come with a wrench, and some will have prongs on them. If your wrench has prongs, there will be a hole on each side of the arbor nut. Place the prongs in the holes and turn the nut counterclockwise.
Step 5
Use your Vise Grips to loosen the arbor nut if your grinder no longer has the factory provided wrench. Grasp the nut with the Vise Grips and turn it counterclockwise to remove it.
Step 6
Lift off the old blade after you have removed the arbor nut. Set a new blade into position. Reinsert the arbor nut and tighten it with your wrench or Vise Grips. It is not necessary to over-tighten the arbor nut. Just tighten it enough to hold the blade in place.
Warning
Make sure you reinstall the blade guard. Check the blade for flaws by turning on the grinder. Make sure it is facing away from you and no one is in front of it. A cracked blade will fly off very quickly. Usually in less than 60 seconds. Always wear safety glasses when using a grinder.