How To Set The Ridge Board On A Gable Roof
Things Needed
-
Dimensional lumber for the ridge board
-
2 X 4 dimensional lumber for the gable studs
-
Correctly cut common rafters
-
2 X 4 bracing boards
-
Marking pencil
-
Carpenter's square
-
Hammer
-
8-penny nails
-
16-penny nails
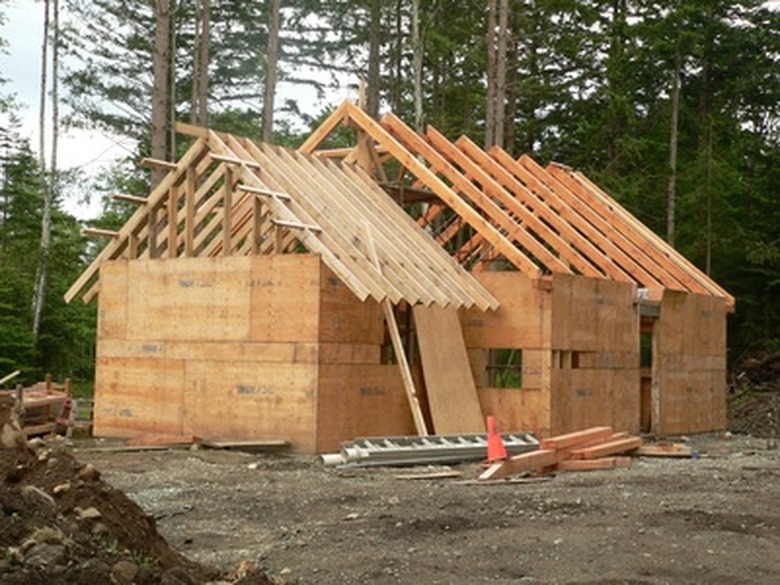
The ridge board runs the length of the building and provides support for the tops of the rafters, helping the whole roof structure work together as a system. The ridge board must be set as perfectly as possible, so take your time and use careful measurements. Roofing jobs are always easier if you have more help, and setting the ridge board really requires three people, to go smoothly. Construct a temporary platform on the ceiling joists, and construct temporary scaffolding, if the peak of the roof is over your reach.
Preparing the Ridge Board
Step 1
Choose a ridge board that is one size larger than your common rafters. For 2 X 4 rafters, use a 2 X 6 ridge board; for 2 X 6 rafters, use a 2 X 8 ridge board, and so on. The ridge board's length will be the outside measurement of the building plus the length of the overhang, at both ends. You may splice two boards together to achieve this length, if necessary, using a 14 and 1/2-inch block of the same material. Put the splice where it will not interfere with the placement of rafters.
Step 2
Lay the ridge board flat and level, on the ground or across sawhorses. Square the ends, if necessary.
Step 3
Make two measurements to mark the location of the first gable-end rafter. From the end of the board, measure the width of the soffit, and mark using the carpenter's square. Now measure again and add 1 and 1/2 inches to give you the placement of the outside face of the gable-end rafter. This puts the gable-end slightly inside the building, so gable studs can be flat-nailed easily and neatly.
Step 4
Rip the end of the board down to 2 X 4, at the top up to the first mark. This allows the soffit to fit without further notching when you are up on the roof.
Step 5
Repeat Steps 3 and 4 for the other end of the ridge board.
Step 6
Continue to measure and mark the placement of additional rafters. The rafter tails should square up with the ceiling joists, when the roof is in place, so pull your measurements from the established positions of the joists.
Step 7
Bring the marked ridge board and two people up onto the roof.
Setting the Ridge Board
Step 1
Hand up the first gable-end rafter. Temporarily toenail it into place on the top plate, using 8-penny nails, remembering to allow an extra 1 and 1/2 inches from the end of the wall.
Step 2
Hand up the opposing gable-end rafter and toenail into place. One person should support the rafters to keep them from tipping off the end of the roof, or nail in temporary supports.
Step 3
Repeat with a second set of rafters, squaring this set with the ceiling joists.
Step 4
Move about halfway down the roof and repeat with a third set of rafters, to provide support for the middle of the ridge board.
Step 5
Raise the ridge board and nail to the rafters on the marked lines. Use 8-penny nails to tack it together, but do not drive the nails all the way in, because you may need to make adjustments. Once the system is roughly in place, tack a temporary support from the ridge board to the ceiling joists, taking care to fasten between your marked rafter lines, so it does not get in the way, later.
Fastening the Roof System Together
Step 1
Steady the ridge in its approximate final position, using the carpenter's square to make sure the rafters are vertical. Measure from the bottom of the ridge to the top plate, to get the length of your gable-end stud.
Step 2
Cut the gable-end stud and hand it up. Slide it into place between the ridge and top plate, and check that it is perfectly square in all four directions. Fasten with 16-penny nails. Your ridge board should now be square and steady.
Step 3
Remove the temporary 8-penny nails from the rafters, one at a time, and replace with permanent, 16-penny nails. Make sure you are on your marks and square with the ceiling joists.
Step 4
Continue to hand up rafters and fasten into place with 16-penny nails, until you reach the other end of the roof. Check your work frequently, with the carpenter's square, to make sure everything is still vertical.
Step 5
Measure, cut and install the second gable end stud, as you did the first. Double check that everything is properly fastened with 16-penny nails. Remove the temporary supports and proceed to apply sheeting.
Tip
To make the whole building process easier, always work from the same direction to start—from left to right or from right to left. That way, your wall studs will line up with your ceiling joists and the ceiling joists will line up with the rafters, and all odd measurements will be in the same place.
Warning
Use proper safety precautions when working on a roof, and do as much work as possible on the ground.