How To Convert A Swamp Cooler To Solar Powered
We may receive a commission on purchases made from links.
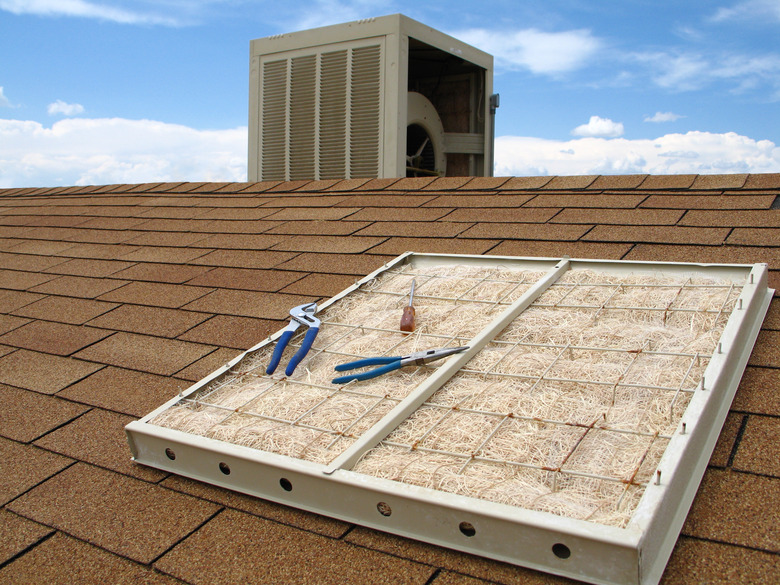
A swamp cooler is a simple device that produces cool air by evaporative cooling. This is achieved by blowing warm, dry air through a permeable pad that is soaked with water. As the water evaporates, it cools the pad and the air that passes through it. This principle works well in hot, dry climates and is less expensive to install and operate than conventional air-conditioning units. Swamp coolers run on regular 115-volt electricity, but they can be low-cost if they are solar powered.
Things Needed
-
Battery
-
Battery charge controller
-
Inverter
-
Copper cable
-
Basic tools
Prepare Your Swamp Cooler
1. Disconnect the Swamp Cooler
Disconnect the swamp cooler from the main electrical supply. Check the outside of the cooler for a label that tells the measurement of electrical current in amps that the unit uses.
2. Calculate Power Needs
Calculate how much power the solar panel will need to provide to the cooler. Power in watts is given by multiplying the current in amps by the voltage in volts. For instance, if on the outside of the cooler the current is given as 1.4 amps, multiply this number by the mains voltage of 115 volts. This gives the electrical power as 1.4 amps times 115 volts, which is equal to 161 watts.
3. Choose Between Conversion Options
Decide how you want to do the conversion. You have two choices. The first option is to replace the electrical motor that runs the fan or blower in the swamp cooler, together with the small water pump, with new units that run on direct current, or DC, electricity. This type of DC equipment is available for either 12-volt or 24-volt DC power. You will need to replace the motor and the water pump with a DC motor and pump and connect the swamp cooler directly to a solar panel that generates enough power for the cooler.
The second option is to convert the DC electricity from the solar panel to 115-volt AC by using an inverter. This way you don't have to replace anything inside the swamp cooler. You just plug the cooler straight into the inverter.
Each option has advantages and disadvantages. In the first option, you essentially have to rebuild the cooler. In the second option, you have to buy and install additional equipment: a battery, a charge controller, and an inverter. This may work out to be more expensive, but technically it is the more efficient option. It also allows your cooler to work at night, which is not possible with a direct solar system.
4. Calculate Energy Usage
Calculate how much electrical energy in kilowatt-hours, or kWh, the swamp cooler will use each day. For instance, if you calculated its power usage as 161 watts, multiply this number by the number of hours each day you want to run the cooler. If the cooler runs for six hours a day during the hottest part of the year, multiply 161 watts by six hours a day to give 966 watt-hours per day. Divide by 1,000 to get 0.966 kWh per day.
Design the System
1. Calculate Needed Power
Determine the power of the solar panel you will need. In sunny areas of the United States, solar designers use a guideline based on five to six peak hours of sunshine a day. So the solar panel should be rated at about 200 watts. This panel will produce between 1.0 and 1.2 kWh of electricity each day — which should be enough energy to run the swamp cooler for six hours a day. If the panel are slightly oversized, this is better since there will be losses in the batteries and inverter that will reduce the amount of electricity that gets to the cooler.
2. Determine Battery Needs
Calculate how many batteries you will need, the size of the charge controller, and the power of the inverter. A 100-amp-hour, 12-volt battery can store 1.2 kWh of electricity, so in this case you would need only one battery.
3. Select a Charge Controller
The charge controller ensures that the battery is not overcharged by the solar panel. The 200-watt panel will produce about 16 volts DC when charging the battery. That's a current of about 12.5 amps. So select a charge controller that is rated for more than this current. The inverter has to produce the required power: in this case, 161 watts. Select a small 12-volt inverter rated at more than this power so that the higher start-up current of the blower motor is not a problem. A 200-watt inverter should work fine.
4. Choose an Installation Location
Decide where you will install the equipment. The solar panel should be located in a place where nothing blocks the sun's rays during the day. It does not necessarily have to be on the roof of your house, but this is often the only place that does not get any shade. The panel should face south and be inclined at an angle equal to the latitude of your location.
The battery should be inside the house in a cool place where there is plenty of ventilation to disperse the gases given off when the battery is charging. Measure the distance in feet from the solar panel to the battery, tracing the route the connecting wires will take. Multiply this distance by two. You will need to buy this length of wire.
Install and Start Your System
1. Buy the Equipment
Go to a solar energy equipment supplier or find online suppliers that sell the equipment you need. Purchase the panel, the battery, the charge controller, the inverter, and the cable needed to connect them all together. The thickness of the copper cable is important. Ask the equipment supplier what gauge of copper wire you need for the solar panel you have purchased.
2. Install the Equipment
Install the panel following the instructions in the installation manual. Put the battery in the place you have chosen for it and install the charge controller on a wall close by. Mount the inverter on a wall in the house anywhere convenient between the charge controller and the swamp cooler. Make sure both the charge controller and the inverter are switched off. Connect the solar panel to the terminal in the charge controller marked "PV" or "solar"; then connect the battery to the terminals in the charge controller marked "battery." Finally, connect the inverter to the terminals in the charge controller marked "load."
3. Start Cooling With Solar Power
Turn on the charge controller and check that it is working as described in the installation manual. Let the charge controller charge the battery for most of the day before testing the inverter. Turn on the inverter and check that it is working correctly. Connect the inverter 115-volt AC outlet to the swamp cooler. The cooler should start up and start blowing cool air into the house.
Tip
Cooling a house in a hot climate requires more than evaporative cooling or air conditioning. Look at ways to cool your home by adding thermal insulation to or finding ways to shade west-facing walls that get a lot of sunshine in the afternoon.