How To Connect End Caps On Electrical Wire
We may receive a commission on purchases made from links.
End caps for electrical wires are often called wire caps or wire nuts. Wire Nut is actually a trademark name of Ideal Industries, but, similar to terms such as Velcro and Kleenex, it has entered everyday vocabulary. Whatever you call them, electrical caps are an essential supply for any wiring job. The most common type are screw-on connectors, but push-on connectors are also available.
The most important thing to remember when purchasing or using wire caps is to select one that is large enough to accommodate the wires you are joining. The wires should all be the same gauge. The electrical code doesn't permit connecting different size wires in the same circuit.
Size Wire Caps by Manufacturer's Specifications, Not by Color
Size Wire Caps by Manufacturer's Specifications, Not by Color
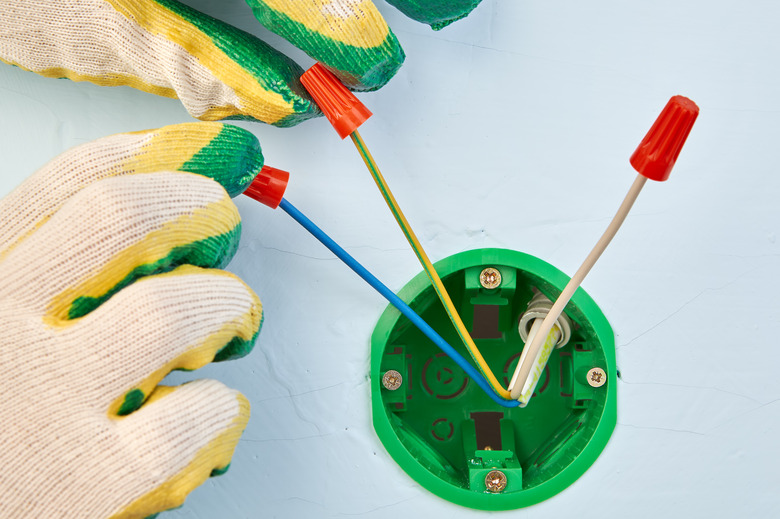
Screw-on wire caps are conical and made of plastic, often with ribbing or wings to make them easier to grip. Inside, at the narrow end of the cone, a threaded conducting metal grips the ends of the wires you want to join and twists them together when you screw the cap clockwise. Push-on connectors are similar, but instead screw threads, they feature a locking mechanism that holds the wires securely. All you have to do is push the wires into the connector openings.
When you shop for wire caps, you'll see a rainbow of colors, and they appear to conform to a color scheme that indicates which wire gauge they are for. While this scheme does apply to a point, you can't rely on it, because there are no standards that govern it. Instead, you should check the label on the container for the manufacturer's wire gauge recommendations. If you want to use a large nut intended for heavy gauge wire to connect several smaller-gauge wires, you should check the specifications for the maximum wire diameter the connector is designed to hold.
To Twist or Not to Twist?
To Twist or Not to Twist?
Before connecting wires with a wire cap, strip about a half inch of insulation from the end of each wire to be joined. Use a wire stripper for this. It's cleaner and easier than using a knife. Straighten out the stripped ends of the wires and hold the wires together so the ends are parallel. Slip the cap over the ends and screw it on. Keep tightening until the visible, insulated wires outside the cap begin to twist together, which means that the bare wires under the cap are as tight as they can be.
Many electricians add one more step to this procedure. They twist the wire ends together with pliers before screwing on the cap. This provides insurance against separating, and is recommended. If you do twist the wires, twist them clockwise. If you go the other way, the wire cap will actually loosen the wires when you screw it on.
Safety Considerations When Using Wire Caps
Safety Considerations When Using Wire Caps
As is true when you're doing any electrical work, it's important to turn off the power before you touch exposed wires. Keep a voltage tester handy so you can test each wire individually.
Strip just enough wire to fit inside the cap. No exposed wire should be visible outside it. If there are exposed wires, it's safer to redo the connection than to cover the cap with electrical tape, but tape is always an option.
Use waterproof wire caps whenever doing exterior or underground wiring. These are usually filled with silicone sealant and, unlike interior wire caps, are not reusable.
Connect stranded and solid wires by extending the end of the stranded wire about 1/8 inch past the end of the solid one, That way, when you screw on the cap, the stranded wire will bond securely to the exposed end of the solid one and not to the insulation.