How To Adjust A Honeywell Gas Valve
Honeywell offers a wide variety of gas valves for residential and commercial properties which control the hot water heater or boiler. Honeywell valves offer the user the ability to adjust the temperature of the water, the pilot light and the pressure of the tank in easy to access areas. Adjusting a Honeywell gas valve is very simple. However, take care not to over-adjust any of the areas, which could lead to burns or failure of the water heater.
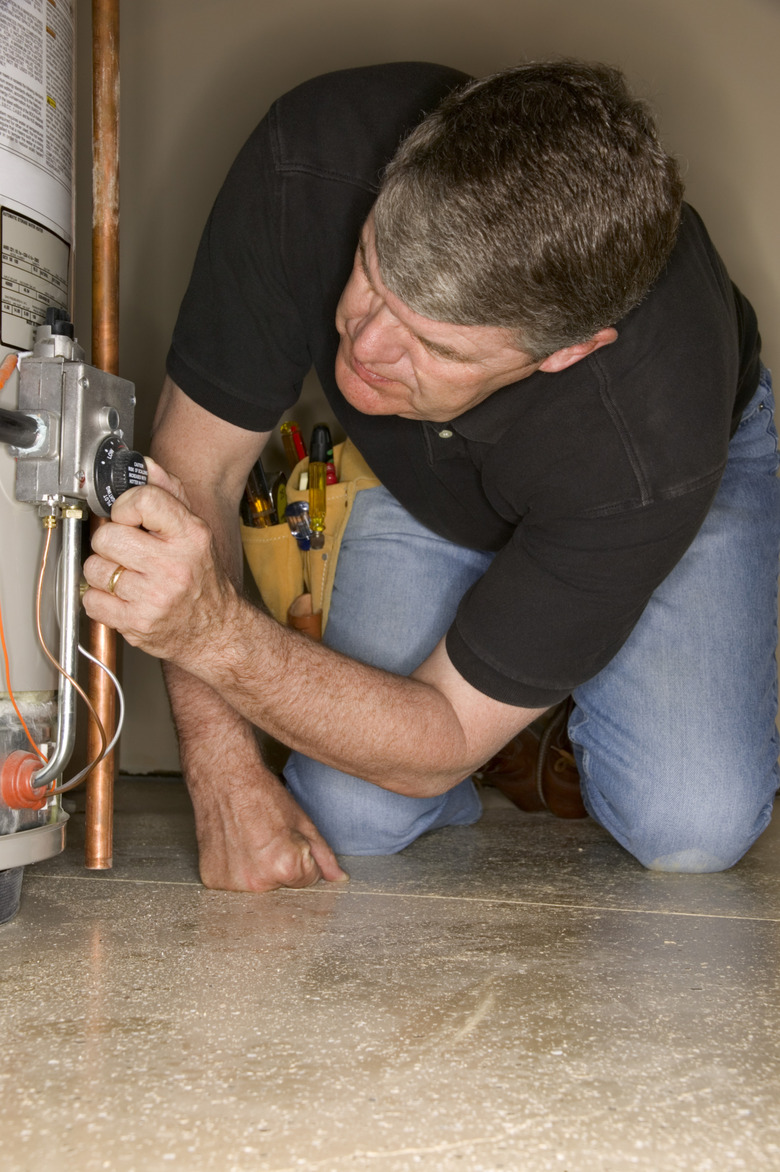
Water Temperature
Step 1
Find the water temperature dial located on the front of the gas valve. The dial will typically have listings such as "Low," "Pilot," "Warm," "Hot" and "Very Hot" listed on the dial, along with letters like "A" and "B" listed between the words on the dial.
Step 2
Lower the temperature of the water by turning the dial towards the low section of the dial. If leaving for vacation or other extended period, move the dial all the way to "Low" to save on gas costs since you will not use the water.
Step 3
Turn the dial towards "Very Hot" to raise the water temperature. The "Very Hot" setting can reach 160 F for a residential water heater. This temperature can cause burns. Be very careful when moving the water temperature higher on the gas valve.
Pilot Light
Step 1
Remove the screw cap cover to the pilot light adjustment screw with a screwdriver. If the gas valve has the pilot light adjustment screw it is located on top of the gas valve. The pilot light adjustment will raise or lower the height of the light inside. Not all Honeywell gas valves have this option.
Step 2
Use the screwdriver to turn the screw clockwise to lower the pilot light. This moves the screw into the gas valve, lowering the flame. Turning this screw too much will extinguish the pilot light.
Step 3
Turn the screw counterclockwise to raise the screw which will raise the height of the pilot light. Raising the pilot light too much may trigger breakers within the valve, shutting down the system.
Step 4
Replace the cap screw over the pilot light screw once you have found the desired pilot light setting.
Pressure Regulator
Step 1
Remove the cap screw covering the pressure regulator screw located on the front or top of the Honeywell gas valve, depending on the model. The pressure regulator measures the amount of pressure present within the water heater. It is important that the gas valve matches the pressure rating of the water heater along with the type of gas such as natural gas or propane.
Step 2
Turn the screw clockwise to raise the pressure of the water heater.
Step 3
Turn the screw counterclockwise to lower the pressure of the water tank.
Step 4
Replace the cap screw once the desired pressure setting has been reached.