DIY Homemade Shower Rock Wall
We may receive a commission on purchases made from links.
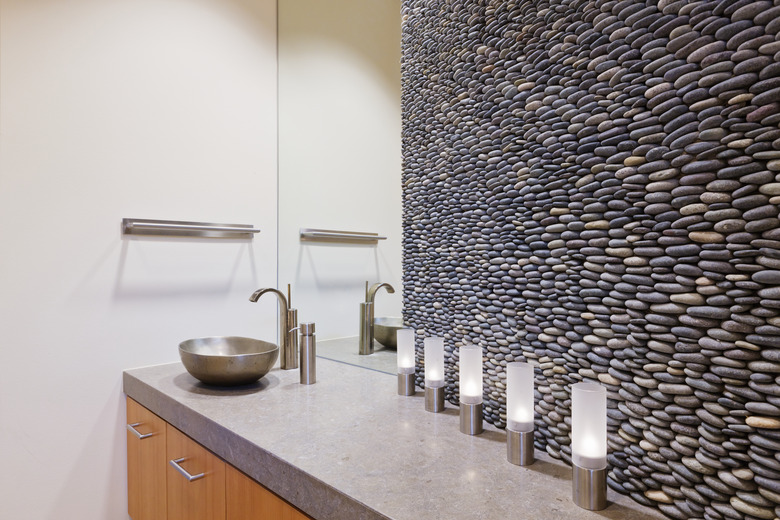
The sound of trickling water over rocks creates a tranquil and soothing sensation. Enjoy this feeling every day as you shower with a rock shower wall. Whether you want to cover all the shower walls with rocks or make an accent wall, you can create a homemade river rock shower wall with a little time and some work.
Use river rocks to build rock shower for their round or oval shapes and smooth surface. Since each rock has a distinctive shape, design the layout ahead of time using your shower wall measurements to ensure the rocks fit properly and create a visually pleasing look.
1. Install Cement Backerboard
Install cement backerboard inside the shower enclosure. Secure the boards in place by hammering finishing nails through the boards into the wall studs or shower frame studs. This water-resistant material makes the set-up suitable for shower walls.
2. Measure the Wall
Measure the wall in the shower. Have the 1-by-4-inch pieces of wood cut to the wall specifications. Lay out the boards on the floor to map out the stones before you attach them to the backerboard. Ensuring accuracy at this point is vital, so that the finished product looks well-planned.
3. Prepare the Mortar
Prepare Type S mortar in the large bucket according to the manufacturer's instructions. Mix one bag at a time to ensure the mortar does not begin to dry and set before you add it to the wall. You can find this kind of mortar at home improvement stores such as Home Depot and Amazon.
4. Ensure Proper Mortar Consistency
Mix the mortar with potable water. Use the mixing attachment on your electric drill to combine the water and mortar. Test for the right texture by scooping a thin portion up with your trowel and holding it at 90-degree angle. The mortar should remain on the trowel. If it does not remain on the trowel, the consistency is too fluid, which means you've added too much water. Correct the problem by adding more mortar until the mixture remains on the trowel when tested.
5. Apply Mortar to Wall
Don your work gloves. Scoop up a handful of mortar and place it on the wall. Smooth the mortar over the wall in a 1/2-inch layer. Continue applying the mortar in this manner until you cover the entire wall. Ensure that the mortar is applied at a consistent thickness across the wall.
6. Trowel Over the Mortar
Drag the notched side of the trowel over the mortar to create grooves. Let the mortar cure or dry for 48 hours.
7. Prepare Another Batch of Mortar
Put on your work gloves again and prepare another batch of mortar in the bucket.
8. Apply Rocks to Wall
Add a thin layer of mortar to the wall with the trowel, beginning at the bottom right corner of the wall. Put a layer of mortar onto a river rock and press it to the wall. Continue adding the rocks in a row until you cover the entire wall. Let the wall cure for 48 hours.
9. Seal Rock Wall
Seal the shower rock wall with a water-based masonry sealer. Use a paintbrush to apply the sealer to the wall. Let it dry according to the manufacturer's instructions. This will usually be 24 to 48 hours, before you can use the shower.