Although they both dispense water in exactly the same way once installed, a wall-mount faucet is very different from a deck-mount one. The installation of a wall-mount faucet requires more planning and more careful measurements, and it involves installing water supply lines behind the wall. Unless your DIY know-how and plumbing skills are better than average and you're confident you can make leak-free connections that will be sealed behind a wall covering, you should think twice about doing this yourself.
On the other hand, the job is akin to installing a shower valve, and it's even a bit easier, so if you're comfortable with rough-in plumbing, you're good to tear open the wall or backsplash, assemble your tools and supplies and start making measurements. Some of the tasks the job could involve include:
Video of the Day
Video of the Day
- Installing new shutoff valves
- Modifying the framing
- Soldering pipe connections
Depending on the type of faucet you have and if you have a wall or backsplash made of tile, stone or some other difficult-to-remove material, it might be easier to go into an adjacent room and install the plumbing from the other side of the wall.
Considerations for Design
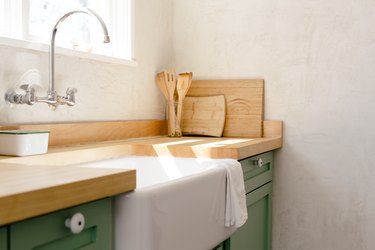
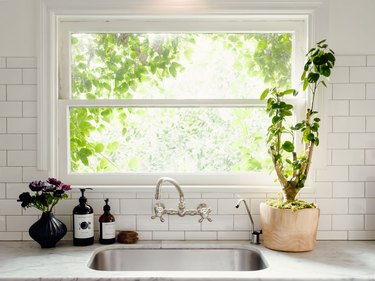
It's important to place the faucet at the correct height above the sink. If it's too high, water will splash, and if it's too low, you won't have any working room. The minimum distance from the spout to the flood rim of the sink allowed by code is 1 inch, but there's no maximum. Moen recommends 3 inches as the ideal height for a bathroom faucet, but a kitchen sink is deeper than a bathroom one, so you'll want to set your kitchen faucet higher to provide enough space for getting underneath the faucet with large pots and pans.
When installing a wall-mount bathroom faucet, be sure you choose one with a spout long enough to clear the back of the sink. A wall-mount kitchen faucet usually has a long spout but not a bathroom one, and you could have problems with a short spout, especially when used in conjunction with a wall-mount or vessel sink.
Things You'll Need
2x4 lumber
2 1/2-inch wood screws
1/2-inch copper or PEX water pipe
Two shutoff valves
Two 1/2-inch threaded elbows
1 1/4-inch screws
1/2-inch brass pipe nipples
Duct tape
Soldering supplies
Level
Locking pliers
Screwdriver
How to Install a Wall-Mount Faucet
Step 1: Consult the Installation Instructions
Read the installation instructions that come with your faucet. They include specifications that apply to your specific faucet model, and you need to follow them carefully. In particular, pay attention to the blocking requirements, including the setback if you're installing an in-wall valve with removable faucet handles and a removable spout.
Step 2: Modify the Framing and Add Blocking
Identify the approximate placement of the center of the faucet and move any studs that are in the way. You don't always have to do this because some faucets, such as bridge-style ones, can reach over intervening studs, but if the valve is hidden in the wall, the studs will get in the way.
Install blocking, which is typically 2x4 lumber set between a pair of studs with its wide edge facing out. Screw the blocking to the studs with 2 1/2-inch wood screws.
Step 3: Run the Water Supply Lines and Install Shutoff Valves
Install 1/2-inch water supply lines. A plumber typically uses copper pipes, but you may prefer PEX, which is easier to install and less likely to leak if the pipes freeze in the wall. Don't forget to install shutoff valves for the hot and cold water.
If you're replacing a sink-mount faucet with a wall-mount faucet, you should be able to extend the existing water lines up the wall and use the existing shutoff valves. If it's a brand-new faucet and you can't hide the shutoff valves in a cabinet, find a place in the room or an adjacent one where you can hide them behind a removable panel. You can also locate them in another part of the house such as the basement or crawl space depending on where the pipes go.
Step 4: Terminate the Pipes or Install the Valve
The termination depends on the type of faucet you have and the type of pipes. To install a standard double-handle bridge-style faucet onto copper pipes, solder a copper or brass elbow to each pipe with a 1/2-inch IPS threaded inlet facing out and screw the fitting onto the blocking with 1 1/4-inch screws. If you're using PEX pipes, use an appropriate PEX fitting instead.
If the faucet has a hidden valve, install it according to the manufacturer's instructions, soldering copper pipes to the valve or using appropriate PEX fittings as needed. Be sure to level the valve before you tighten the screws holding it to the blocking.
Step 5: Install Pipe Nipples
For a faucet that doesn't have an in-wall valve, screw a 1/2-inch brass nipple into each of the elbows you prepared. Make sure the nipples are long enough to reach beyond the wall for the distance recommended by the manufacturer. Cover the nipple openings with duct tape to keep out debris while you replace the drywall or other wall covering.
If you're installing a faucet with an in-wall valve, it should have stub-outs that will extend through the wall covering, so you don't need to add nipples. The stub-outs should have protective covers to keep out debris during the installation.
Step 6: Finish the Wall and Install the Faucet or Faucet Trim
Finish the wall completely, including doing all the drywall and painting or the tiling and grout sealing along with other necessary details. Install the faucet or faucet trim according to the manufacturer's instructions. If you're installing a stainless steel, solid brass or other type of utility faucet, use the compression nuts that come with it and tighten them with locking pliers. If your faucet has a hidden valve, you usually screw the trim onto the valve stub-outs and tighten a set screw to secure them using a screwdriver or Allen wrench.