
The steel or wood panels that make up a typical garage door are thin, and the door itself is usually separated from the frame and floor by sizable gaps when it's closed. Such a door doesn't provide much protection from winter winds, and that makes for a cold garage. If you want to use the garage for a workshop, or if there's a living space overhead, you have to spend extra money for heating—maybe a lot of money—and it's really an unnecessary expense. Insulating a garage door is inexpensive and easy to do, and it makes a big difference.
Besides giving you a warmer garage and lowering your heating bill, garage door insulation provides soundproofing: It prevents your power tools—or your son's rock band—from causing a neighborhood disturbance, and it keeps traffic noise outside so you can enjoy listening to your favorite classical music while you work. What does it take to get all these benefits? A cash outlay of between $60 and $150 and about 3 or 4 hours of your time. No heavy-duty construction is involved, and you don't need any power tools. You might already have most of the materials you need around the house, but if not, they are on the shelves at your local home improvement outlet.
Video of the Day
Video of the Day
MaterialsYou Need to Insulate Garage Doors
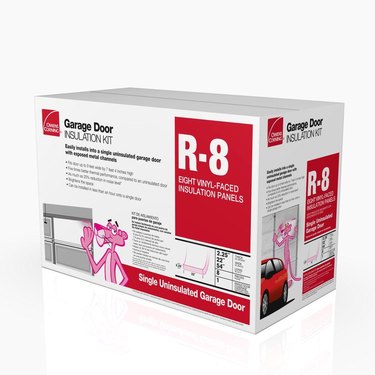
The easiest way to assemble the materials you need to insulate your garage door is to buy a kit. Commercial kits contain enough foil-faced rigid foam or fiberglass batt panels to finish the job. If you spend a bit more, you can get a kit that includes tape, gloves, a dust mask and even a knife. The main advantage to buying a kit is that it contains special hooks for fastening the insulation material to the door.
If you decide to forgo the kit, you'll need to buy the insulation separately. If you opt for rigid foam, you can choose expanded or extruded polystyrene (EPS or XPS) or polyisocyanurate, as long as it's thinner than the cavities on the door into which it must fit. A thickness of 1 1/2 inches works for most doors. You can also choose 1 1/2-inch batt insulation sold for insulating ductwork. Don't use conventional 3 1/2 inch fiberglass insulation; you'll have to compress it to fit it in the door cavities, and compressed insulation reduces its R-value.
Warning
Unfaced insulation is often flammable, and using it could violate local building codes. Stick to foil-faced insulation unless the packaging specifically states that the insulation is fire-safe.
Insulating a Garage Door with Rigid Foam
Foil-backed rigid foam insulation is easy to fit into garage door panels. If you cut the pieces accurately, you can fit them snugly underneath the panel lips, but you still need to secure them with tape or construction adhesive to keep them in place when the door is open. The process for installing them involves the following steps.
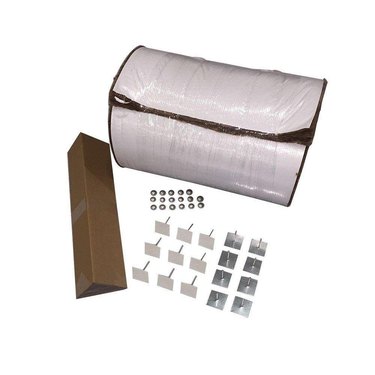
Things You'll Need
Tape measure
Foil-backed rigid insulation
Straightedge
Felt marker
Utility knife
Construction adhesive
Caulking gun
Tape
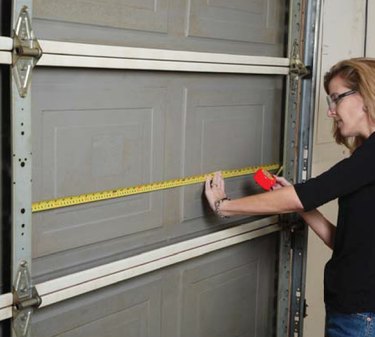
- Measure the length and width of each panel, using a tape measure. Transfer the measurements onto a panel of foil-backed insulation and draw cutting lines with a straightedge and felt marker.
- Score along one of the lines, using a utility knife and straightedge, and continue the score to the edges of the panel. Break along the line and cut the foil on the back. Repeat the process to cut in the perpendicular direction. The process is similar to cutting drywall. Cut out notches as needed with the knife.
- Apply construction adhesive to the back of the piece you just cut and fit it into place. It should stay in place by itself, but if not, secure it temporarily with tape.
- Fill all the panels in the same way. Let the adhesive set for an hour, then remove any tape holding the panels and apply insulating tape to cover the gaps between panels.
Insulating a Garage Door with Batts
The basic procedure for installing batt insulation is similar to that for installing rigid foam. If you buy an insulation kit, use the hooks that come with it to secure the insulation to the door. They are easy to use and eliminate the need for adhesive.
- Measure each panel and cut the insulation to about an inch wider and longer than the measurements for a snug fit.
- Install two hooks on each panel, spaced equidistant from the edges. Each hook has a base and a cap. Remove the cap and stick the base to the door.
- Place the insulation over the hooks and stuff the edges underneath the panel lips and into the crevices. Make a small cut to allow each hook base to pass through the backing, then snap on the cap.
- Tape the gaps between panels with insulating tape when you've finished installing the insulation.
Tip
If you don't have hooks, secure the insulation to the panels with the tape or adhesive recommended by the insulation manufacturer.
Weatherstripping Your Garage Door
The insulation job isn't complete until you install weatherstripping. The gaps on the top and sides of a garage door are often wide—so wide that dust and rain may be carried into the garage along with the wind. Weatherstripping costs less than $10 for a 9-foot strip, and you'll need at least three strips for a typical door. Cut the weatherstripping to length with a knife, and nail or screw it to the door frame when the door is closed.
Most garage doors are already equipped with a bottom seal. If yours has worn out, you can usually pull the rubber insert out of its holder and slide in a replacement. If your door doesn't have a bottom seal, you can buy the holder and insert the holder and seal at the same time. Secure the holder to the bottom of the door with screws or nails.
Don't Forget the Side Entry Door
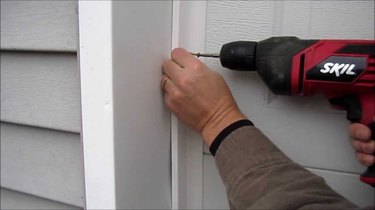
While the large overhead door is the main point of heat loss and draftiness in a garage, don't neglect the side entry door. Inspect the weatherstripping along the sides and bottom of the side entry door, and repair or replace the seals, if necessary, to reduce heat loss and eliminate drafts. Installing a storm door, or replacing the side entry door with an insulated fiberglass or foam-filled steel door will give you the best protection against heat loss and drafts.