If you're an old-house person, you probably need no convincing that plaster is far superior to drywall. It feels more solid, it's better for soundproofing and it has a texture that's much more pleasing to the eye than generic sprayed-on drywall textures. But plaster isn't perfect. It tends to crack over time, and when you drill or hammer into it, you can end up with a much bigger hole than you wanted. Plaster also seems more complicated than drywall, since the material is hand-applied rather than screwed in place. As it turns out, that's another advantage of plaster, as repairing ordinary cracks and holes isn't much more difficult than icing a cake (which, for old-house enthusiasts, might just be the icing on the cake).
Video of the Day
Checking for Loose Plaster
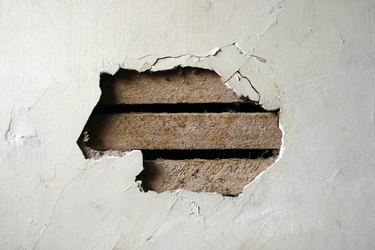
Traditional plaster is applied wet over strips of wood lath, pressed between the gaps so that the hardened segments of plaster (called keys) grip tightly. But over time the plaster can separate from the wood lath, creating a thin hollow space between the plaster layer and the lath. It is also possible that the wood lath itself may have loosened from the studs to which they are attached, which will require that the wall itself be reinforced with additional nails or screws. Newer plaster installations may use a type of porous gypsum backer board known as rock lathe, or the installation may use metal lath, a porous steel fabric into which the wet plaster is pressed during application. However, the principles for patching cracks or holes are the same no matter what type of lath was used in the original installation. The instructions given below assume you have wood lath behind your plaster but are easily adapted to other types of lath.
Video of the Day
If you try to repair an area where the plaster has come loose, the plaster can move and crack your repair job. Therefore, it's a good idea to check for looseness that indicates a broken bond with the lath before making your repair. Carefully tap along the edges of the crack or hole with the handle of a tool, such as a drywall knife, or with a small hammer. If the tapping sounds or feels hollow—and more so than when tapping in surrounding areas—the plaster may be loose. You can also push along the edges of cracks to see if the plaster moves in and out.
There's a simple fix for loose plaster, assuming the problem isn't significant:
- Drill holes spaced about 3 inches apart on both sides of the crack or around the perimeter of the hole, using a 3/8-inch masonry drill bit. Drill just through the plaster, and stop when you hit the wood behind. If you don't hit any wood, circle the hole with a pencil to identify it as a "miss."
- Squirt plaster adhesive (sold in tubes applied with caulk gun) into each hole, ignoring the circled holes.
- Secure the plaster with evenly spaced drywall screws fitted with plaster washers. Drive the screws through the plaster and into the wood; don't drive them in the drilled holes. You will cover the screws and washers with drywall mud (as well as the "miss" holes) after you make the repair.
Tip
If you detect large areas of loose plaster—especially on a ceiling—have it inspected by a restoration professional. Plaster is very heavy and can break free from lath and fall off in large pieces, which is potentially dangerous.
How to Repair Cracks in Plaster
Repairing cracks in plaster can be done with the same materials used in standard drywall finishing projects. For such small repairs, buy a small tub of premixed drywall joint compound rather than mixing up a large quantity.
Things You'll Need
Putty knife or painter’s 5-in-1 tool
100- and 150-grit sandpaper or sanding sponges
Rags
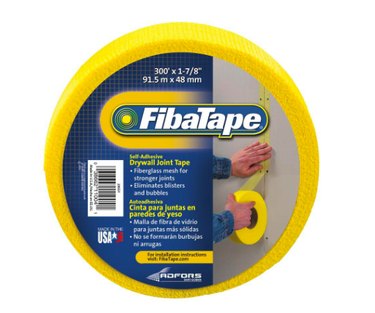
Fiberglass mesh drywall joint tape
All-purpose drywall joint compound
6-inch drywall knife
Primer, paint and painting supplies (as needed)
Step 1: Clean Out the Crack
To make effective repairs to plaster cracks with drywall mud and fiberglass tape, the crack needs to be clean and free of loose material and debris.
- Use a putty knife or a painter's 5-in-1 tool to scrape out loose plaster or old repair material from the crack. You don't have to dig out the solid plaster; just remove the loose stuff.
- Sand along the edges of the crack and about 6 inches to either side of the crack with 100-grit sandpaper (a sanding sponge works well for this). The goal with sanding is to remove any loose paint or plaster flakes and to roughen the surrounding painted area so the repair materials will stick to the surface.
- Remove all sanding dust from the area with a slightly damp rag, and let the surface dry.
Step 2: Tape and Mud the Crack
Plaster cracks can be effectively repaired with ordinary drywall compound and fiberglass tape, which is self-adhesive and readily sticks to the wall surfaces.
- Apply self-adhesive mesh drywall joint tape over the crack. Press and smooth the tape onto the surface with a 6-inch drywall knife.
- Apply a thin coat of premixed all-purpose drywall joint compound (mud) to the crack with the drywall knife.
- Force the mud into the crack so it is completely filled, then make additional passes with the knife to smooth the mud layer over the tape. It's okay if the mesh shows through the initial coat; too thin is better than too thick.
- Let the mud dry overnight.
Step 3: Apply the Second Mud Coat
Once the first coat of mud is dry, apply a second coat to raise the surface of the patch and completely cover the fiberglass tape.
- Scrape the mudded area carefully with the 6-inch knife to remove any blobs or chunks of hardened mud.
- Apply a second thin coat of mud over the entire repair area, spreading it out a little wider than the first coat to "feather" the mud into the surrounding surfaces. This coat should be just thick enough to cover the mesh tape.
- Let the mud dry overnight.
Step 4: Finish the Repair
Finishing the crack repair requires a final coat of mud, then very light sanding to remove irregularities. Make sure not to over-sand, exposing the fiberglass tape.
- Scrape the dried mud, as before, then apply a final thin coat of fresh mud, feathering it out at the edges so it is flush with the surrounding wall.
- Let the mud dry overnight.
- Sand the mudded area with 150-grit sandpaper (or a sanding sponge) to smooth out any imperfections.
- Wipe off all sanding dust with a dry rag.
- Prime and paint the patch to match the surrounding surface.
Tip
If the old plaster surface is heavily textured, use drywall mud to create a matching texture over the smooth patch. It’s usually best to thin the mud as needed with water, then apply it with any tool that will simulate the original texture, such as a drywall knife, a whisk broom, a sponge or a paint roller.
How to Repair Holes in Plaster
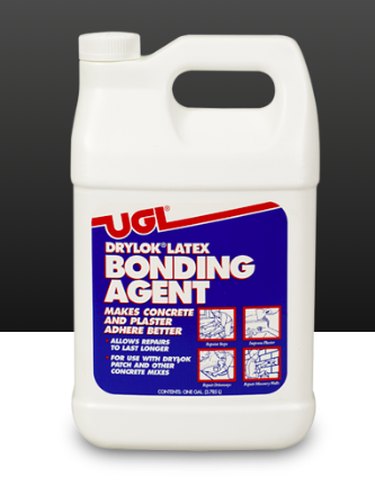
Repairing larger holes in plaster uses many of the same tools and materials as crack repair, but instead of drywall compound, you will use patching plaster. This repair also calls for a latex bonding agent that helps the patching plaster adhere to the lath.
Things You'll Need
Putty knife or painter's 5-in-1 tool
100-grit and 150-grit sandpaper or sanding sponge
Rags
Liquid bonding agent
Paintbrush
Patching plaster
Margin trowel
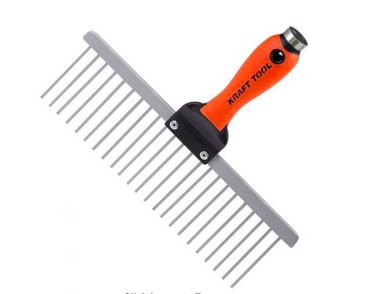
Scarifying tool (optional)
6-inch drywall knife
Premixed all-purpose drywall compound
150-grit sandpaper or sanding sponge
Primer, paint and painting supplies (as needed)
Step 1: Prepare the Patch Area
Cleaning the patch area and removing loose debris is essential to a long-lasting patch.
- Scrape along the edges of the hole to remove all loose plaster and peeling paint, using a putty knife or a painter's 5-in-1 tool. Also, remove any loose plaster from the interior of the hole.
- Sand the painted surface in an area about 6 inches beyond the perimeter of the hole, using 100-grit sandpaper (a sanding sponge works well for this). The goal with sanding is to remove any loose paint or plaster flakes and to roughen the surrounding painted area so the repair materials will stick to the surface.
- Remove all sanding dust from the area with a slightly damp rag, and let the surface dry.
- Coat all surfaces inside and around the hole with liquid bonding agent, using a paintbrush. Let the agent set or dry as directed. This treatment acts as an adhesive and seals over the dry wood to prevent premature drying of the patching material.
Tip
For very small holes, you can simply remove loose plaster from the hole, then fill the hole with patching plaster or spackling compound, smoothing the surface with a putty knife. Let the patch dry, then touch up the area with paint.
Step 2: Apply the First Patch Coat
Effective patching of holes in plaster is best done with several layers of patching plaster. Avoid the temptation to complete the patch with a single application. Applied too thick, patching plaster can take a very long time to dry and may be weaker if not allowed to dry fully.
- Apply a base layer of patching plaster to the hole, using a margin trowel. Press the plaster against the wood lath so it squeezes in between the gaps for a strong bond. Fill the hole to about half of its depth with this first layer.
- If recommended by the manufacturer, scarify the surface of the plaster with a crosshatching of lines about 1/4 inch apart, using a nail or flat-blade screwdriver (or use a scarifying tool if you have one).
- Let the plaster set as directed by the manufacturer.
Step 3: Apply the Second Patch Coat
Once the first coat is fully dry, fill the remainder of the hole with patching plaster, using a 6-inch drywall knife. Smooth the plaster flush with the surrounding surface. Let the plaster dry as directed.
Step 4: Finish the Repair
A bit of artistry is required to finish the repair area, especially if you are trying to match a textured surface. The finishing is done with drywall compound, not patching plaster.
- Scrape the dried patch area smooth with a 6-inch drywall knife to remove any blobs or chunks of hardened patching plaster.
- Apply a thin coat of premixed all-purpose drywall compound ("mud") over the entire repair area, spreading it out a little wider than the plaster to "feather" the mud into the surrounding surfaces.
- Let the mud dry overnight.
- Sand the mudded area with 150-grit sandpaper (or a sanding sponge) to smooth out any imperfections.
- Wipe off all sanding dust with a dry rag.
- If desired, texturize the patch to blend it in with the rest of the wall or ceiling.
- Prime and paint the patch to match the surrounding area.