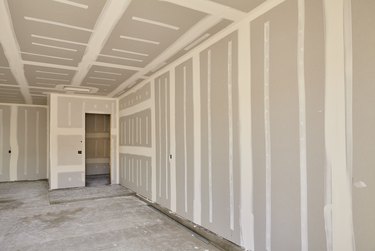
Drywall became a "thing" in North America during the construction boom following the Second World War. Prior to this, it was still common to cover interior walls by slathering plaster onto them. Installing drywall doesn't completely eliminate the need for a form of plaster, but you need a fraction of the amount you need for plaster walls, and it's a different material. The "plaster" used in drywall installation is actually a gypsum product called joint compound, which drywall professionals refer to as mud. The joints between drywall sheets are finished by covering them with paper or fiberglass tape, then covering the tape with several coats of mud. This process is called taping and mudding in the building trades, and when you do it properly, the wall is completely smooth and flat and ready for painting or texturing.
Useful Tools and Materials
Video of the Day
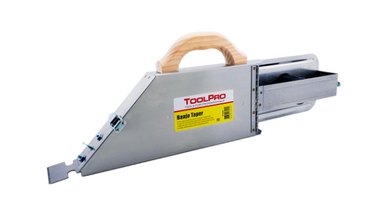
Taping and mudding can be slow work, especially when many rooms need finishing, but tools are available to speed it up. One of these is called a banjo. It applies tape and mud at the same time, turning two jobs into one. A banjo can be tricky to use, and it isn't essential, especially if you're mudding a single room. However, if you're planning a big job, or you have aspirations to turn mudding into a hobby or business, it's worth learning how to use one. It's a real time saver.
Video of the Day
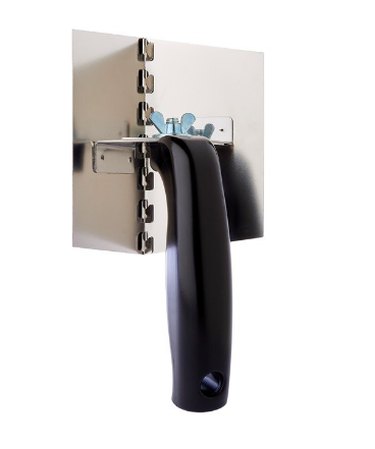
A corner trowel is another time-saving tool that allows you to scrape mud from inside corners in a single stroke. Like a banjo, it isn't essential; you can do all your corner mudding with a straight blade, but you'll work cleaner and faster if you have a corner trowel in your drywall tool set.
One more handy tool you'll want if you're going to mix your own mud is a stir rod that attaches to a power drill. It doesn't quite qualify as an essential tool, because you can stir with a stick, but it's worth the few dollars it takes to buy one.
The list of essential tools also includes a selection of flat drywall knives, a trough with a metal edge for scraping mud off your blades, and a sanding pole for sanding the wall after the final coat has dried.
About Drywall Tape and Corner Beading
You have your choice of paper or fiberglass mesh drywall tape. Paper is the traditional material, but many first-timers prefer the fiberglass variety because it's more flexible and easier to apply. Some brands of mesh tape even stick to the wall by themselves, which is a definite plus. There are two main drawbacks with mesh tape: that it can catch on the corner of your blade and come off the wall when you're scraping, and that it's difficult to cut.
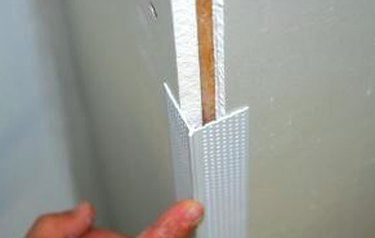
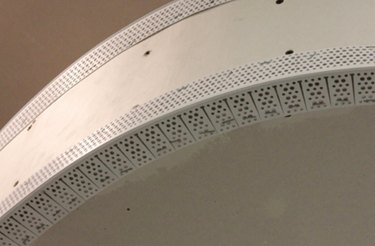
You can cover inside corners with drywall tape, but it's better to use inside corner beading. Corner beading is a length of fiberglass or aluminum molded to fit in the corner and bordered by paper tape so you can stick it to the wall with mud. You can use the same type of beading for outside corners, although the traditional way to cover them is to fasten solid metal or vinyl beading with screws or nails, then cover it with mud. Installing beading on outside corners is usually part of drywall installation—not finishing‚ but if you use the vinyl variety, applying it is part of the mudding job.
Both inside and outside corner beading is sold both as rigid lengths of beading, or in rolls that you cut to the length you need.
How to Tape and Mud Drywall Seams
Although it's usually the job of the drywall installer to sink nail and screw heads at least 1/16 inch below the paper surface of the drywall, it's important to double-check this before you start finishing, because protruding nail or screw heads creates headaches when you're in the middle of mudding. Make sure to sink all such fasteners before you start taping, and you'll thank yourself.
Things You'll Need
5-gallon bucket
Stir stick or drill-powered stir rod
Pre-mixed or powdered joint compound
Mudding trough
Selection of drywall blades of different widths
Corner trowel
Banjo (optional)
Drywall tape (paper or fiberglass)
Scissors
Outside corner bead (if necessary)
Pole sander
120-grit sandpaper
Step 1: Mix the Mud
Fill a 5-gallon bucket with enough pre-mixed or powdered joint compound to last the day. You can use the pre-mixed variety straight out of the container, but it doesn't hurt to mix it with a small amount of water to make it more flexible. The powdered variety has to be mixed with water before you can use it.
Add water and stir with a stir stick or drill-powered stir rod. The final consistency of the mud should be like peanut butter. It should stay on your drywall blade even when you hold the blade vertically.
Step 2: Lay the Tape
For paper drywall tape: Transfer some mud to a mudding trough and spread a bead about 4 inches wide along the first flat drywall seam, using a 4-inch drywall knife. Lay the drywall tape on top of the mud and draw the knife along the seam to press it firmly into the mud. Hold the knife at an angle as you draw it along the seam. As the mud oozes out from under the sides of the tape, scrape it off and transfer the excess back into the mudding trough.
For fiberglass drywall tape: Cut a length of drywall tape and press it over the seam. Fiberglass tape is usually self-adhesive and will stick to the seam without first applying mud.
Tip
If you are using paper drywall tape, it helps to dip it in water before laying it on the seam.
Step 3: Install Corner Beading
- Cut inside corner beading to the length of the wall corner.
- Spread a coat of mud on the inside corner, extending it about 4 inches out onto each wall surface.
- Lay the corner bead into the mud and scrape the taped edges flat, making sure the bead flanges are flat against the walls.
- Install outside corner beading, if necessary (it may have already been installed during drywall installation). If you're using the same kind of paper-edged beading for the outside corners, install it the same way you did the inside corners.
- If the outside corners have been covered with metal beading by the installers, spread a coat of mud over the edges and scrape it flat, letting the edge of your blade extend past the edge of the wall as you do.
Step 4: Apply the First Coat of Mud
- Wait for the corner bead mud to dry, which takes anywhere from 8 to 24 hours, depending on the temperature and humidity.
- Apply the first top coat of mud over each seam, using a 6-to 8-inch drywall blade. Scrape off the excess mud with the edge of the blade and return it to the mudding trough. For best results, hold the blade at a 45-degree angle with respect to the surface and scrape along the seam, not across it. Some of the mud inevitably falls on the floor during this procedure, but you should be able to transfer most of it back to the trough.
- While you're applying the first coat, fill all the nail and screw holes with mud and scrape it flat.
Step 5: Apply Additional Coats of Mud
- Let the first coat of mud dry, then apply another coat, using a drywall knife with a wider blade. Inside and outside corners should also get another application of mud.
- Apply a second coat of mud to the fastener holes and scrape it flat.
- After the second coat dries, apply a third coat of mud with an even wider blade. The fasteners usually need only two coats, but you'll probably want to return to the seams with a third and possibly fourth coat, depending on how much luck you're having getting the joints flat. Drywalling pros typically end with a blade 12 inches or even wider.
- If the mudding application is very skilled, very little final sanding will be necessary. It is much less messy to apply three or four thin coats of mud than to over-apply too much mud, which leaves you with a lot of sanding.
Step 6: Sand the Final Coat
Use a pole sander and 120-grit sandpaper to sand the wall after the final coat has dried. Although you can do this job with a sanding block, a pole sander makes it easier and produces better results. After sanding, shine a light obliquely in the wall and look for gouges or ridges. Touch these up with more mud as needed, then sand again when the mud dries.
Handy Tips
Mudding is simple in principle, but it takes skill and practice to do it well and quickly. Here are some pro tips to help you do that:
- Spread the mud generously, but don't overdo it. If you lay mud too thick, it takes a long time to dry, and it is likely to crack.
- You shouldn't have to sand between coats, but don't hesitate to do it when necessary to cut down high ridges.
- Keep the mud in your trough free of debris, such as bits of paper and dried mud. When these get on your blade, they create lines on the wall as you scrape.
- Speed up drying time by running a heater or fan in the room. Some pros use quick-setting joint compound, which hardens in less than an hour. This is tricky to use and isn't recommended if you're mudding for the first time.
- Use fiberglass mesh tape in bathrooms or other rooms in which moisture could be a problem.
- Cover the floor with non-slip drop cloths. You will drop mud on the floor, and if you walk through it and track it on an uncovered floor, you'll have major cleanup to do after you've finished the mudding. Mud comes off easily with water, but it can be difficult to remove it from cracks between floorboards.