
DIY in a Day brings you step-by-step instructions for easy projects that will spruce up your space — within 24 hours (or less!).
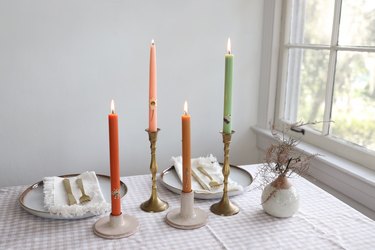
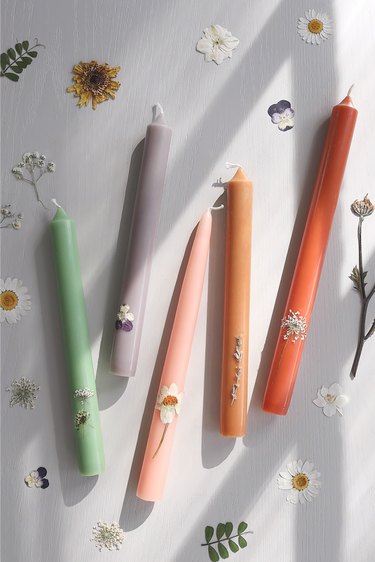
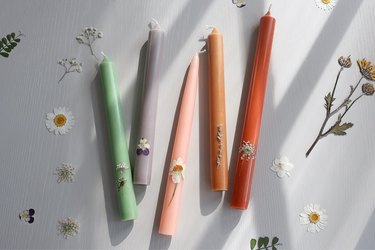
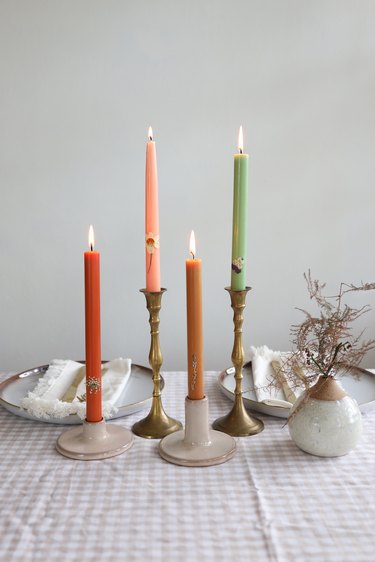
Bring botanical beauty to plain taper candles by pressing dried flowers into the wax. Not only is it an incredibly easy (and might we say enjoyable) DIY project, but the results are simply stunning. When tied together with ribbon, they make a thoughtful and unique gift, which you can easily customize by combining your preferred blooms and candle colors. Group them together to create a lovely centerpiece for festive gatherings, or scatter them around your home to perk up your desk, table, mantel, or shelves with pops of color and pretty petals.
Video of the Day
Things You'll Need
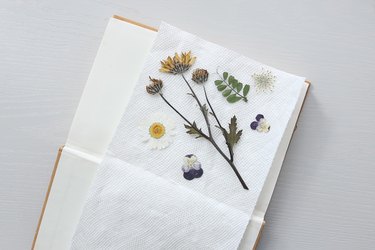
Pressed flowers (or make your own in advance)
Paper towel
Step 1
Either purchase pressed flowers, or press your own with a heavy book or flower press. For best results, you should plan to press them at least two weeks in advance. However, there are a few hacks out there, using a microwave or iron, if you want to speed up the process. We haven't tried them ourselves, but essentially you place the flowers between sheets of parchment paper, and either microwave them on low under a heavy plate for 30-second increments, or iron them on a flat surface for 15-second increments, until flat and dry.
Step 2
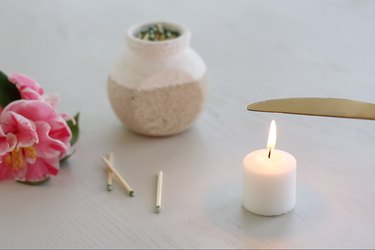
Light a tea candle or other small candle that you don't mind burning for the duration of the project (you'll just be using it as a heat source). Hold a clean butter knife an inch above the flame for about ten seconds. Don't put the knife directly in the flame, or else it'll produce black soot.
Step 3
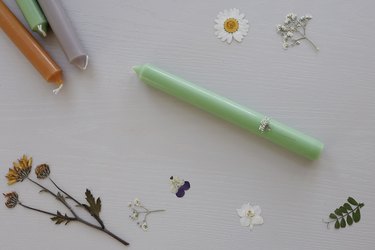
Place a pressed flower or leaf near the bottom of the taper candle. (If you place it towards the top, it'll just get covered in wax faster as the candle melts and drips.) Smaller delicate flowers and leaves work best, but definitely experiment with different floral varieties!
Step 4
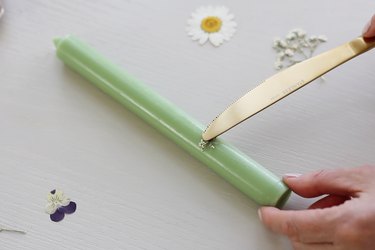
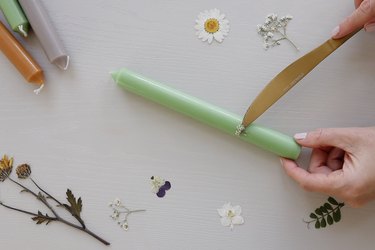
Gently press the hot knife in the center of the flower and hold for a few seconds, just long enough to melt the wax slightly underneath the flower. As the wax cools, the flower will set inside the wax.
Step 5
Hold the knife above the flame to re-heat it, and then lightly run it around the edges of the flower. Be careful not to touch the wax outside the flower to avoid creating any dents or drip marks. Repeat as needed until the flower is securely attached to the candle.
Step 6
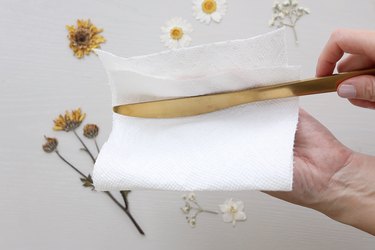
Wipe the knife on a clean paper towel in between making each candle, especially if you're using various candle colors.
And that's it! So easy. Either package them with ribbon and give as a gift, or place your beautiful new floral candles in candle holders, and enjoy the flowery glow!