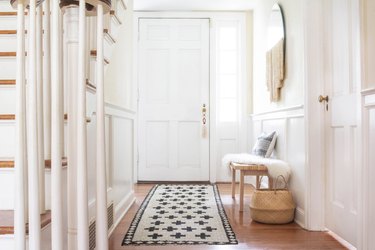
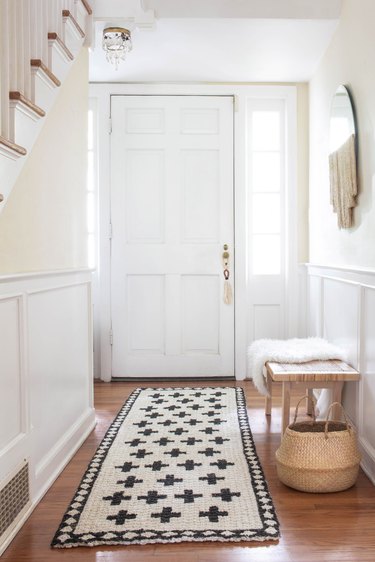
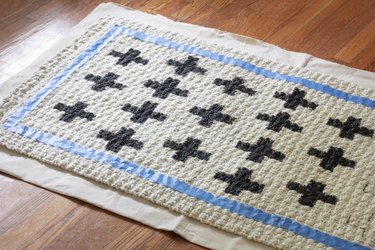
Choosing a natural fiber rug for your home is always a great idea. From jute to sisal to seagrass or hemp, they impart a fabulous earthy texture to a space and offer lasting durability, among other advantages. But maybe you're like us, and came across a drool-inducing Moroccan vintage rug with a one-of-a-kind pattern you simply couldn't stop obsessing over? And you had a light-bulb moment when you realized you could paint a similar pattern onto a plain jute rug, leveraging a practical rug choice into a beautiful design statement? It turns out painting a natural fiber rug is actually really easy, and we're sharing everything we know so you can do it, too.
Video of the Day
Things You'll Need
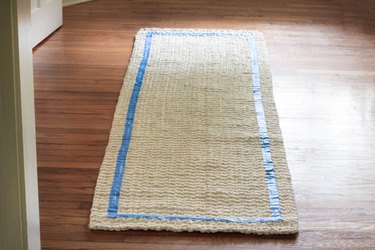
Jute or other natural fiber rug (we used this one)
Free cross template and diamond template
Printer
Cardstock
Scissors
Utility knife
Painter's tape
Drop cloth
Ruler or tape measure
Marker
Latex paint in matte finish (see notes)
1 1/2-inch paintbrush
Spray bottle
Scotchgard (optional)
Tip
(1) While fabric paint would work for this project, a water-based latex paint works just as well, and is a more affordable option if you're painting a large rug size. (2) If you're concerned about the rug being stiff when the paint dries, you could add some fabric medium to the paint for a softer finish. However, we did not find it necessary since the texture of jute is already fairly stiff. (3) If you plan to use the rug outdoors, be sure to choose an exterior latex paint and spray it with a fabric protector like Scotchgard once it's dry.
Step 1
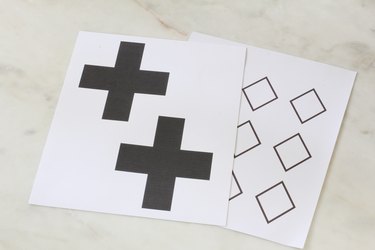
Download the free cross template and diamond template, and print them both out on cardstock. We found that printing two copies of the cross template and one copy of the diamond template worked best for painting our 2 1/2-foot-by-8-foot runner, but you may want to print more copies if you're painting a larger rug. If you're not painting the same pattern as ours, you can still follow the same techniques outlined in this tutorial.
Video of the Day
Step 2
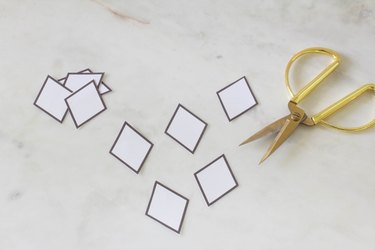
Cut out the diamond shapes with scissors.
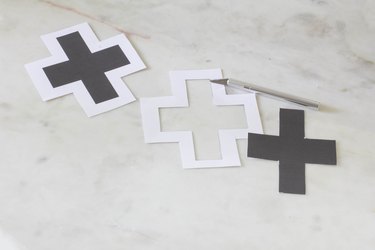
Cut around the cross shapes with scissors, leaving a 1/2-inch white border around the entire cross. Then use a utility knife to carefully cut out the cross in the center. This will leave you with two types of stencils: one with the shape cut out that you can tape down and paint, and one that you can use to trace around and paint. We'll show you how to use both, but we ultimately found the one you trace around to result in a much faster workflow.
Step 3
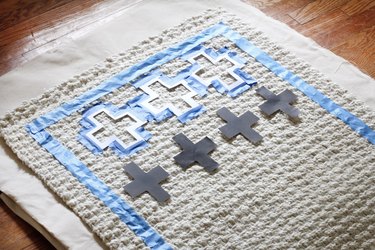
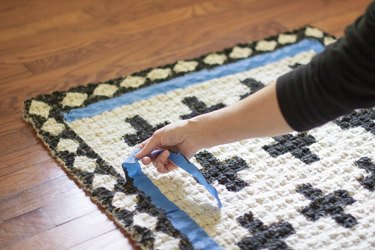
Tape off a 2 1/2-inch border around all sides of the rug with painter's tape.
Step 4
Place the rug on a drop cloth, and lay out the first row of crosses, spacing the tops and sides approximately two inches away from the taped border. Make sure the crosses are evenly spaced apart from each other as well. Then lay out the second row of crosses, spacing them 1 3/4 inches down from the first row, and staggering them between the crosses above. Alternate the number of crosses in each row — we alternated rows of three and four crosses — depending on your rug size.
Tip
These measurements worked well for our rug size of 2 1/2-feet-by-8-feet. However, if you're using a different rug size, you may want to do a dry run first to ensure the spacing works. Simply use the template pieces to lay out the first two rows, mark the bottom of the last row with tape, then pick up the template pieces and lay out the next two rows, and so on.
Stencil Method 1:
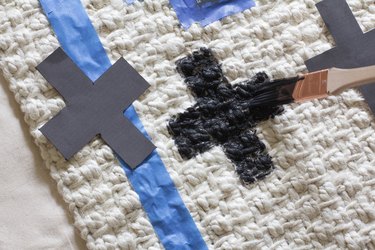
Tape down the edges of the stencil with painter's tape. Dip your paintbrush into the paint and allow any excess to drip off. Fill in the negative space of the stencil with paint. A mix of brushing and dabbing the paintbrush worked well to really push the paint into the fibers of the rug.
We used a 1 1/2-inch angled paintbrush, which was the perfect size for this template, but if you're using a larger stencil or painting a larger pattern, a roller brush would work well. Allow the paint to dry about 20 minutes or so before peeling off the template.

Stencil Method 2:
Trace around the cross shape with a marker. Since we used black paint, we used a black marker.
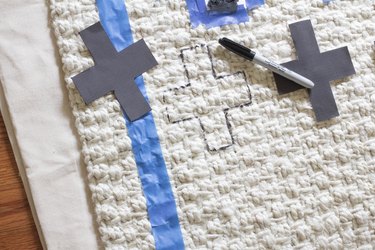
Paint inside the traced lines, using a mix of brushing and dabbing motions to work the paint into the rug fibers. Using a smaller brush size made it fairly easy to stay in the lines, but since we were aiming for an artisanal vibe, we didn't worry too much about it.
Step 5
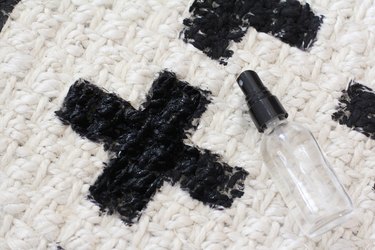
Whichever stencil method you use, spritz the paint with water before it dries to help it better soak into the rug fibers.
Step 6
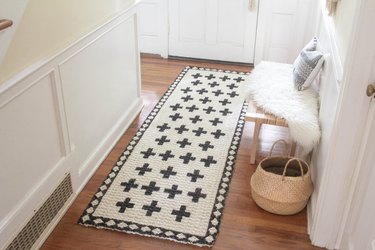
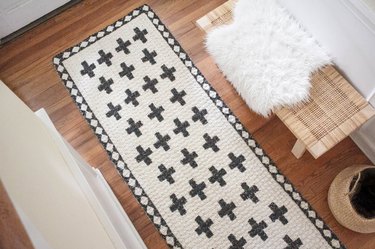
Continue painting the rows down the entire length of the rug.
Step 7
Tape the diamond templates inside the taped border, spacing them about 1/4-inch apart from each other. Lay the diamonds vertically along the long sides of the rug, and lay them horizontally along the short sides.
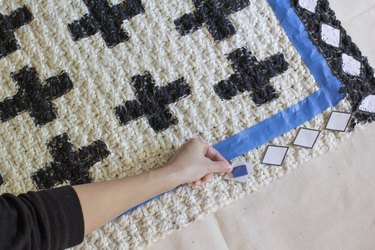
Fill in the space around the diamonds with paint. Hold the edges of the diamonds down as you paint around them to ensure paint doesn't bleed too much outside the lines, but a little bit of bleeding is fine for that handcrafted look.
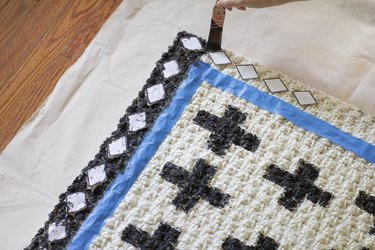
Step 8
Allow the paint to dry about 20 minutes or so, and then peel off the tape around the border.
And just like that, you have a hand-painted rug that looks like a highly coveted find you scored off a high-end vintage site instead of a budget-friendly buy from a common retailer.
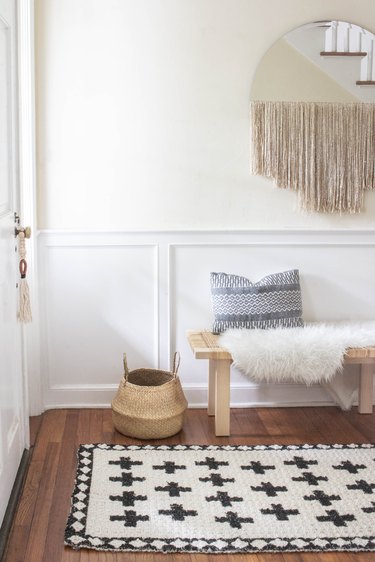
Pssst... like that fringe mirror and door tassel? They're both DIYs, and you can find the deets here and here.