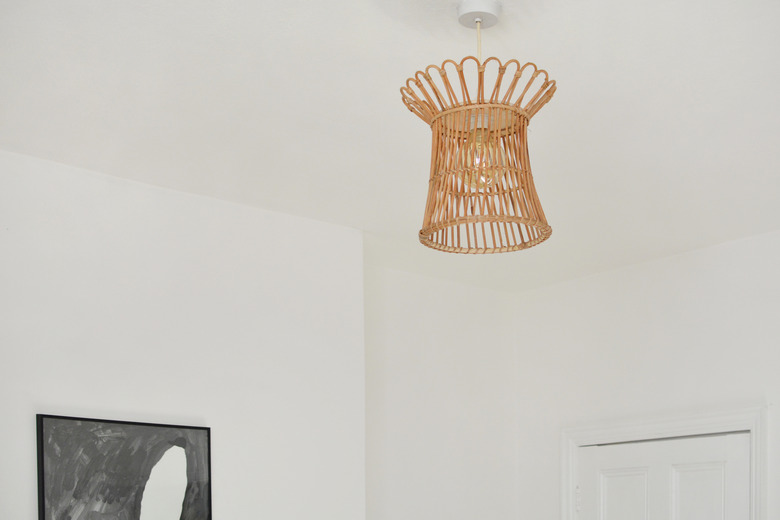
This Brilliant Light Was Created Using A Super Cute IKEA Plant Stand
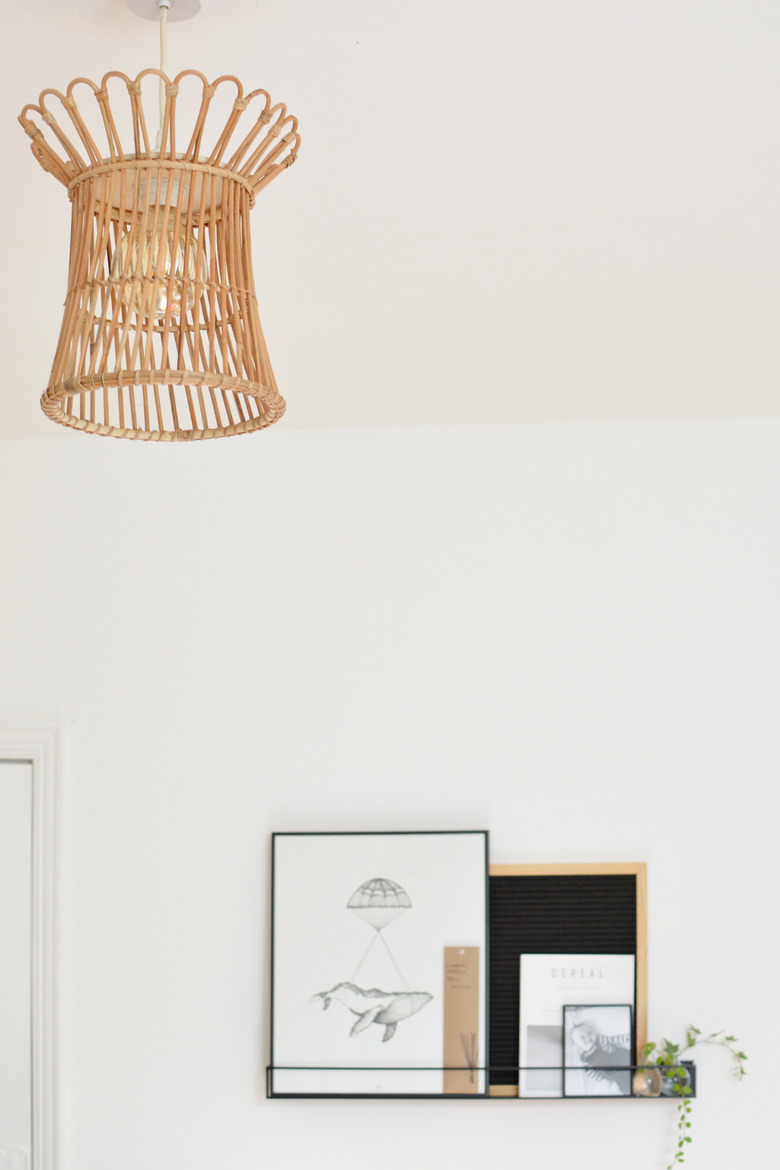
If you love a relaxed boho home vibe like we do, you're probably well aware that it's an easy-to-achieve look simply by adding natural, earthy art, accents, and textures to your space. To achieve this, one of our favorite materials to use is rattan. However, we don't always love the price tag that comes with it. Enter this hack: how to create a hanging light from a popular IKEA plant stand.
Before we start, a quick word on pendants. You don't want your shade to be hanging directly from the bulb so check your light fittings before you start. It's best to use a fitting like this IKEA Hemma, which unscrews to separate the shade from touching the bulb.
 Caroline Burke
WARNING: Always take care when working with any type of electrical fittings. We like to turn the electricity off when installing anything just to be sure.
Things Needed
-
Jigsaw
-
Hand clamp
-
Wood glue
-
Plywood (minimum 15 by 15 inches)
Step 1
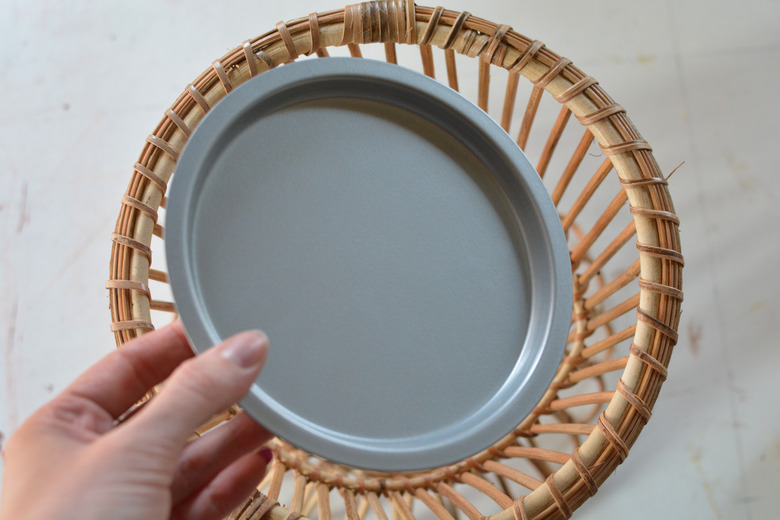
The first thing to do is to remove the tray from the base of the plant stand.
 Caroline Burke
Step 2
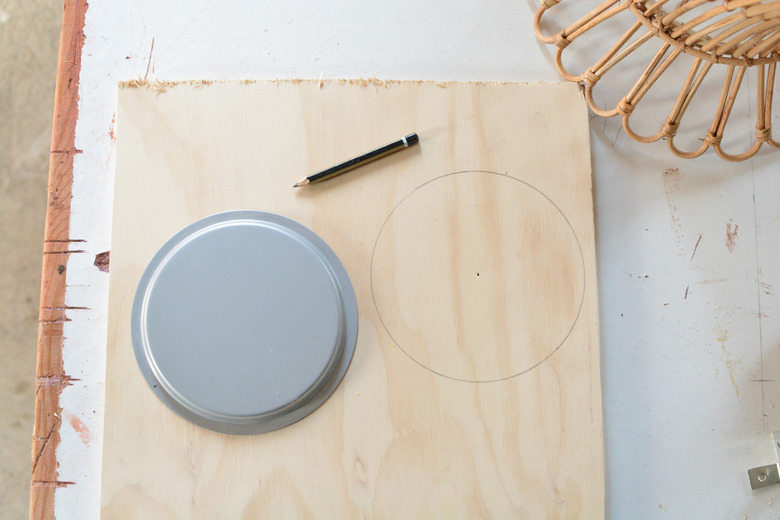
Place the tray onto a piece of plywood and trace the outside with a pencil. You can use any thickness of plywood, but we found 1/4-inch thickness worked well.
If you don't have the tools to cut a plywood sheet, ask your local hardware store to cut you a piece. We recommend no smaller than 15 by 15 inches for this project, so you have space to fix a hand clamp when cutting.
 Caroline Burke
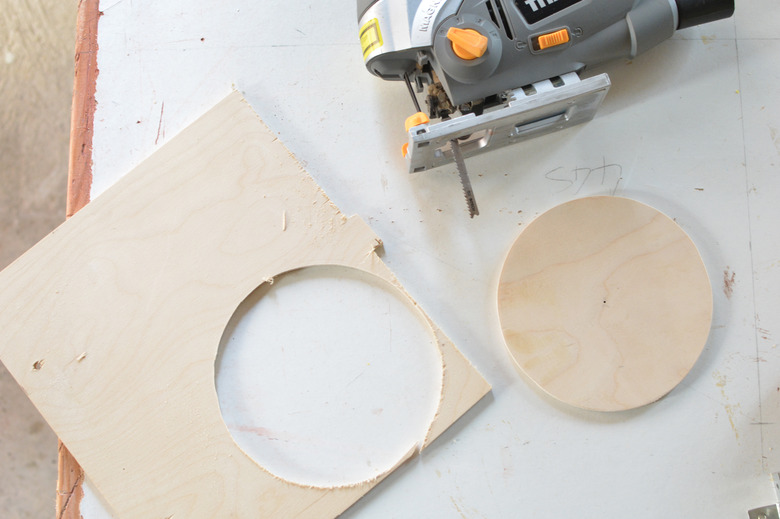
Step 3
Clamp the plywood onto your work surface/bench before cutting out the circle with a jigsaw. Take your time and follow the pencil line.
 Caroline Burke
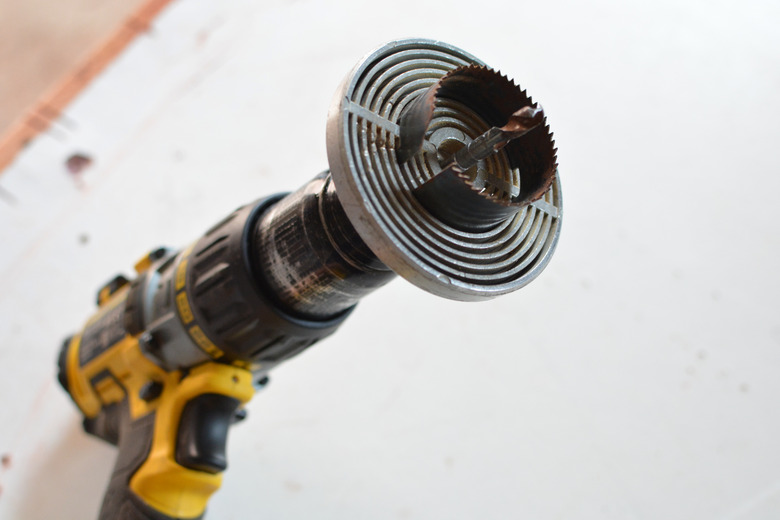
Step 4
Next, you need to make a hole for your cord. Measure the width of your light fitting — ours was 1 1/2 inches in diameter, but styles will vary. Take a hole saw with the same diameter (or as close as possible, it can be a little bigger) and attach it to your power drill.
 Caroline Burke
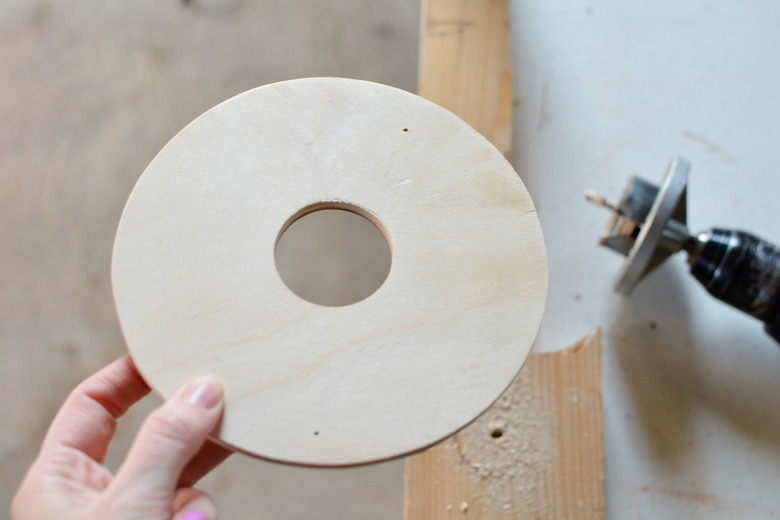
Step 5
Secure the plywood circle to some scrap wood with a clamp and drill through the middle with the hole saw.
 Caroline Burke
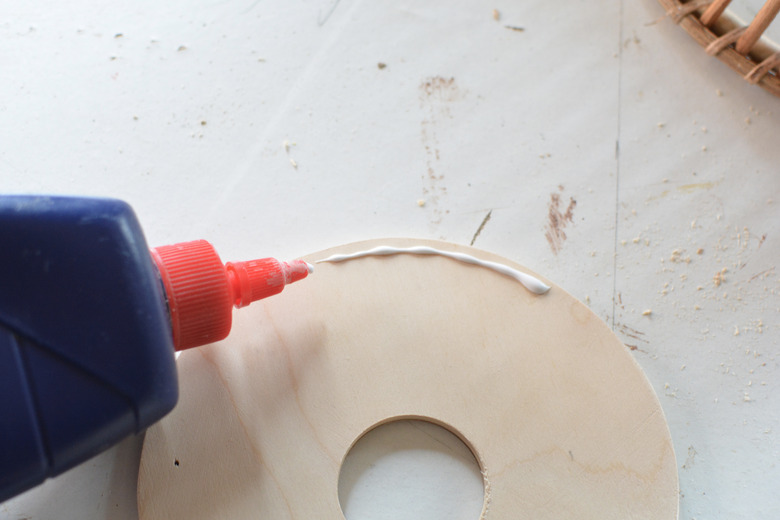
Step 6
Run some wood glue around the edges.
 Caroline Burke
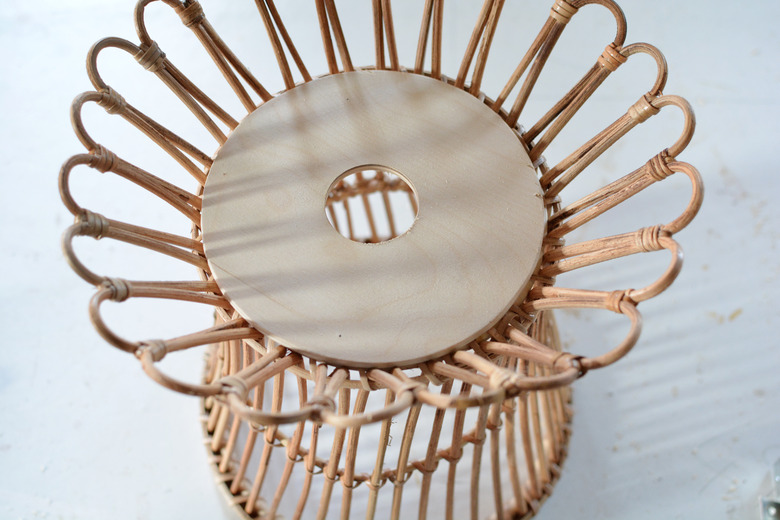
Step 7
Place the plywood glue-side down onto the plant stand. Leave to dry.
 Caroline Burke
Once dry, add the cord set. You'll need to unscrew the light bulb to hang the shade, then simply place it back afterward!
 Caroline Burke
If you're in any doubt about working with fittings or electricals, don't hesitate to consult an electrician.