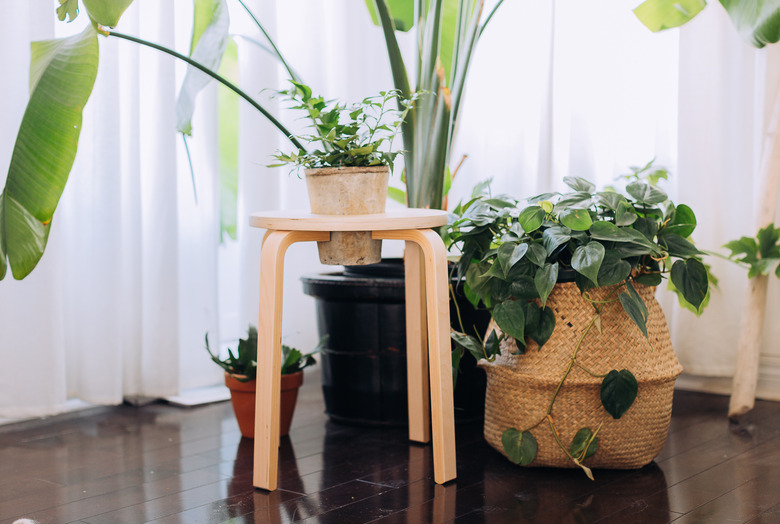
Got Houseplants? From Stool To Plant Stand, This IKEA Hack Is Simply Awesome
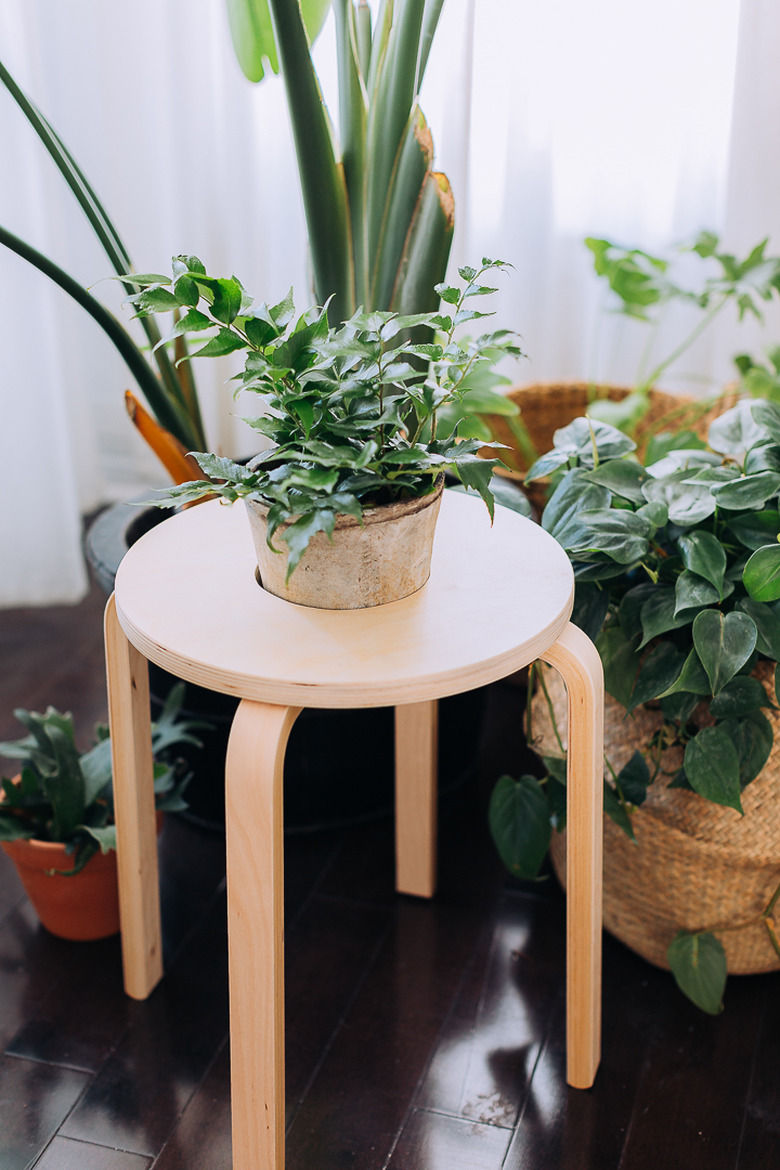
If you've been flexing your green thumb, here's an IKEA hack made just for you: we took a simple IKEA Frosta stool and made it into a stylish plant stand. Way to elevate your greenery, right?
 Lucy Akins
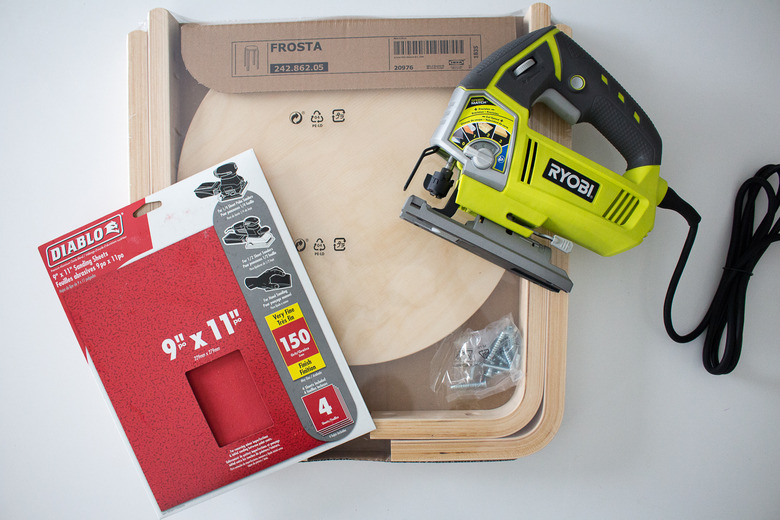
Things Needed
-
Plant pot
-
Drill (and bit)
 Lucy Akins
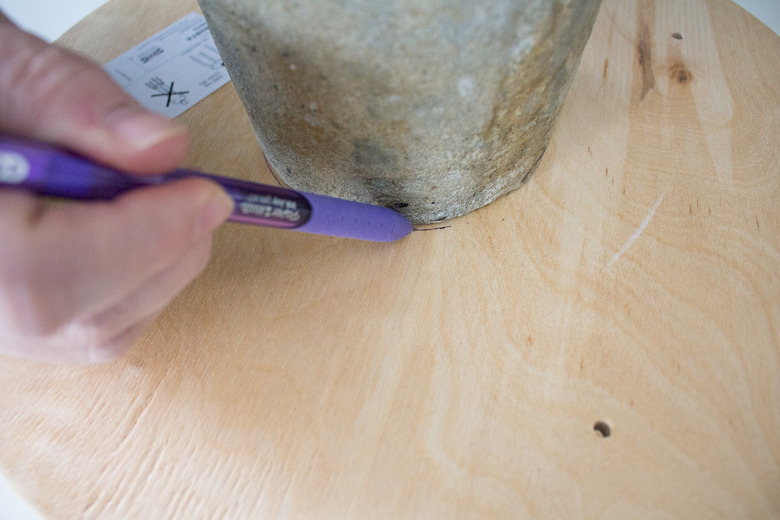
Step 1
Place the bottom of the pot in the center of the stool and trace around it.
 Lucy Akins
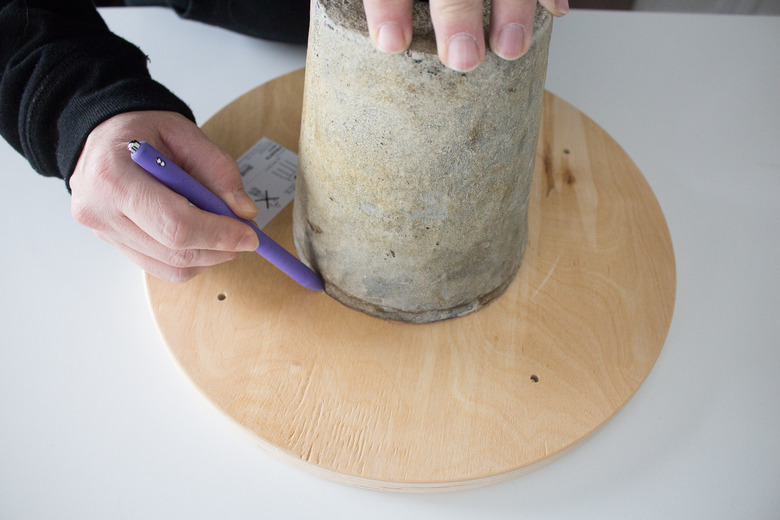
Step 2
Flip your pot upside down (so that the opening touches the bottom), center it on the stool, and trace around it.
 Lucy Akins
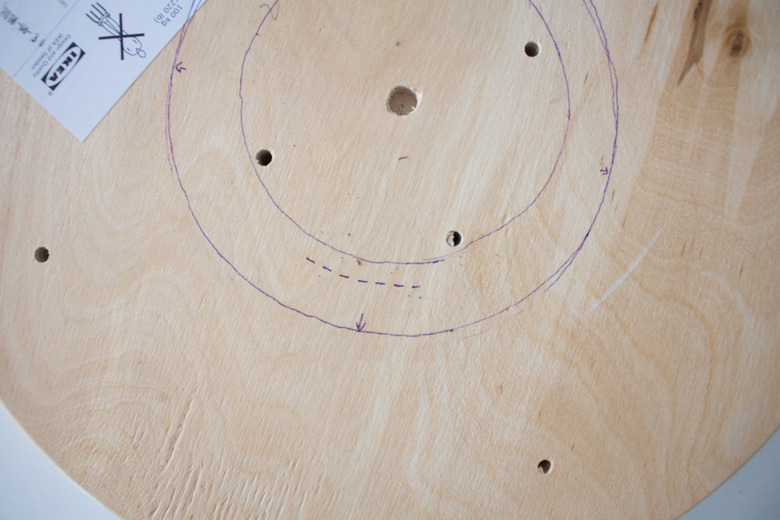
Step 3
You'll now have two circles representing the minimum and maximum circumference of the pot. Mark a third line (dotted in illustration) between the two circles, as this is where you'll make your cut.
 Lucy Akins
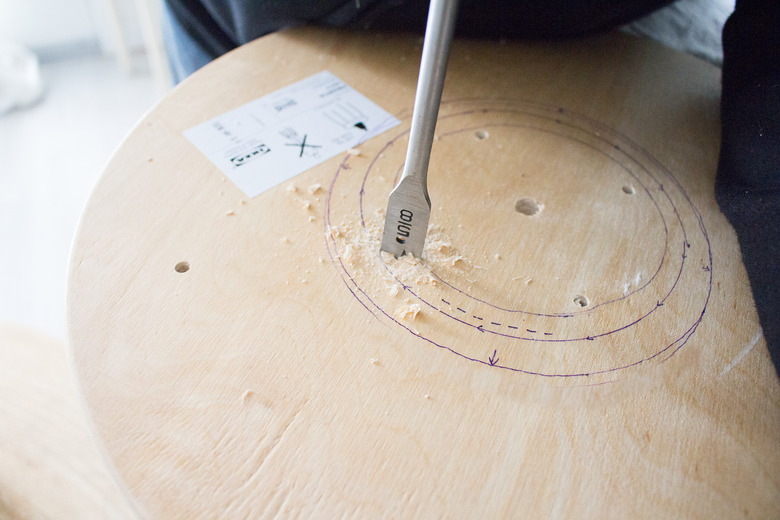
Step 4
Using the third line you drew (centered between the minimum and maximum circumference lines) as a guide, drill a hole so that you can insert and use your jigsaw.
 Lucy Akins
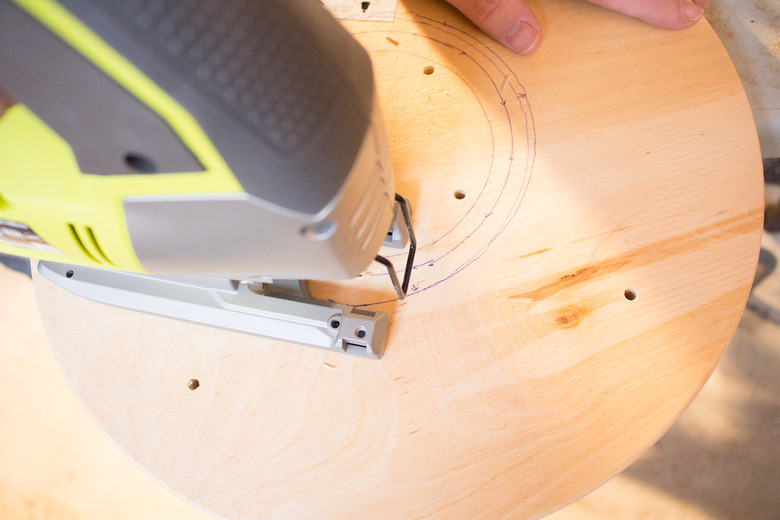
Step 5
Insert your jigsaw in the drilled hole and slowly cut along the middle line.
 Lucy Akins
 Lucy Akins
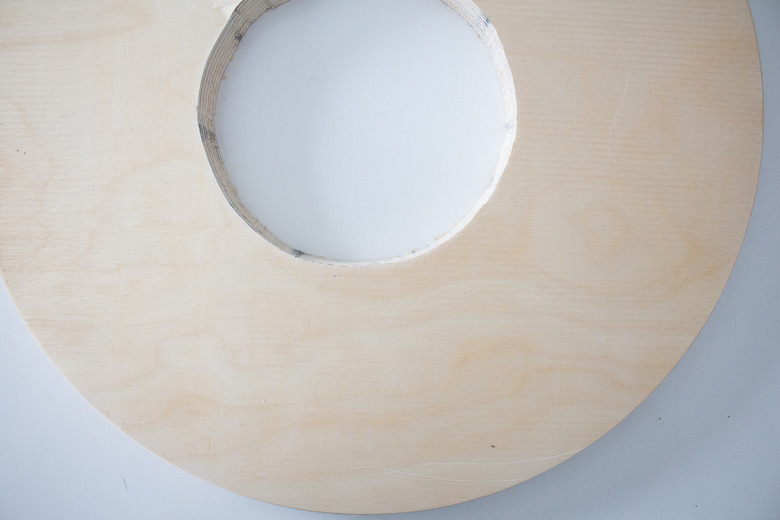
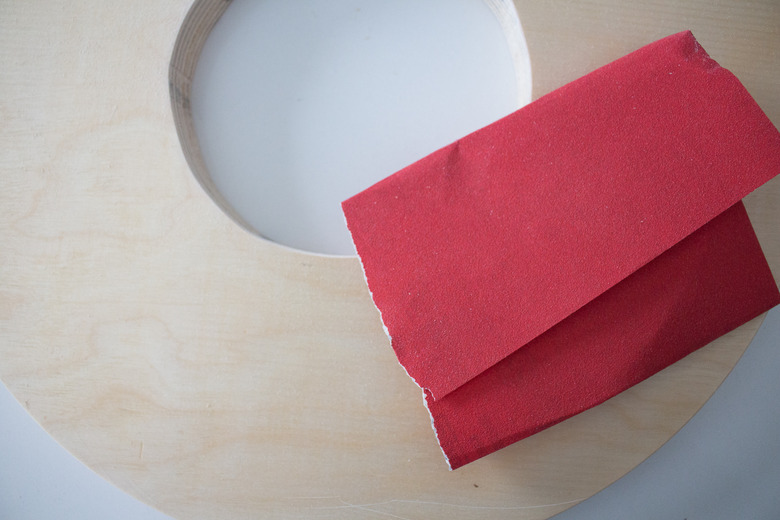
Step 6
After you have cut the hole, use sandpaper to smooth the edges of the cut.
 Lucy Akins
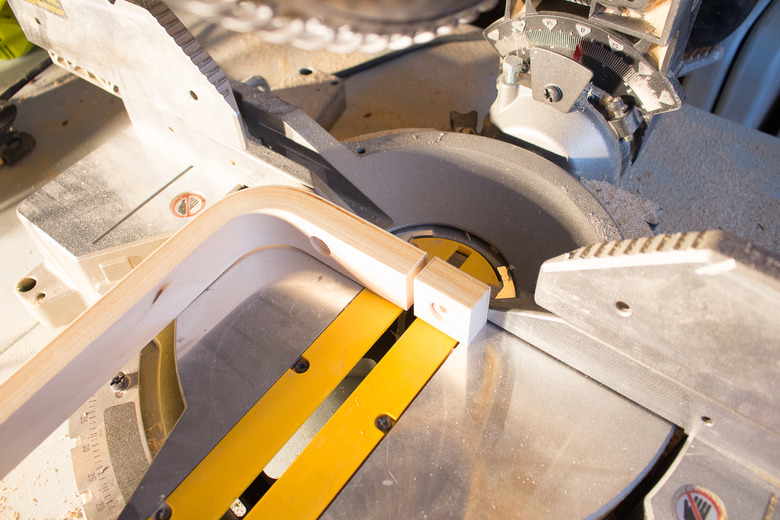
Step 7
Having cut a circle in the center of the stool, the legs (that were pre-measured) are now too big and will need to be adjusted to fit accordingly. Hold the leg at its originally marked place and note where on the leg you'll need to cut.
 Lucy Akins
Step 8
Cut along the marked line, removing the excess piece of leg.
 Lucy Akins
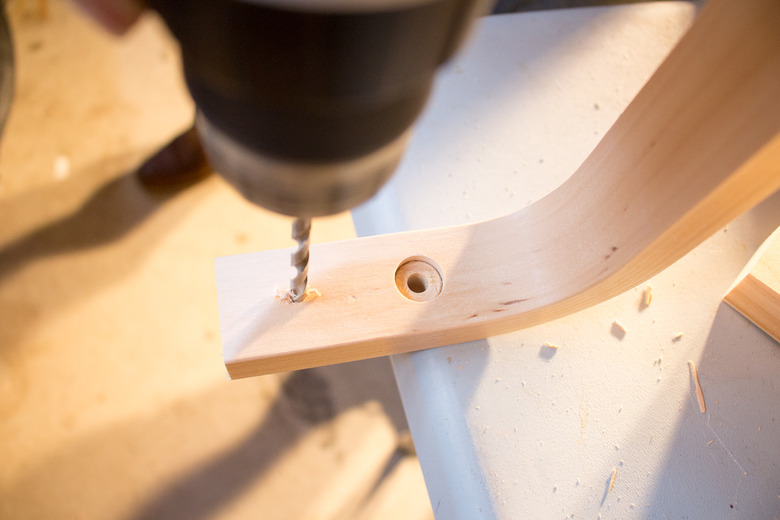
Step 9
Having cut the excess piece of leg, you will also have removed one of the two pre-drilled holes. To make a new (second) hole, mark and drill a hole using a drill bit that is the same measurement as the screws that came with the stool.
 Lucy Akins
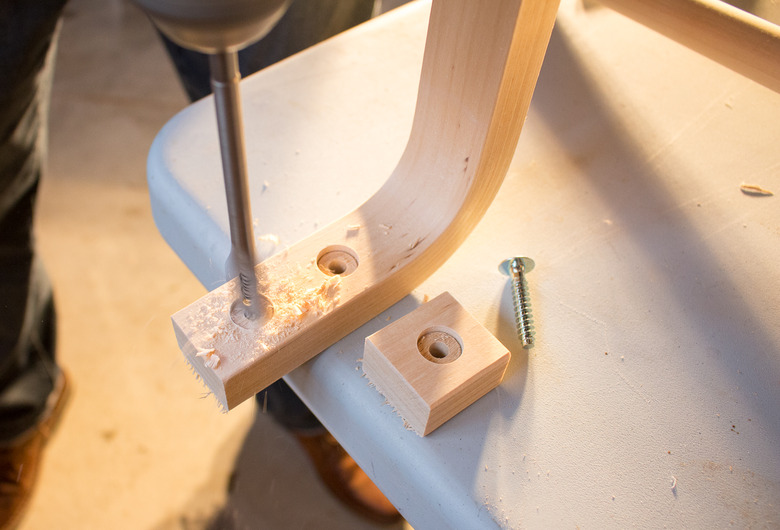
Step 10
Optional: To ensure a smoother finish, use a larger drill bit to enable the screw to sit countersink to the leg surface.
 Lucy Akins
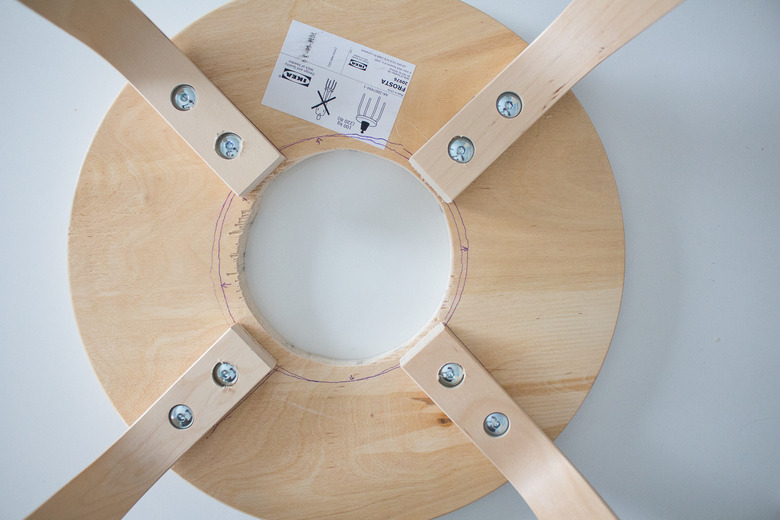
Step 11
With your adjusted legs now prepared, screw them onto the stool.
 Lucy Akins
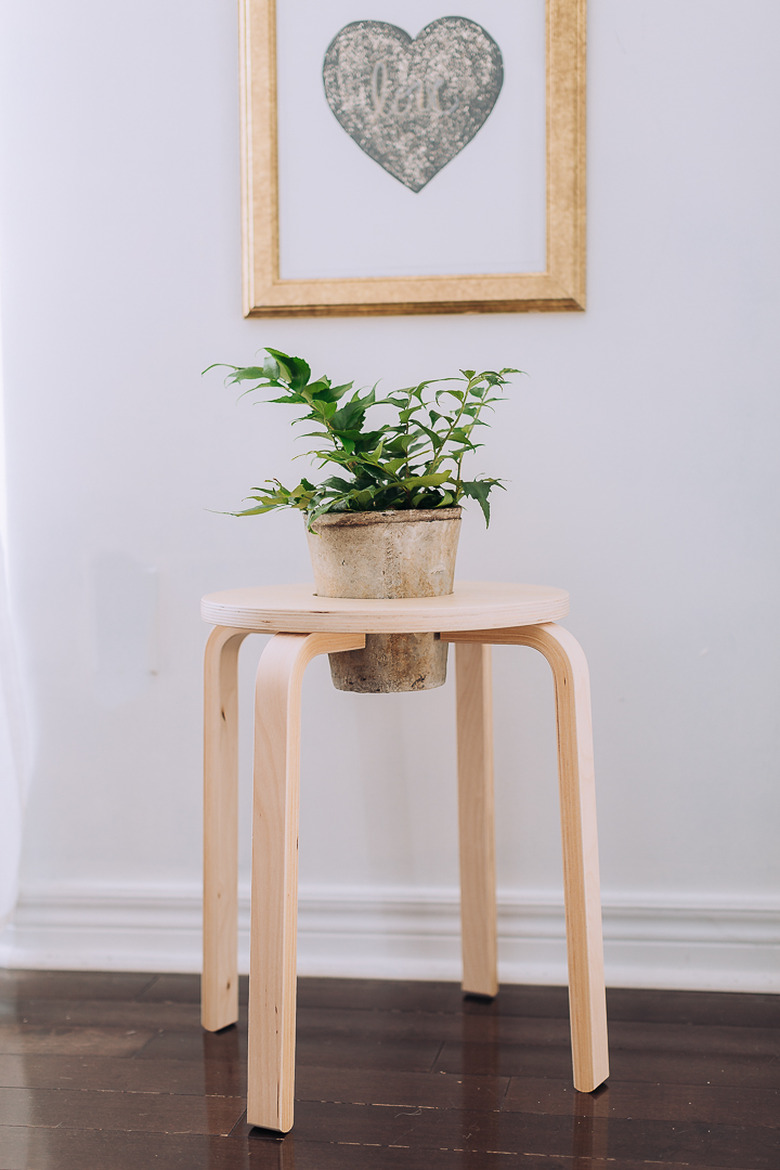
Finally, place your pot within the stool for your finished (gorgeous) product.
 Lucy Akins
 Lucy Akins
TIP: Don't have a watering can? No problem. Simply remove the pot and take it to the sink to water it, returning it to the stand once the water has drained.