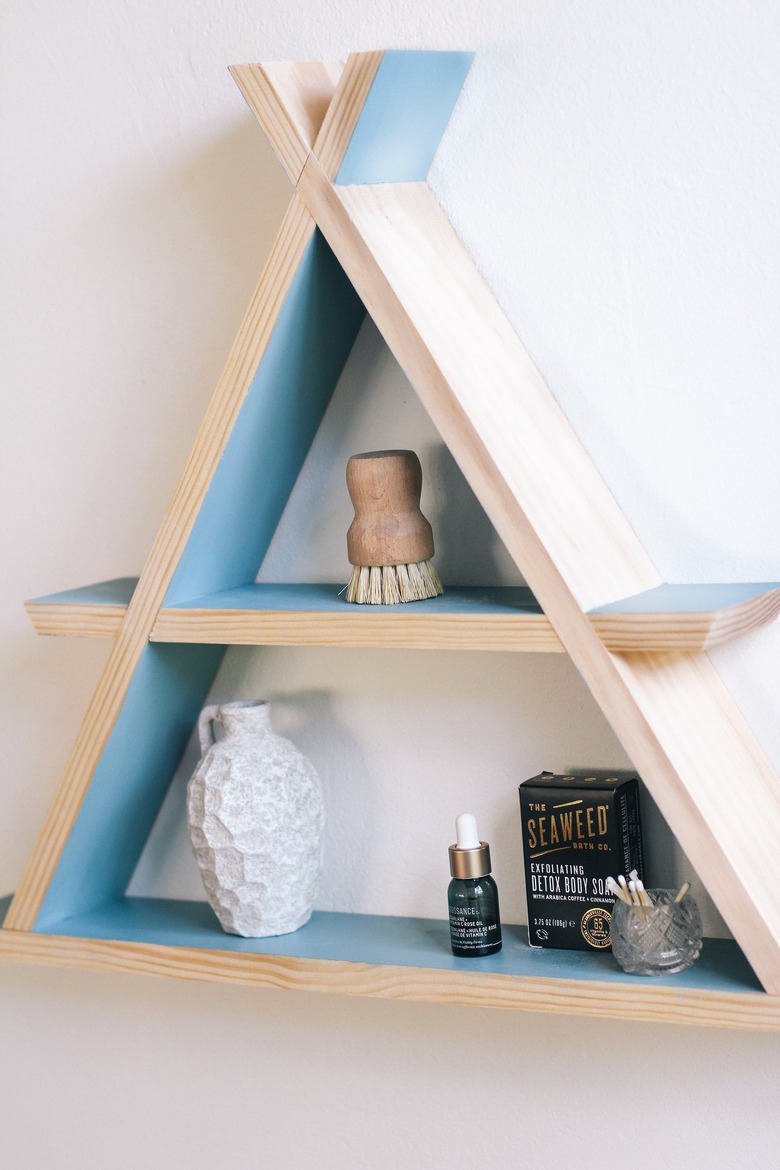
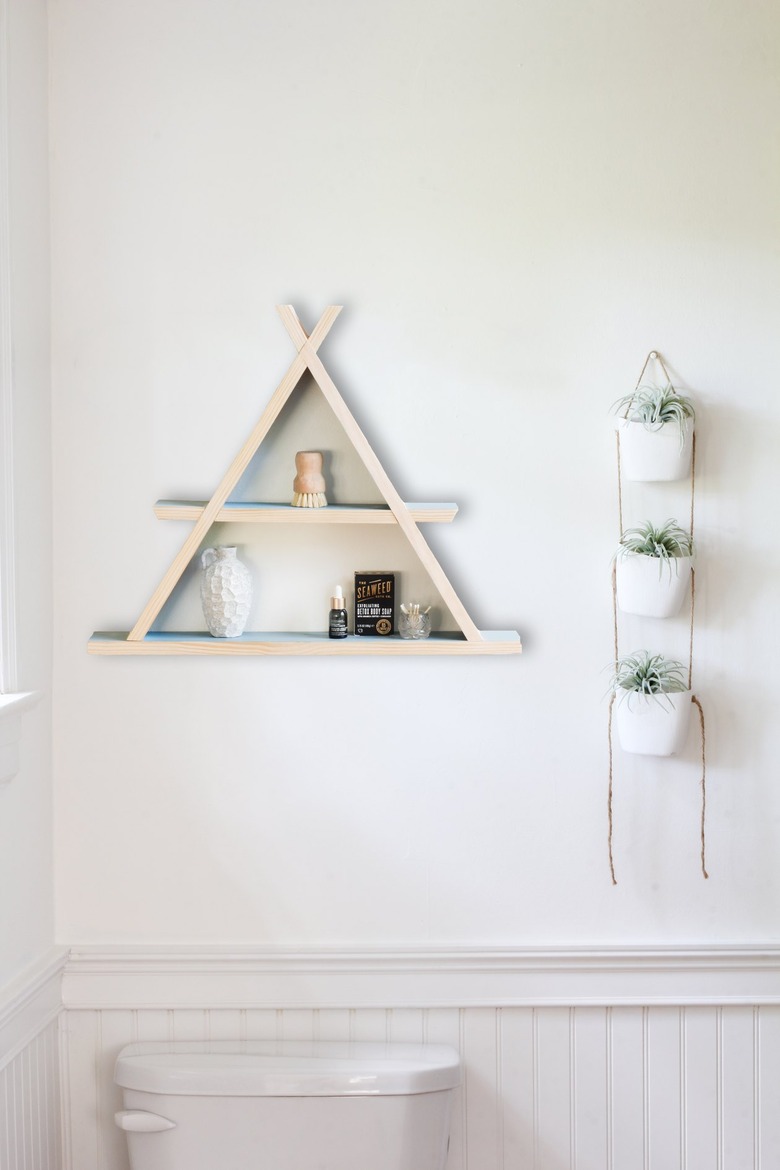
For A Small Bathroom Or Entryway, We Present This DIY A-Frame Shelf

Bring your A-game to organization with a #shelfie that packs major style and function. Part storage, part display piece, it's perfect for showing off all the tiny things that make you smile — or for keeping those prized products you use daily within arm's reach. Featuring playful lines and a peek of color, we especially love it for small spaces that might need more storage, like a bathroom. But it would shape up the walls in any room of your home, such as a nursery or entryway, with equal parts fun and whimsy. (Oh, and if you own an actual A-frame home, this is a must, don't you think?)
Things Needed
-
1-inch-by-4-inch wood board
-
Ruler
-
Miter saw
-
Wood glue
-
Painter's tape
-
1 1/4-inch finish nails
-
Hammer or nail gun
-
Medium-grit sandpaper
-
Paint & paintbrush (optional)
-
Clear protective topcoat (optional)
 Trisha Sprouse for Hunker
Step 1
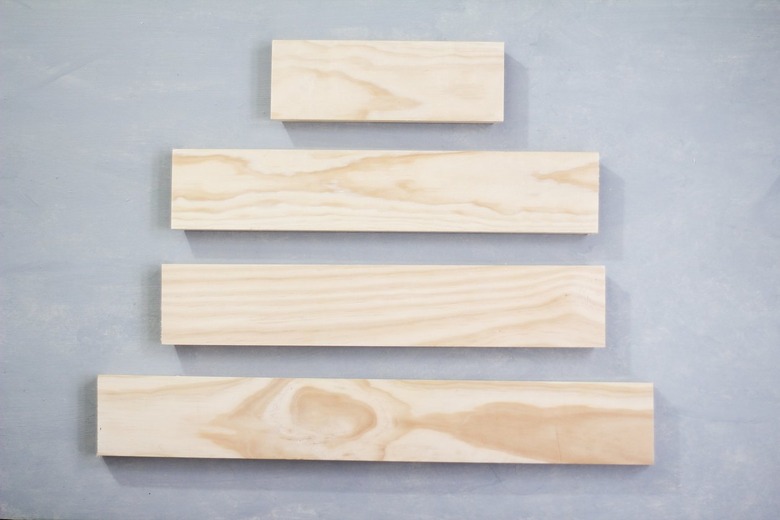
Have your hardware store cut the 1-inch-by-4-inch wood board into eight smaller boards with the following lengths:
-
1 board: 24 inches
-
1 board: 19 ¼
inches
-
1 board: 18 ½
inches
-
1 board: 10 ¼ inches
-
4 boards: 3 inches
 Trisha Sprouse for Hunker
Step 2
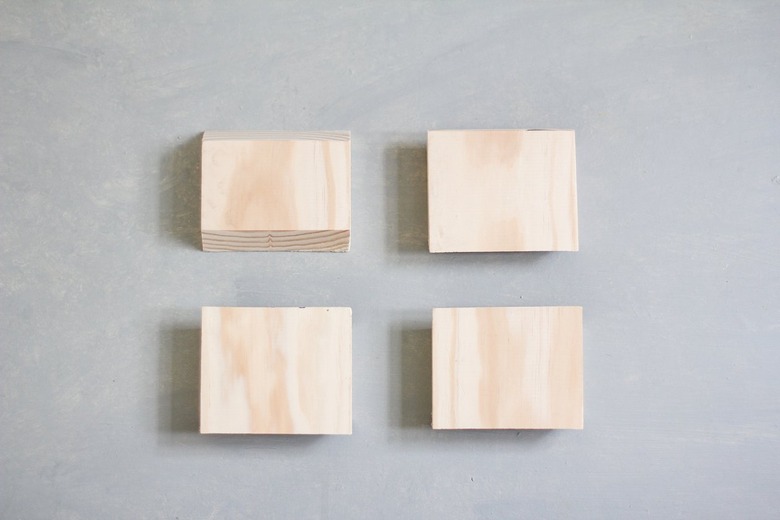
On each of the four 3-inch boards, use a miter saw to cut a 30-degree angle on each end. Be sure after you cut the angle on the first end of the board that you rotate it clockwise 180 degrees — with the same side facing up — to cut the other end. (In other words, don't flip the board over.) This will ensure the 30-degree angles are facing opposite directions.
 Trisha Sprouse for Hunker
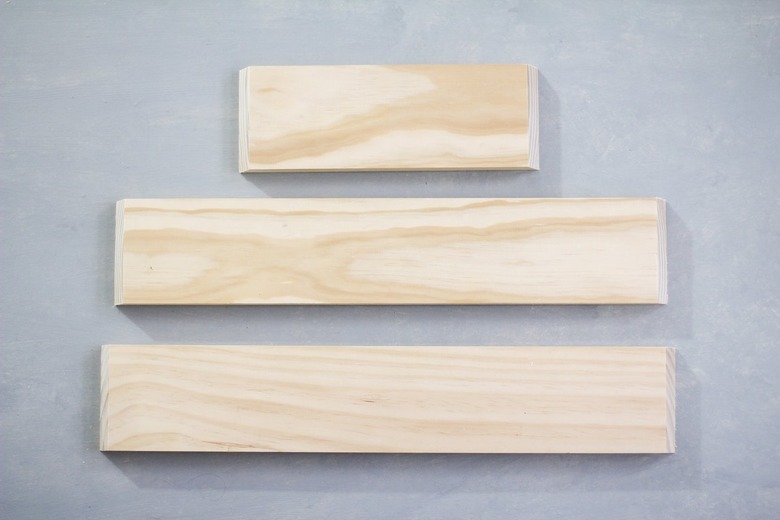
Also cut a 30-degree angle on both ends of the 10 ¼-inch, 18 ½-inch, and 19 ¼-inch boards. Leave the ends of the 24-inch board straight, as this will serve as the bottom of the shelf.
 Trisha Sprouse for Hunker
Step 3
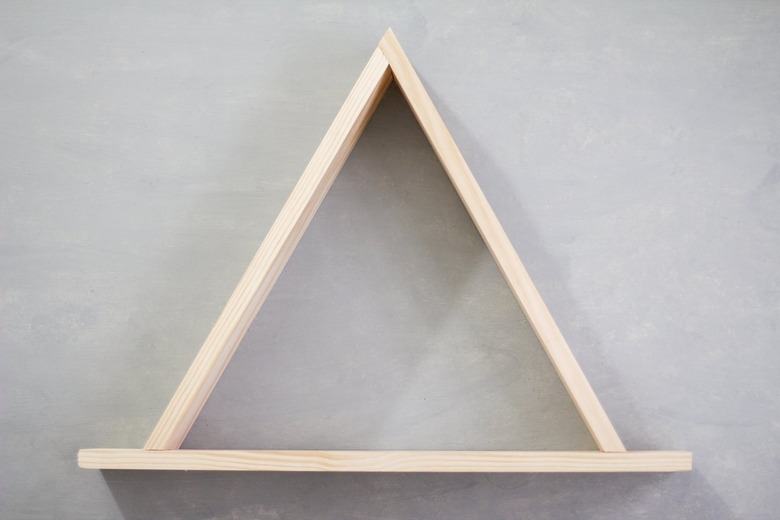
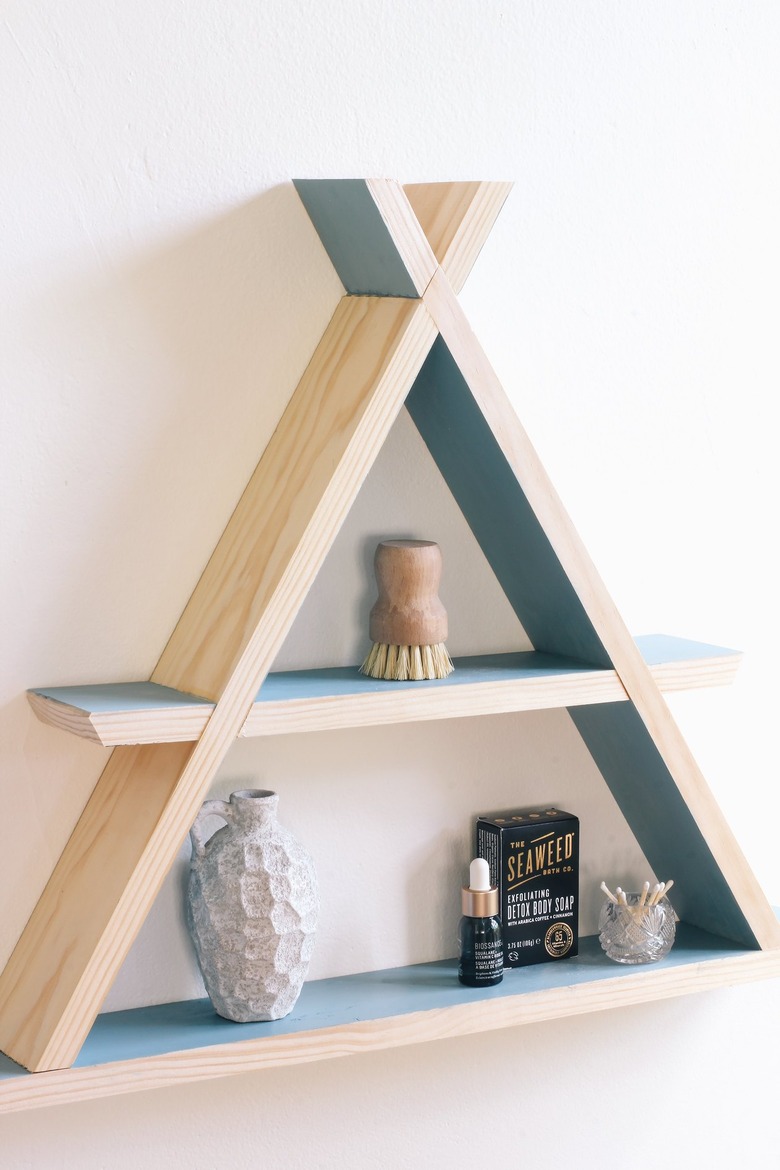
To assemble, place the 24-inch board horizontally with its one-inch side facing up to serve as the bottom of the shelf. Place the 19 ¼-inch and 18 ½-inch boards diagonally on top of it until their tops meet to form a triangle. There should be two-and-a-quarter inches of empty space on each side of the triangle.
 Trisha Sprouse for Hunker
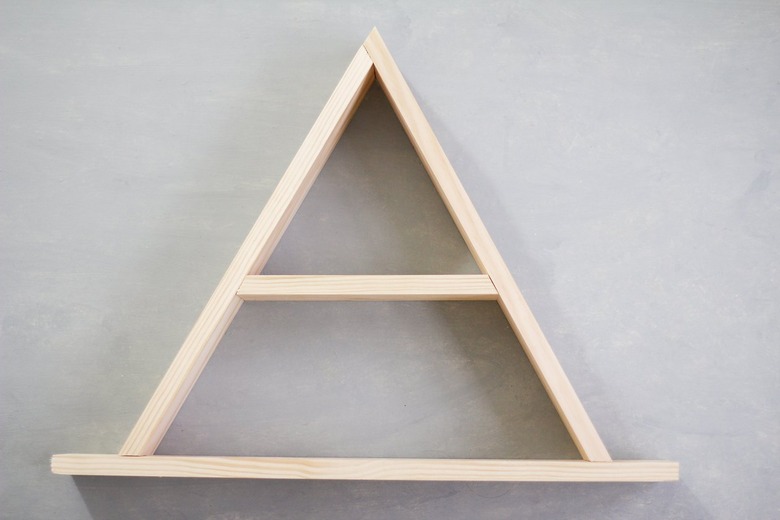
Now place the 10 ¼-inch board horizontally in the center of the triangle.
 Trisha Sprouse for Hunker
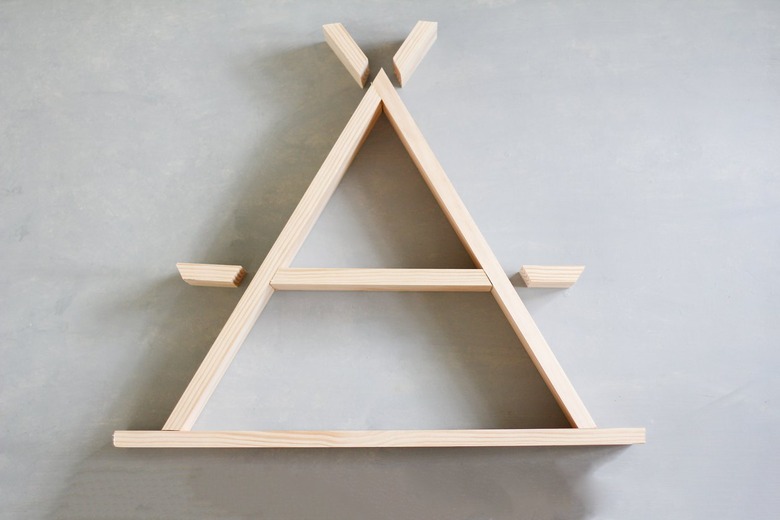
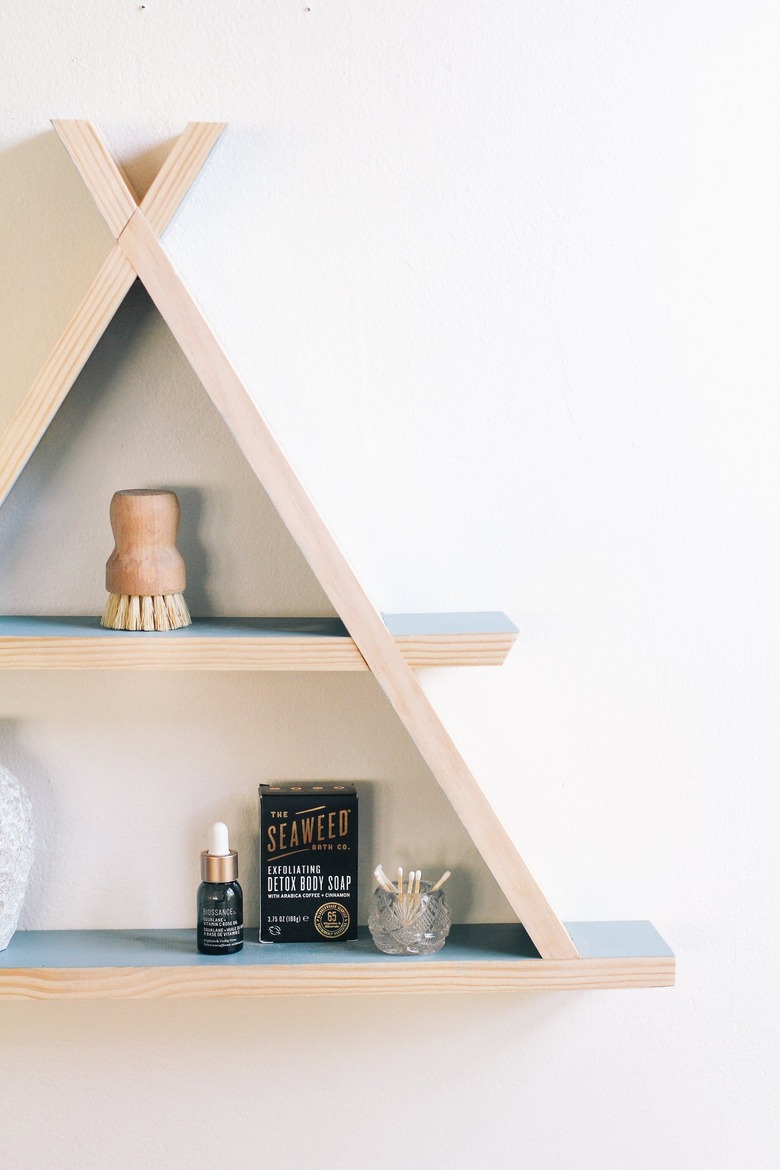
Lastly, place two of the 3-inch boards at the top of the triangle so that they form a V, and place the remaining two 3-inch boards on each side of the 10 ¼-inch board to extend the middle shelf on each side.
 Trisha Sprouse for Hunker
 Trisha Sprouse for Hunker
Step 4
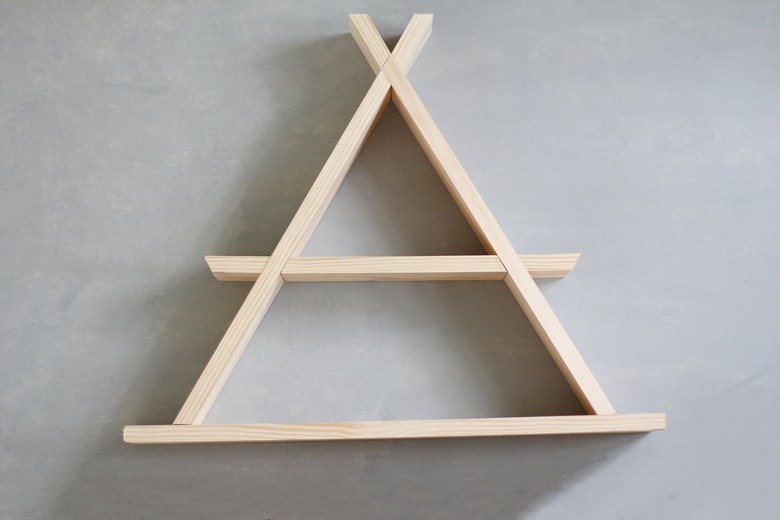
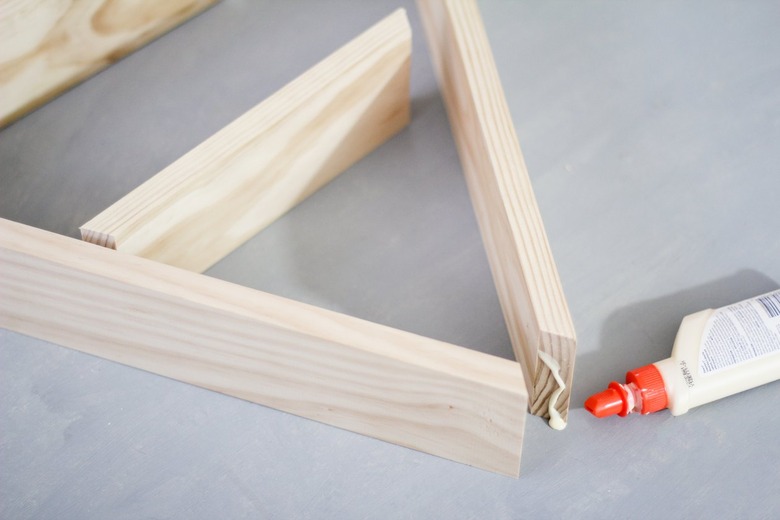
Glue all of the boards together using wood glue.
 Trisha Sprouse for Hunker
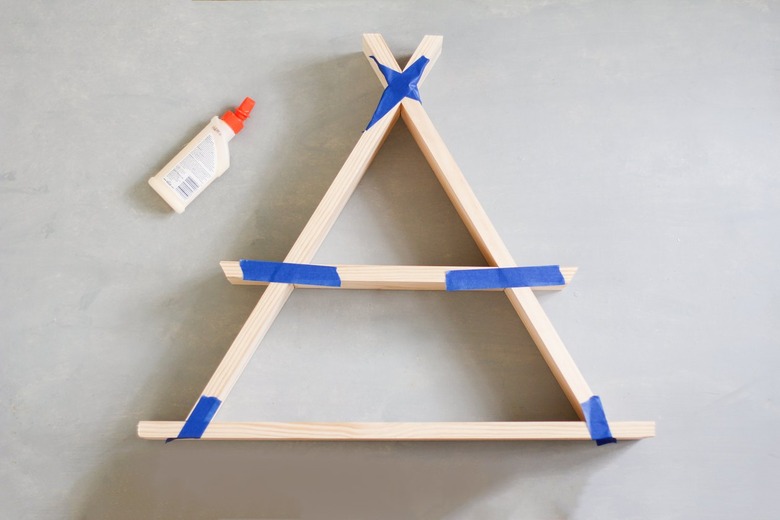
Use painter's tape to hold them together until the glue dries.
 Trisha Sprouse for Hunker
Step 5
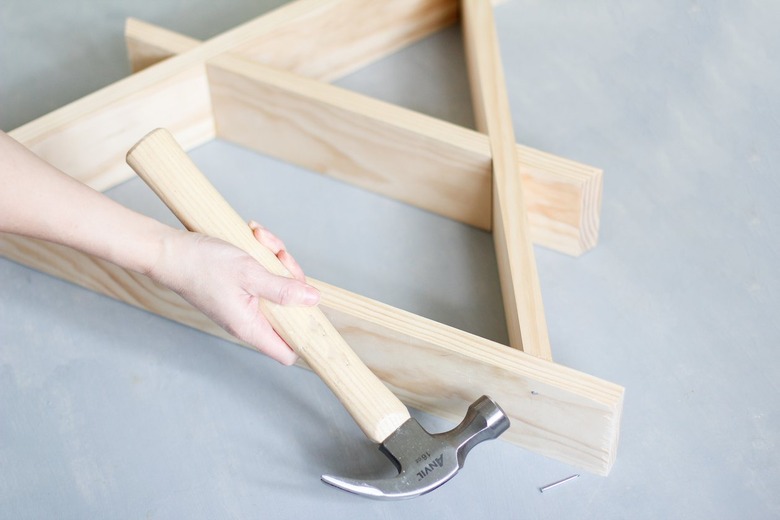
Once the glue is dry, remove the tape and nail the boards together with a hammer and nails, or a nail gun.
 Trisha Sprouse for Hunker
Step 6
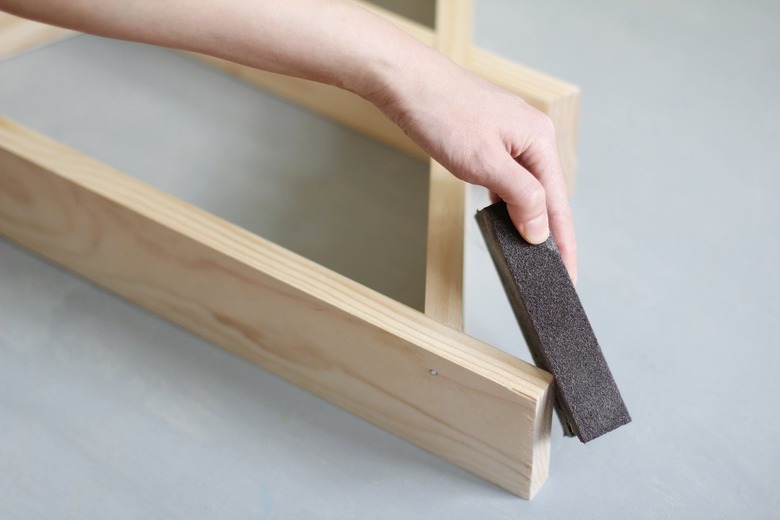
Use a medium-grit sandpaper to sand any rough edges or splinters.
 Trisha Sprouse for Hunker
Step 7
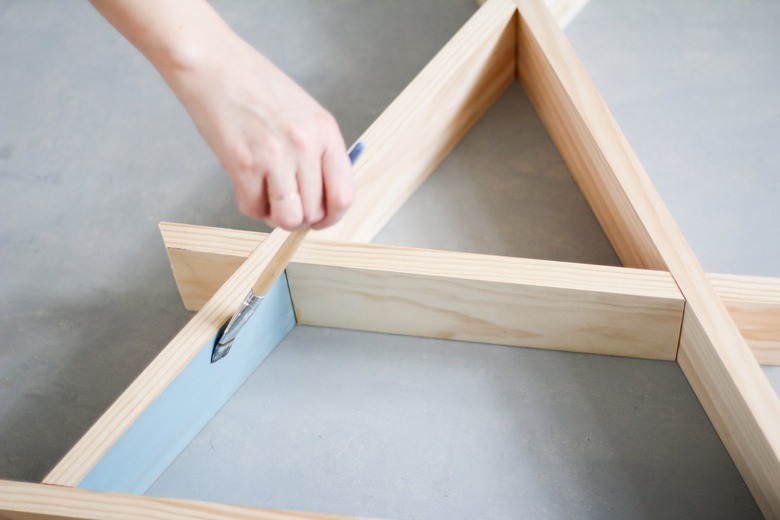
This is optional, but I opted to paint the inside portion of the shelf to add a bit of color and contrast. I painted two coats using this slate gray color, allowing adequate drying time between coats.
TIP: Once the paint is dry, you can paint a layer of clear topcoat over it to protect the paint. Or, you can topcoat the bare wood even if you opt not to paint the shelf.
 Trisha Sprouse for Hunker
Now you have a cool A-frame shelf to display your favorite wares and collectibles. Simply hang a nail on the wall and rest the point of the triangle on top.
 Trisha Sprouse for Hunker
 Trisha Sprouse for Hunker
 Trisha Sprouse for Hunker