
DIY in a Day brings you step-by-step instructions for easy projects that will spruce up your space — within 24 hours (or less!).
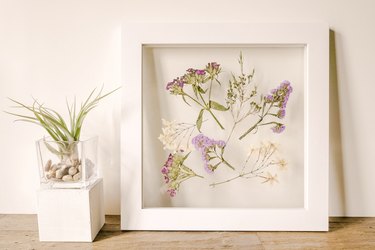
Put a modern spin on the age-old craft of flower pressing by showcasing preserved blooms in a minimalist floating frame. It's the perfect focal piece for a side table or dresser, especially for the garden-less urban dweller who longs for bit of flora into their life. Though there are a number of more instant flower-pressing methods — like using an electric iron or even a microwave (which just feels wrong, IMO) — we've chosen to feature the traditional book-pressed method. It takes a bit more time and patience, but that's all part of the nostalgic charm, don't you think?

Video of the Day
Hunker may earn compensation through affiliate links in this story.
Video of the Day
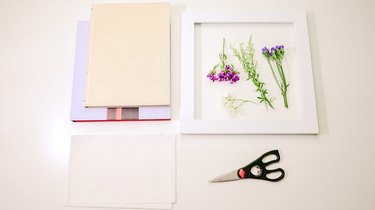
Things You'll Need
Fresh flowers and bouquet filler (less bulky flowers work best)
Tool to cut flowers (we used regular scissors)
Paper towels
Two or three fairly heavy books (make sure one of the books isn't valuable; see Step 2)
Step 1: Cut Flowers
Cut the flowers into small, short sprigs leaving between 2 to 5 inches of stem (depending on your desired result and the size of your frame) as shown below. The less bulky the flowers and foliage, the quicker they'll dry out.


Step 2: Press Between Pages of a Book
Make sure that the book you're using as a press isn't a valuable one, as there's a chance the moisture may stain the pages. The paper towel will absorb most if not all of the moisture, but there's a possibility that a little might seep through.
Open the book to a random page somewhere near the middle. Insert a paper towel inside.

Lay the flowers on top of the paper towel, spacing them slightly apart from each other to avoid the sprigs from sticking together. Place another paper towel on the page opposite, then close the book, sandwiching the flowers between the towels.

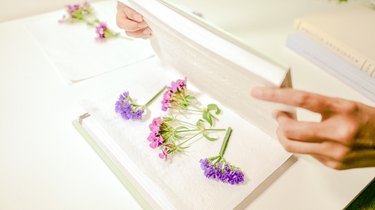

Lay one or two heavy books on top to weigh it down, ensuring that the flowers remain tightly pressed. Leave as is for approximately one week or until the flowers are completely dried out.

Step 3: Remove Flowers and Arrange in the Frame
After completely dried, gently remove the pressed flowers from the book.

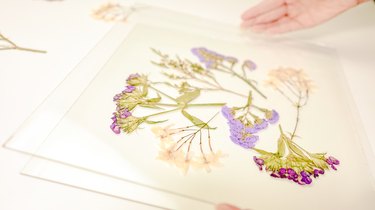
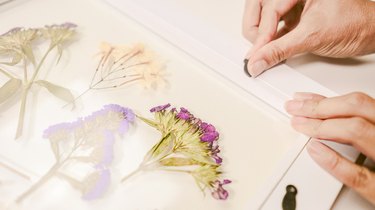
Disassemble the frame and place the two glass panels side by side.

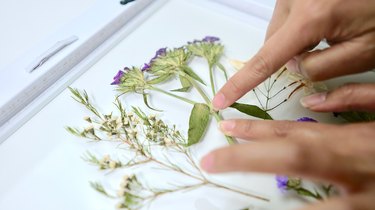
Arrange the flowers as desired atop one of the panels. You can choose to bunch them together like a bouquet, or leave some negative space in between for a floating-in-mid-air look as we've done here.


Step 4: Secure the Flowers With Glue Dots (As Needed)
Depending on how flat your flowers become or the amount of space between the glass panels once the frame is assembled, you may need to secure the flatter pieces in position using small glue dots, like these.
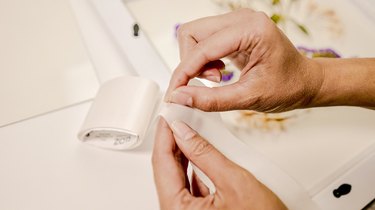

Hide the glue dots by adhering them to the back glass panel and attaching them underneath the wider parts of the flowers. For example, larger leaves or thicker areas of the stem. Avoid attaching the glue dots to the petals, which are more delicate and prone to breaking off.
Step 5: Reassemble the Frame
When you're done creating your floral design, slowly place the other glass frame on top, taking care not to disturb your design.
Once the two panels are together, you'll have to flip them over in order to place them face down into the back of the frame (see photo and tip below). This means you'll have to tightly press the panels together so that the flowers between them don't shift around during the inversion. If you've secured most of the flowers with glue dots, this should be a fairly painless process.
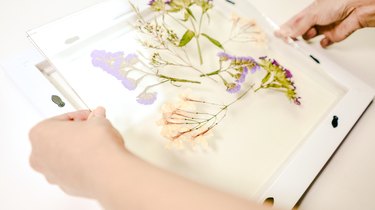
TIP: To avoid having to flip over the glass panels before inserting them into the back of the frame, you could arrange the flowers with the wrong side facing you (i.e. upside down) in Step 3. We found this a bit tough, so we opted to use ample glue dots and invert.
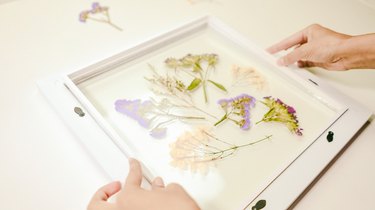
Finally, finish assembling the frame by setting the panels into the back and securing them according to the specific product instructions.
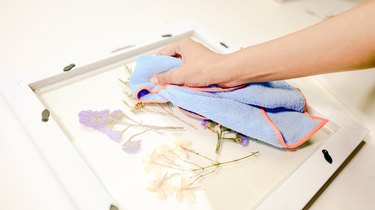
Step 6: Polish
Lastly, wipe down with glass cleaner and a microfiber cloth to remove any fingerprints.
Your modern DIY pressed flower frame is done! And now it's springtime, all of the time.
