
How to Build a Wishing Well From Bricks

A lush landscape and garden provides a place of solace you can retreat to after a long hard day. You may also have garden statues or a trickling fountain to add to the ambiance. Put the final touch on your sanctuary with a wishing well built from bricks.
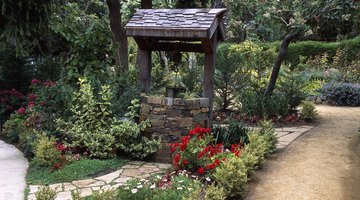
Instead of filling the well with water to catch your coins, fill this well with potting soil to plant your favorite perennial flowers.
Things You Will Need
- Spray paint
- Tape measure
- Shovel
- 72-inch-long, 2-by-4-foot pieces of wood, 2
- Mallet
- Sand
- Mortar
- Bucket
- Trowel
- Bristle brush
- 30-inch-long, 2-by-4-foot piece of wood
- 6-inch nails
- Hammer
- 16-by-30-inch triangular pieces of plywood, 2
- 24-by-36-inch pieces of plywood, 2
- 4-inch nails
- Outdoor latex paint
- Small paint roller
Tip
Add shingles to the roof if desired. You can attach a handle to the roof for an added whimsical touch.
Build the Well
-
Draw a 3-foot diameter circle with spray paint on the ground where you plan to build your wishing well. Paint another line three inches apart to use as a guide to place the bricks.
-
Dig up existing grass from inside the circle. Dig out a 3-inch-deep trench in the 3-inch space around the circle. Dig two 4-inch-wide and 6-inch-deep trenches adjacent to each other on either side of the circle for the posts for the roof. Insert the 2-by-4 pieces of wood into the holes. Tap the wood down with a mallet.
-
Fill the trench with sand two inches high. Fill in sand in and around the holes for the boards to secure them. Level the sand around the trench with the back of the shovel.
-
Place one layer of bricks in the trench. Leave a small space between each brick to fill with mortar.
-
Mix the mortar in a bucket according to the manufacturer’s directions. Mix one bag at a time so you don’t waste any of the mortar.
-
Drag the end of the trowel through the mortar and spread a 1-inch layer of mortar onto one side of a brick. Set the brick, mortar side down, on top of two bricks in the first layer so the center of this brick meets the space between the other two bricks. Leave a small space and set another brick next to this one. Continue adding bricks in this manner until you have five staggered layers of bricks. Let the mortar dry for two to four hours.
-
Add a thick layer of mortar to the end of the trowel and spread it vertically over the brick well to fill in the spaces between the bricks. Scrape excess mortar from the bricks with the side of the trowel. Let the mortar dry for two to four hours.
-
Brush dried excess mortar from the well with a bristle brush.
Build the Roof
-
Place the 30-inch long 2-by-4 piece of wood flat across the two posts. Secure the piece of wood to the posts with the 6-inch nails. This piece of wood will stabilize the pieces of plywood for the roof.
-
Nail the two triangular pieces of wood to the top of each post to make the closed sides of the roof. You can have these pieces cut at your local home improvement store.
-
Hold the top edge of one piece of plywood against the stabilizer and nail it into place with the 4-inch nails. Begin at the left corner and drive a nail in place two inches apart until you reach the end of the stabilizer. Nail the sides of the board to the edge of each triangular piece of wood. Secure the other piece of plywood to the other side of the well in the same fashion.
-
Paint the plywood with outdoor latex paint in the color desired. Use a small paint roller to prevent visible brush strokes.
The Drip Cap
- A lush landscape and garden provides a place of solace you can retreat to after a long hard day.
- Draw a 3-foot diameter circle with spray paint on the ground where you plan to build your wishing well.
- Paint another line three inches apart to use as a guide to place the bricks.
- Place one layer of bricks in the trench.
- Continue adding bricks in this manner until you have five staggered layers of bricks.
- Let the mortar dry for two to four hours.
- Secure the piece of wood to the posts with the 6-inch nails.
- Nail the two triangular pieces of wood to the top of each post to make the closed sides of the roof.
References
Writer Bio
After attending the University of Missouri St. Louis, Stephanie Rempe worked as a documentation manager in the finance industry 10 years before turning to her first love, writing, which she's been doing professionally since 2008. She currently divides her time between Missouri and her fiance's hometown in Oregon. In addition to her freelance writing, Rempe is working on a romance novel and short stories.
Photo Credits
- Dynamic Graphics Group/Dynamic Graphics Group/Getty Images
- Dynamic Graphics Group/Dynamic Graphics Group/Getty Images
More Articles