
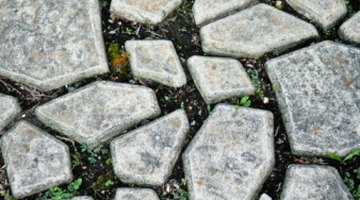
Homemade Concrete Stepping Stone Mold

Making your own concrete stepping stones is not only fun and creative, it can save you money as well. You can make your molds in whatever shape you choose. Molds for concrete stepping stones can be made from virtually any object you have around the house that can hold concrete.
This includes cake pans, baking pans, old milk jugs, even pizza boxes. The material you choose for your mold will depend on the size and shape you want your pavers to be, and on how many pavers of the same size and shape you need to make.
Things You Will Need
- Cement
- Sand
- 5-gallon bucket
- Water
- Window screen
- Scissors
- Mold
- Cooking spray
- Trowel
-
Make your mold by deciding on a shape and size that will complement your garden and then searching through your kitchen and garage for a plastic or metal container that is the shape and size you need. Old milk jugs can be cut in half and the bottom used as a mold. Old pizza boxes can be used. Cake pans, frying pans or virtually any other object with at least 2-inch-high sides can be used as a mold.
-
Coat the inside of your stepping-stone mold with cooking spray, which will act as a release agent and make it easier to remove your stone from the mold once the stone is dry.
-
Cut a piece of window screen the same size and shape as the inside of your mold. Screen can be purchased by the foot at hardware stores and home improvement centers and can be cut with scissors or an X-acto knife.
-
Mix your concrete in a 5-gallon plastic bucket. Regular cement can be used in it, or you can purchase special stepping-stone cement at most hobby shops and some home improvement centers. Mix in the required amount of sand, then add water and stir until the concrete is the consistency of thick pancake batter.
-
Fill your mold with approximately 1 inch of concrete. Tap the sides of the mold or pick it up and drop it from a height of 3 inches half a dozen times to ensure that all air bubbles are out of the concrete. Then set your piece of cut window screen on top of the concrete and add 1 more inch of concrete on top of the screen. The screen will help to keep the stepping stone from cracking later, after drying.
-
Tap the sides of the mold several times or pick the mold up and drop it half a dozen times from a height of approximately 3 inches to get rid of all air bubbles.
-
Smooth the top of the concrete with a trowel to help bring excess water to the surface. Do not worry about excess water.
-
Dry your stone for approximately 15 minutes in a shady spot and then add sea shells or hand prints or leaves to the top of the stone if you wish.
-
Remove your stone from the mold after it has dried overnight. Your stone should come out of the mold with only minimal effort because of the coating of cooking spray you applied earlier. Be gentle with your paver, because it is not yet fully cured.
-
Spray your paver with a garden hose and then place the wet paver inside a plastic bag and seal the bag. Place the sealed bag in a shaded spot and allow the stone to fully cure for 21 days. Then place in your garden.
The Drip Cap
- Making your own concrete stepping stones is not only fun and creative, it can save you money as well.
- Make your mold by deciding on a shape and size that will complement your garden and then searching through your kitchen and garage for a plastic or metal container that is the shape and size you need.
- Old milk jugs can be cut in half and the bottom used as a mold.
- Coat the inside of your stepping-stone mold with cooking spray, which will act as a release agent and make it easier to remove your stone from the mold once the stone is dry.
- Remove your stone from the mold after it has dried overnight.
- Spray your paver with a garden hose and then place the wet paver inside a plastic bag and seal the bag.
References
Writer Bio
Larry Parr has been a full-time professional freelance writer for more than 30 years. For 25 years he wrote cartoons for television, everything from "Smurfs" to "Spider-Man." Today Parr train dogs and write articles on a variety of topics for websites worldwide.
Photo Credits
- Jupiterimages/Photos.com/Getty Images
- Jupiterimages/Photos.com/Getty Images
More Articles