
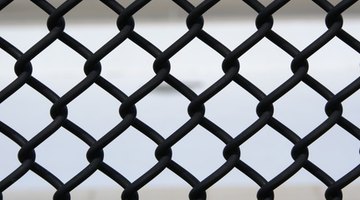
How to Attach a Tension Wire to a Chain-Link Fence

Adding tension wire to a chain-link fence provides stability and security from dogs or people who try to go under a fence. The wire holds the chain link in place low to the ground very tightly so that it cannot bend at the bottom.
Tension wire generally is installed after the poles are set for a new chain-link fence and before the fence installation. The wire is positioned between the mesh and the poles.
Things You Will Need
- Brace bands with bolts and nuts
- 2 pairs of pliers
- Wire cutters
- Come-a-long
Tip
If tension wire is added to an existing chain-link fence, install and stretch it on the outside of the fence and then slide up under the fencing to the inside. You may use tension wire at the top of a chain-link fence to lower the total fencing cost by eliminating the top rail. This method of installation also inhibits people climbing over the fence without a handhold on the top rail. Placing the tension wire roll on a stick and holding it in two hands as you walk will let the wire feed out easily. A terminal post is an ending post on one side of the fence at a corner or on either side of a gate.
Warning
Always hold the tension wire with one hand one the wire before the cutting area so that the wire does not harm you when you cut if for a corner or terminal post.
-
Attach a brace band to a corner post by placing it on the post about 2 inches from the bottom. Insert a brace band bolt through the holes in both ends and screw on a nut on the backside. Hand-tighten the bolt while holding the nut with the other hand.
-
Pull the loose end of the tension wire from its roll about 6 feet long and loop through the brace band bolt with an extra tail of 6 to 8 inches long. Wrap the tail in a circular motion around the next 6 to 8 inches of tension wire that leads to the next post. Tighten the wrapping, using pliers and moving around it in a circular motion. Tighten the brace band bolt with pliers while holding the nut with a second pair of pliers.
-
Unroll the tension wire by walking along the fence line to the next corner or terminal post. Walk 6 to 8 inches beyond the post and cut the wire at this point. Attach the wire to a come-a-long and attach the come-a-long to the post with a sling made of rope or a towing strap. A come-a-long is a manually-operated winch. You may use an electric winch in the same fashion.
-
Depress and release the come-along handle to tighten the tension wire with each repetition. Make the tension wire as tight as you can, using this method. Attach a brace brand to the post 2 inches from the bottom by placing the bolt through both end holes and screw the nut on hand tight. Insert the loose end of the tension wire around the bolt and loop the additional wire around the tightened part of the tension wire. Tighten the brace brand completely with two sets of pliers as on the other end. Tighten the loops around the tight wire with pliers as on the other end.
-
Release the come-along. Repeat for each stretch of fence between terminal poles around the fence line. Add chain-link mesh on the fence on the inside of the area so that the tension wire is between the poles and the mesh.
The Drip Cap
- Adding tension wire to a chain-link fence provides stability and security from dogs or people who try to go under a fence.
- Pull the loose end of the tension wire from its roll about 6 feet long and loop through the brace band bolt with an extra tail of 6 to 8 inches long.
- Attach the wire to a come-a-long and attach the come-a-long to the post with a sling made of rope or a towing strap.
- You may use an electric winch in the same fashion.
- Tighten the loops around the tight wire with pliers as on the other end.
References
Writer Bio
Mary Lougee has been writing for over 10 years. She holds a Bachelor's Degree with a major in Management and a double minor in accounting and computer science. She loves writing about careers for busy families as well as family oriented planning, meals and activities for all ages.
Photo Credits
- chain link fence image by Kenneth Summers from Fotolia.com
- chain link fence image by Kenneth Summers from Fotolia.com
More Articles