
How to Install a Lock Washer

The biggest advantage of a nut-and-bolt connection versus a welded or riveted connection is that nuts and bolts may be disassembled when necessary.
This advantage, however, is also the nut-and-bolt connection's biggest weakness: Unintended loosening due to vibration (called vibrational loosening by engineers) is a common problem. This phenomenon has been greatly reduced through the development of several different types of lock washers, an easy-to-install connection.
Things You Will Need
- Lock spring washers
- Internal lock washers
- Lock nuts
- Free-spinning lock washers
- Wrench set
Tip
Do not overtighten the nut. Failure of the bolt may occur while you are tightening it and cause damage to your hands, the tools you are using or the object being repaired.
-
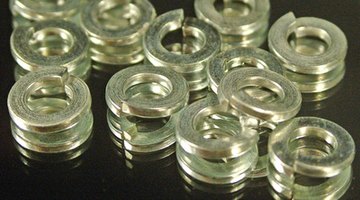
Measure the specific application to be worked upon as accurately as possible. Determine if there's room enough for a lock washer and if the added thickness of a lock washer impedes any mechanical action. Decide if a free-spinning lock washer (most common available) will fully meet your needs. There are two types of free-spinning lock washers to choose from. Lock spring washers are the simplest in design (they look like a broken washer) and are what most people call a "lock washer." They also provide the least protection against loosening. Internal lock washers look like a regular washer, with many small ridges on one side and provide a stronger hold than lock spring washers.
-
Verify the pitch and thread count of the bolt in your application. This is easily accomplished by matching the nut or bolt with one of the same size either at the hardware store, or from a known source in your home. Decide if a more complex type of lock washer, such as a free spinning lock washer or a locking nut, will work better in your application. Free-spinning lock washers are washers that are embedded in the base of a nut. They create friction when turned in the "loosening" direction. Lock nuts are nuts that use the body of the nut itself as the washer, with a substance (metal or plastic) embedded within the nut's threads that provide extra friction to eliminate loosening. In either case, an exact match must be found between the old nut and the new complex lock washer/nut assembly in order for it to work properly.
-
Measure the shank width of the bolt upon which you desire a tight connection. The lock washer should be sized so that there is very little room to move when placed on the shank of the bolt. Lock washers are always placed directly adjacent to the nut of the application. So if using a lock spring washer or an internal lock washer, place it over the shank of the bolt just prior to the nut attachment.
-
Measure the thread size of the bolt if you are going to use a free spinning lock washer or a locking nut. It is important that these are sized with the exact same threads (sae or metric) so that the nut will tighten and hold as designed. An improper thread size will eliminate the advantage of using this type device.
-
Torque the nut until it is tight using a wrench or, if available, a torque wrench set to the desired torque setting of the application.
The Drip Cap
- The biggest advantage of a nut-and-bolt connection versus a welded or riveted connection is that nuts and bolts may be disassembled when necessary.
- This advantage, however, is also the nut-and-bolt connection's biggest weakness: Unintended loosening due to vibration (called vibrational loosening by engineers) is a common problem.
- They also provide the least protection against loosening.
- Measure the thread size of the bolt if you are going to use a free spinning lock washer or a locking nut.
- It is important that these are sized with the exact same threads (sae or metric) so that the nut will tighten and hold as designed.
- An improper thread size will eliminate the advantage of using this type device.
References
Writer Bio
Residing near the Central Florida beaches, Steven Douglas has written extensively on resolving small-business issues since 1990 in publications such as ForexFactory, Forex-Tsd, FxStreet and FxFisherman. After earning a master's degree in administration from the University of Maryland, his primary focus has been on international currency trade and how it can be effectively utilized by small businesses across the United States.
Photo Credits
- washers image by Greg Pickens from Fotolia.com
- washers image by Greg Pickens from Fotolia.com
More Articles