
How to Upholster Corners

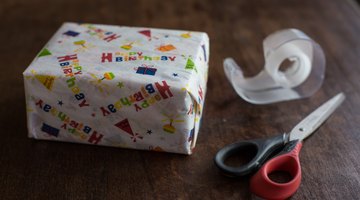
If you can wrap a present, you can upholster chair corners -- even if you think your gift-wrapping skills leave something to be desired. At least you have the basic idea about how to finish an upholstery corner.
With a few tips -- and the knowledge that “perfection” is elusive -- you can wrap your chairs with confidence and ease.
Things You Will Need
- Fabric
- Seat
- Staple gun
- Screwdriver (to remove staples)
Tip
Wash your fabric and consider treating it with a stain repellent before beginning this project. Remember that some fabrics stretch and have more “give” than others, so give yourself time to get the hang of your fabric. Many novice upholsterers tend to end up with a loosely covered seat, which usually means having to take apart and redo at least two corners. But even people who are experienced at working with fabric can pull the fabric too severely, resulting in a tear when someone finally sits down on the covered seat. Strive for a snug fit; the fabric should never be so taut that it extends over the seat like a bridge; this is when tears result.
-
Place the seat cover fabric, right side down, on a clean surface. Position the seat cover (or piece of heavy plywood) right in the center of the fabric. About 3 inches of fabric should extend beyond the seat on all four sides, which will give you plenty of room to stretch the fabric but not so much extra fabric that the bulk will make it difficult to work with. Although you can cut excess fabric later, it's much easier to cut the dimensions to size now.
-
Anchor the fabric in place with four staples: one at each center point of the top, right side, bottom and left side of the seat. Pull the fabric as you fasten each staple to ensure that the fabric is snug against the seat. Check your work on the right side of the seat and reposition the staples if lines or graphic elements on the fabric are uneven. This might be your first lesson in realizing that everything in upholstery can be taken apart, adjusted and redone.
-
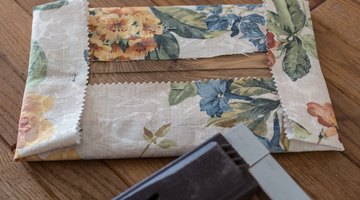
Begin at one of the four corners -- in this case, let's say the right corner -- by running your one hand along the top of the fabric, your other hand along the right side and bringing the fabric together at the corner. Grab the two pieces in one hand and fire two staples – one on either side of the corner – about 2 inches from the edge.
-
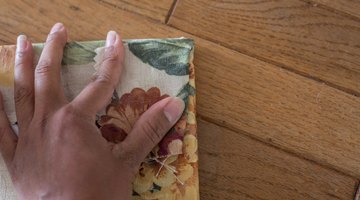
Fold the right side of the fabric toward the edge, then pull the top piece over it so that, together, you have formed a 90 degree angle. Ensure that the fabric is lying perfectly flat, with no creases, and tug on it gently so the fabric hugs the corner.
-
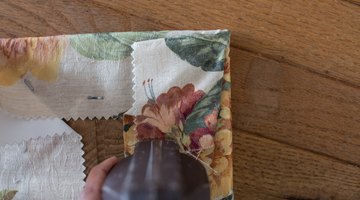
Fire one staple close to the corner -- this will help reduce slippage of the fabric -- and another staple at the bottom of the 90 degree angle of fabric.
-
Proceed to the left corner and follow the same steps. Then work your way to the bottom of the seat, being sure to continually pull the fabric and check your work on the right side of the seat before firing a staple. After you finish all four corners, fire another staple in each corner -- right in between the existing staples -- for good measure.


The Drip Cap
- If you can wrap a present, you can upholster chair corners -- even if you think your gift-wrapping skills leave something to be desired.
- Position the seat cover (or piece of heavy plywood) right in the center of the fabric.
- Anchor the fabric in place with four staples: one at each center point of the top, right side, bottom and left side of the seat.
References
- Step-by-Step Pillows & Cushions; Hilary More; 1998
- Upholster.com: Upholstery Instruction Basics
- The Rowley Company: The Perfect Upholstery Corner
- Upholstery Resource: How to Cover a Dining Chair Seat
Writer Bio
With education, health care and small business marketing as her core interests, M.T. Wroblewski has penned pieces for Woman's Day, Family Circle, Ladies Home Journal and many newspapers and magazines. She holds a master's degree in journalism from Northern Illinois University.
Photo Credits
- Taran Rai/Demand Media
- Taran Rai/Demand Media
- Taran Rai/Demand Media
- Taran Rai/Demand Media
- Taran Rai/Demand Media
- Taran Rai/Demand Media
- Taran Rai/Demand Media
- Taran Rai/Demand Media
More Articles