
How to Roll Texture Drywall

A little bit of texture on a wall or a ceiling adds an element of design, while covering minor imperfections in the drywall. There are many ways drywall contractors apply texture, but one of the simplest do-it-yourself methods involves rolling the texture right onto your walls.
With a few basic painting supplies, and a little practice, you can texture a ceiling or a wall in a couple of hours.
Things You Will Need
- Powdered drywall compound
- Latex paint
- 5-gallon bucket
- Thick-nap roller
- Extension pole
- Large paint pan
- Drop cloth
- Painter’s tape
- Old clothing
- Protective eye wear
Tip
Experiment on a scrap piece of drywall before rolling texture onto your wall.
Warning
It’s difficult to patch a textured wall later if damage to the wall occurs.
Plan to texture the entire wall at one time. Finishing only half a wall, letting it dry, and then finishing the rest may result in lap marks.
Texture Drywall
-
Protect the floor with a drop cloth and apply wide paper-backed painter’s tape to baseboards, wood trim and to adjacent walls that you will not be texturing.
-
Prepare the wall by filling cracks, sanding down rough patches and by applying a coat of primer, tinted at the paint store to match your paint color.
-
Pour twice as much latex paint as you need to paint the entire project into a 5-gallon bucket. Since you’re making a custom paint/texture blend, you must mix the entire batch at one time.
-
Add drywall powder to the latex paint at the rate of ½-cup of powder for every gallon of paint in the bucket. For example, if you normally use one gallon of paint to simply paint the wall, pour double that amount, or 2 gallons of paint, into the bucket and stir in 1 cup of drywall powder. Stir the thickened paint until it is smooth and free of lumps. This step may take 15 minutes or more.
-
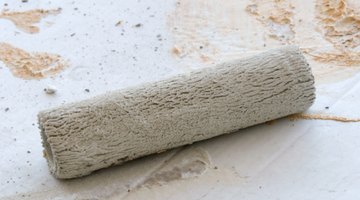
Pour the paint mixture into a large paint pan and attach a thick-nap roller to an extension pole. Submerge the roller in the paint mixture and begin rolling it on the wall, starting in one corner and working in 3-foot swaths across the wall.
-
Place the roller at the top of the wall and allow gravity to pull it down without pushing the roller into the wall. Always start at the top and roll down, don’t roll upward and don’t re-roll over the texture.
-
Refill the roller frequently with the paint mixture for a thick even coat. For a stippled texture, this is all you need to do, but if you want to get creative with your rolled texture, you can add a design.
Add Custom Textures
-
Pat the wet textured wall with a crumpled up rag to form a mottled pattern.
-
Sweep a wallpaper brush, a whisk broom or a paintbrush in semi-circles over the texture to form graceful swirls.
-
Wipe off only the tips of the wet texture with a drywall trowel to create a stucco-like texture known as knockdown or California knockdown.
The Drip Cap
- A little bit of texture on a wall or a ceiling adds an element of design, while covering minor imperfections in the drywall.
- Prepare the wall by filling cracks, sanding down rough patches and by applying a coat of primer, tinted at the paint store to match your paint color.
- This step may take 15 minutes or more.
- Pour the paint mixture into a large paint pan and attach a thick-nap roller to an extension pole.
- For a stippled texture, this is all you need to do, but if you want to get creative with your rolled texture, you can add a design.
References
- “Working With Drywall”; Bryan Tradem; 2009
Writer Bio
Glenda Taylor is a contractor and a full-time writer specializing in construction writing. She also enjoys writing business and finance, food and drink and pet-related articles. Her education includes marketing and a bachelor's degree in journalism from the University of Kansas.
Photo Credits
- Jupiterimages/Photos.com/Getty Images
- Jupiterimages/Photos.com/Getty Images
More Articles