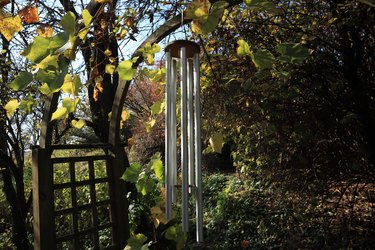
Tubular wind chimes can be a lovely addition to your porch, home or garden. The tubes, which can be made of metal or bamboo, vary in length to allow for a number of tones. When the chimes sway in the wind, they gently hit a part of the unit called the clapper. This creates a relaxing and musical backdrop for your day. Though chime cords can get tangled or broken, restringing your wind chimes is a fairly simple project.
Wind Chime Parts
Video of the Day
Before beginning to repair your wind chimes, it's helpful to understand the basic parts comprising the unit. At the top, a hook or ring is used to hang the chimes. Sometimes, this part is called the hanging ring. This portion of the chimes is connected via several strings to a circle called the chime top.
Video of the Day
From the chime top, you should see several strings or cords that are attached to the chimes themselves. On many wind chime units, small holes are drilled into the chime top for the attachment of these strings. Holes in the tops of the chime tubes are used for the other end of the strings.
Also, hanging from the chime top is a piece called the clapper. This is a smaller circular piece against which the tubes will gently hit in the wind. This will keep the chimes from moving too much or hitting each other.
At the very bottom of the wind chime unit is a piece called the feather. Hanging from the clapper, the feather will swing in the wind and hit the tubes. This will cause the musical notes wind chimes are known for.
Restringing Wind Chimes
Fortunately, wind chime repair is not an overly complicated process. Many chimes are strung using nylon cord or fishing line. Matching replacement cord to what exists on your tubular chimes unit is key if you'll be replacing some but not all of the string.
Lay your wind chimes flat on a table. Cut any strings you will be removing and pull them out of the holes in the chime top. You may need a pair of needle-nosed pliers to assist in removing the strings. Cut new strings to the length you'd like them to be. This will be based in part on how far down you wish for your chimes, clapper and feather to hang. Arrange the chimes in the order you would like them to be situated around the clapper. Longest to shortest is a popular arrangement.
Next, insert new strings into the holes in the chime top. First, thread through the top, then through a chime tube and out the hole on the other side. Finally, bring the wind chime string back up through the chime top. Keep the tube at least 1 inch from the top, but be sure the string is taut. This will ensure a great sound. When you're satisfied with the length of the string, cut it, leaving a tail ¾-inch long.
Other Wind Chime Repairs
If your wind chime tubes were made with aluminum, they should not rust. However, they may experience pitting over time. Use a soft cloth and mild soap and water to clean aluminum chimes. Tubes made of other metals that have rusted can be treated with WD40 on a soft cloth. Wooden tubes may be treated with a thin layer of oil, such as lemon oil, from time to time to keep the material in top shape.