
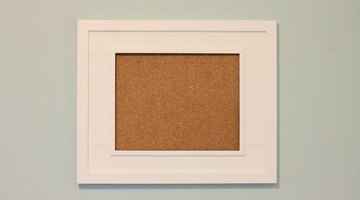
How to Hang a Corkboard

Corkboards create the perfect space for teens to display photos of friends, families to keep running shopping lists and important notices in plain sight, and professionals to maintain a schedule and keep notes in a home office. A corkboard is relatively easy to hang, but you must make sure it's level and secure.
If you have a small board and only plan to pin a few receipts and a grocery list to it, the peel-and-stick mounting option is ideal. For anything heavier, opt for a corkboard with pre-installed metal mounting hardware.
Things You Will Need
- Dishwashing detergent
- All-purpose cleaner
- Lint-free cloths
- Measuring tape
- Pencil
- Spirit level
- Peel-and-stick mounting tape
- Marker
- Picture hangers
- Wall anchors
- Screws
- Hammer
- Electric drill
Tip
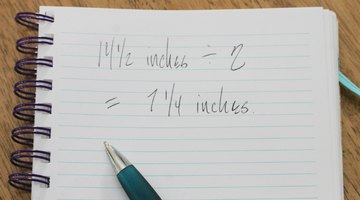
If your board did not come with a peel-and-stick mounting product, you can buy it at office or craft stores. For plain corkboards without any mounting options, purchase long nails with decorative heads. The nails should be long enough go through the corkboard and into the wall at least 1 1/2 inches. Hold the corkboard to the wall; set a level on top, and adjust the board as necessary. Drive the nails through the cork and into the wall at all four corners. Opt for a mallet instead of a hammer to prevent damaging the decorative head.
Peel-and-Stick
-
Clean the wall with mild dish-washing detergent and water, all-purpose household cleaner or a specific cleaner suited for the finish on your walls.
-
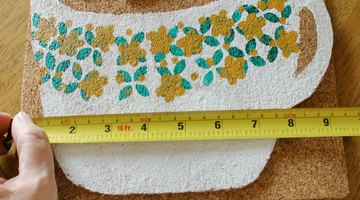
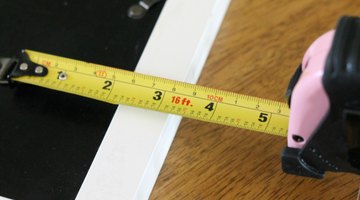
Measure the width and height of the corkboard. Divide the height in half and measure up the wall from the floor 55 inches plus half the height of the board. Measure down from this point to where the bottom of the corkboard will go, and mark this point with a pencil. This places the board at about eye level. If you’re installing the board above a desk or other work surface, measure up from the surface the height of the board plus 4 to 6 inches; mark this point with a pencil, and then make a mark for the bottom of the board.
-
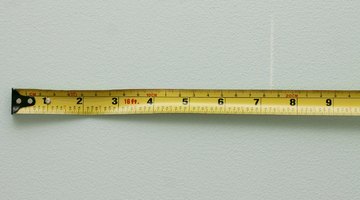
Draw a level line on the wall the width of the corkboard, using the mark you made for the bottom of the board.
-
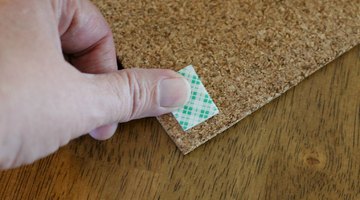
Flip the corkboard face down. Peel the backing off of one side of a square of wall-mounting tape. Press the square onto one corner of the back of the corkboard, backing side up. Repeat with the remaining three corners. If the corkboard is large, add additional squares along the perimeter and in the center.
-
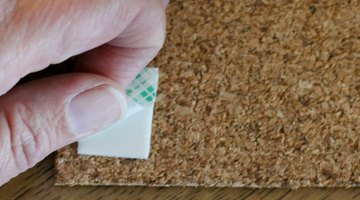
Peel the backing off all of the squares. Line the corkboard up with the level line on the wall, and press it into place. Hold it there for five to 10 seconds. Wait two hours before using the board.


Heavy-Duty Hanging Choices
-
Flip the board face down. Measure the distance between the center of the left hanging hardware and the center of the right. Divide this in half and write it down.
-
Measure down from the top edge of the corkboard to the hanging hardware. On the wall, measure down from the center of the desired height of the top edge the same distance and mark the wall.
-
Measure out from the mark on the wall half the distance between the left and right hanging hardware. Mark the wall. Measure out from the center point in the opposite direction the same distance and mark the wall. Draw a level line between the points. The line on the wall should now be the same width as the distance between the left and right hanging hardware on the corkboard.
-
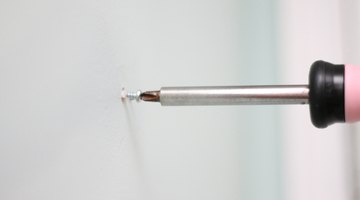
Hammer picture hangers into the left and right endpoints of the line on the wall. If you’re using screws, drill a pilot hole into each mark and insert wall anchors. Drive the screws most of the way through the anchors, leaving 1/4 inch sticking out. Hang the corkboard.
The Drip Cap
- Corkboards create the perfect space for teens to display photos of friends, families to keep running shopping lists and important notices in plain sight, and professionals to maintain a schedule and keep notes in a home office.
- If you have a small board and only plan to pin a few receipts and a grocery list to it, the peel-and-stick mounting option is ideal.
- Measure the width and height of the corkboard.
- If you’re installing the board above a desk or other work surface, measure up from the surface the height of the board plus 4 to 6 inches; mark this point with a pencil, and then make a mark for the bottom of the board.
- Press the square onto one corner of the back of the corkboard, backing side up.
- Hold it there for five to 10 seconds.
- Divide this in half and write it down.
References
Resources
Writer Bio
Amanda Bell spent six years working as an interior designer and project coordinator before becoming a professional writer in 2010. She has published thousands of articles for various websites and clients, specializing in home renovation, DIY projects, gardening and travel. Bell studied English composition and literature at the University of Boston and the University of Maryland.
Photo Credits
- Dana Dowling/Demand Media
- Dana Dowling/Demand Media
- Dana Dowling/Demand Media
- Dana Dowling/Demand Media
- Dana Dowling/Demand Media
- Dana Dowling/Demand Media
- Dana Dowling/Demand Media
- Dana Dowling/Demand Media
- Dana Dowling/Demand Media
- Dana Dowling/Demand Media
- Dana Dowling/Demand Media
More Articles